


In this article, you will learn everything about:
Tools and material
Tools
- Cordless screwdriver
- Random orbital sander, belt sander
- Scroll saw
- Cordless drill
- Clamps
- Folding ruler, try square, pencil
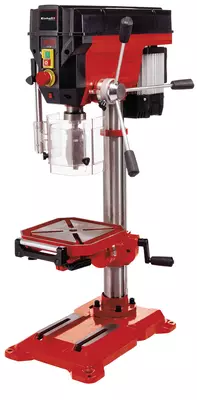
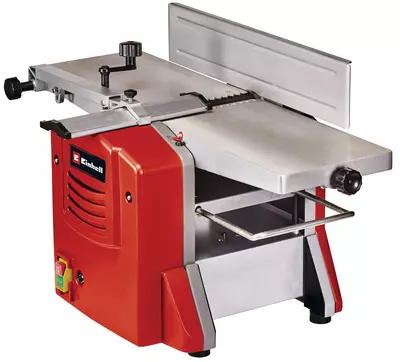
- Stationary planer
Material
You’ll find the specific material details in the corresponding project.
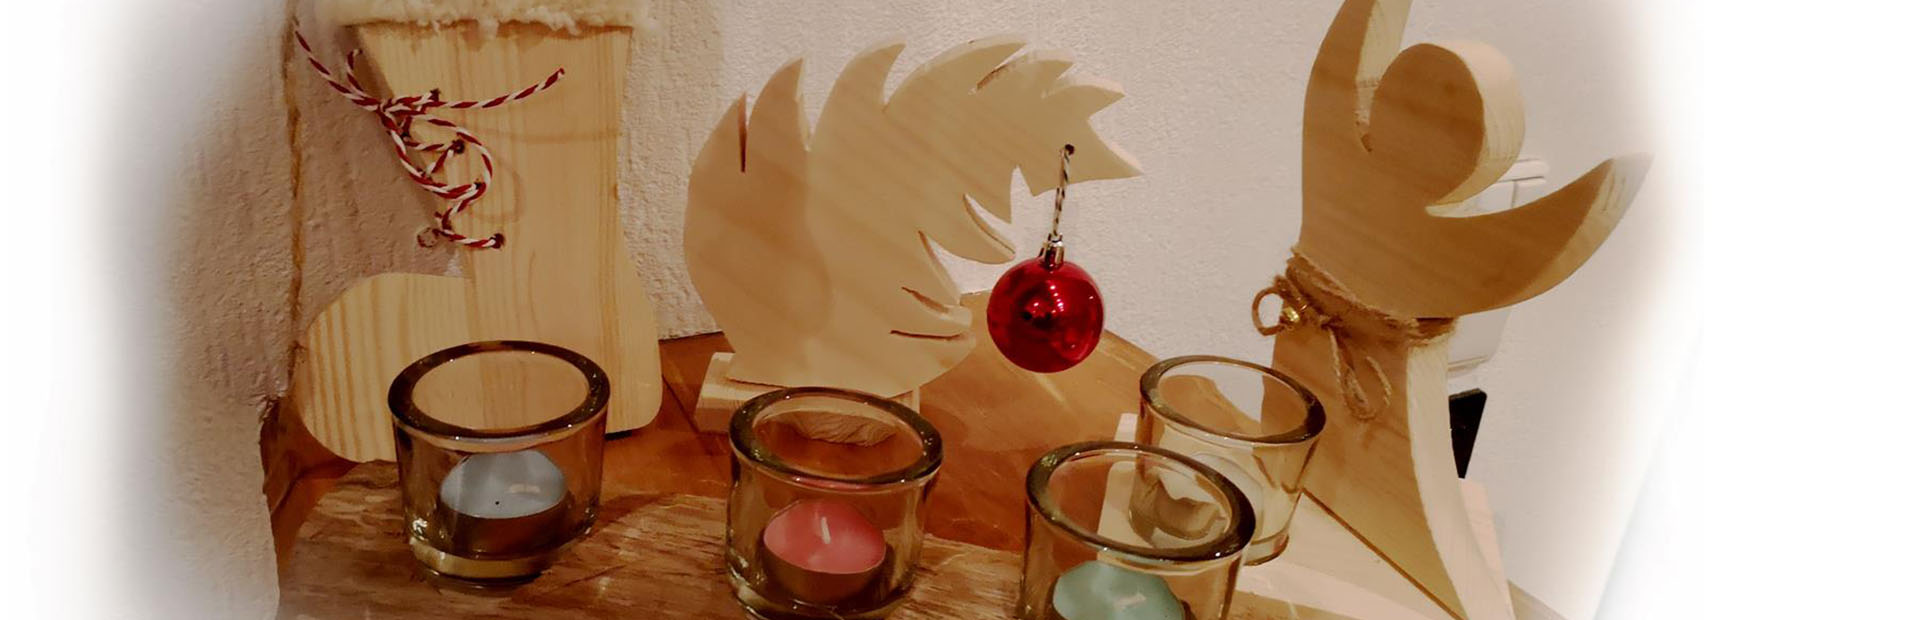
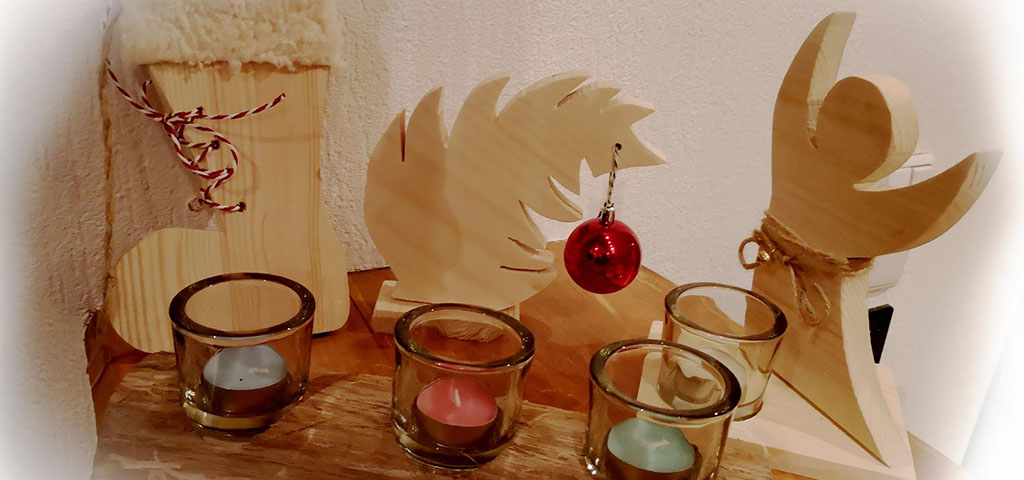
Project 1: Santa Claus Boot
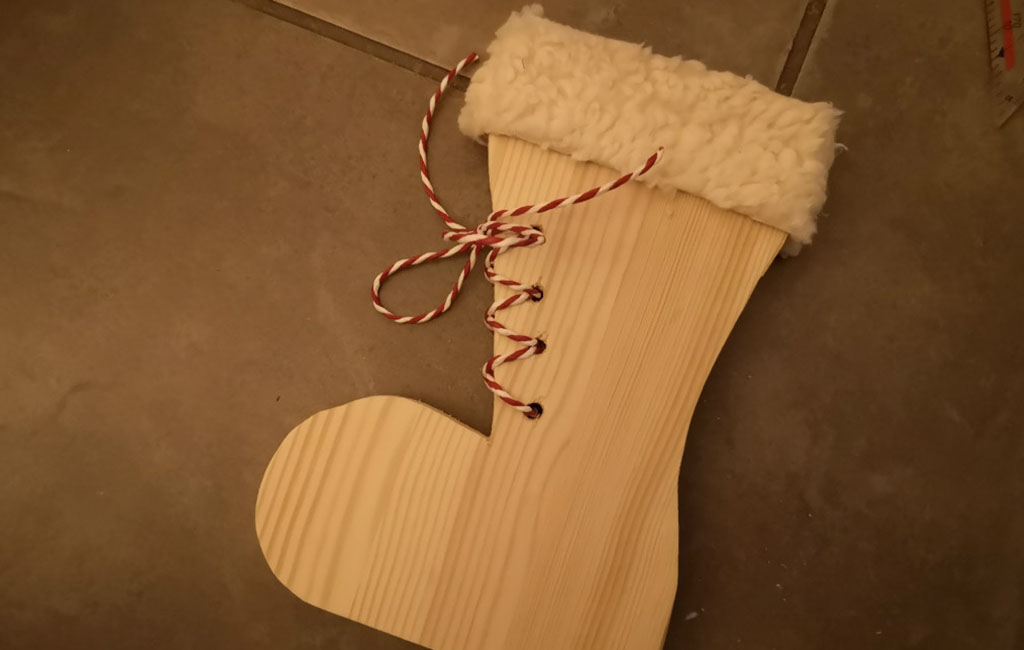
The St. Nicholas boot is a lovely decorative item, perfect for example for the front door or the kitchen window.
The materials you need are simply:
- Glued laminated wood (solid wood panel)
- A small piece of fur
- An eyelet for hanging
- A cord to serve as a shoelace
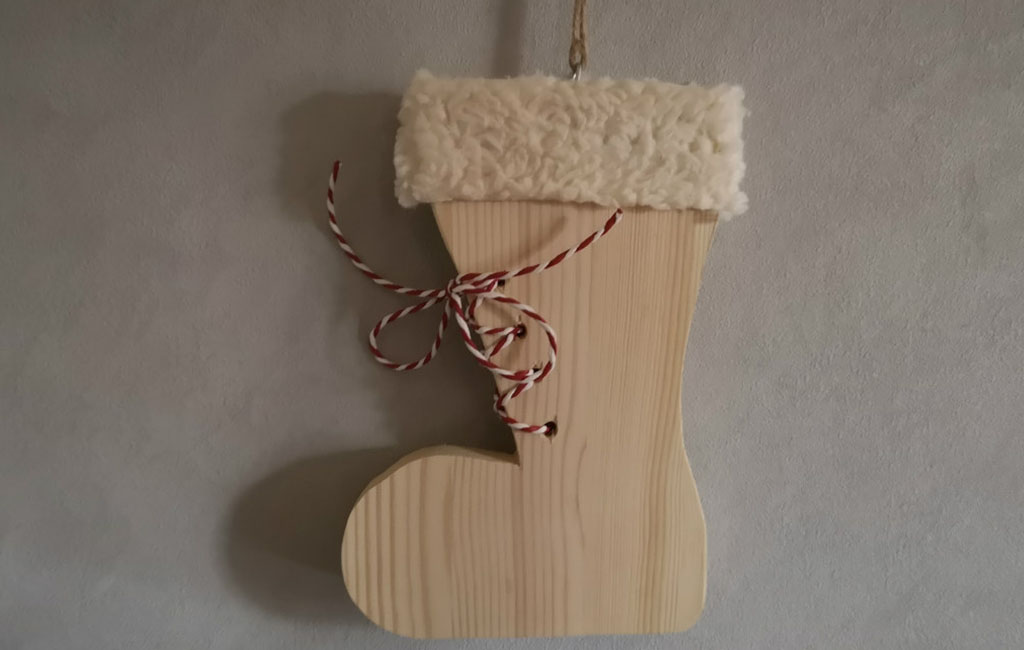
The Christmas boot can either be stood up or hung up.
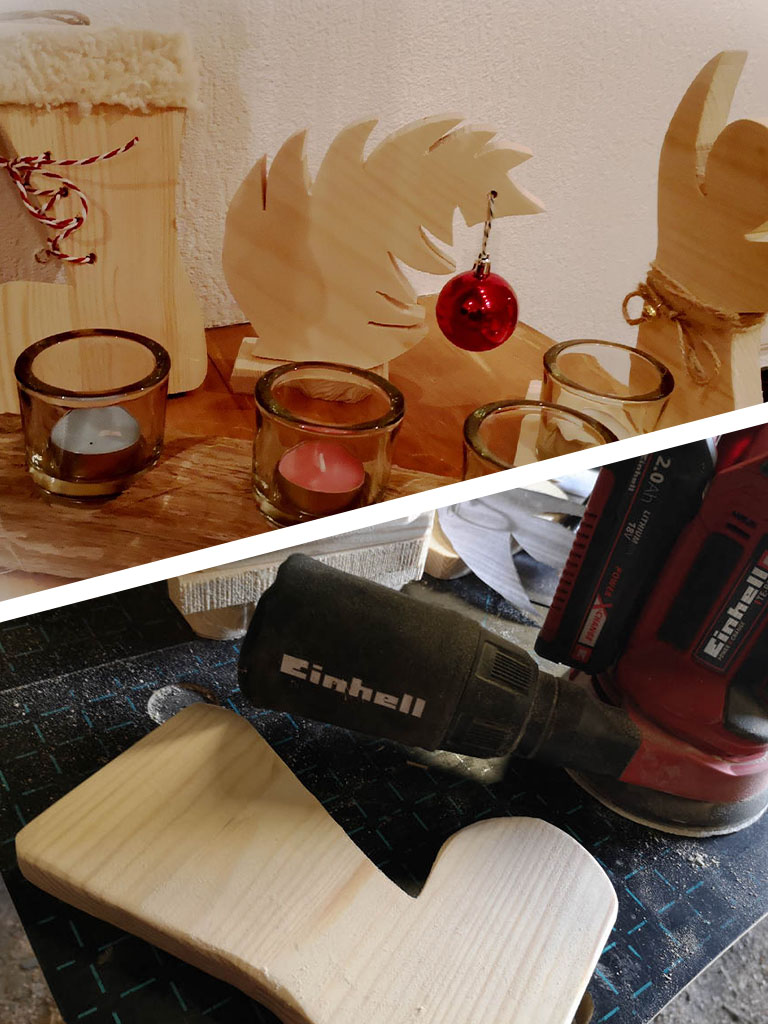
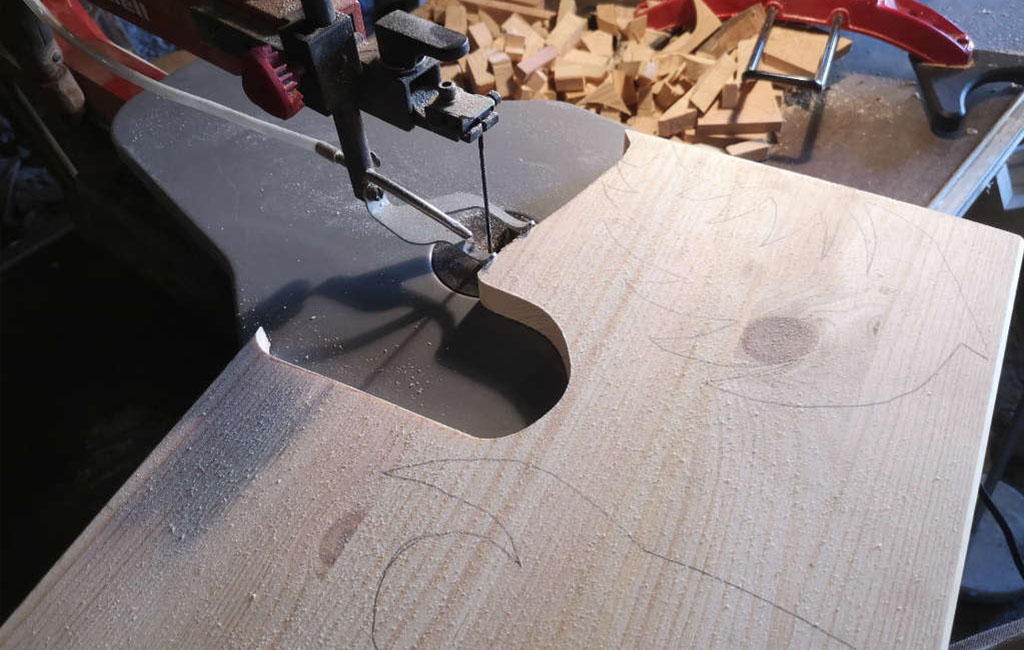
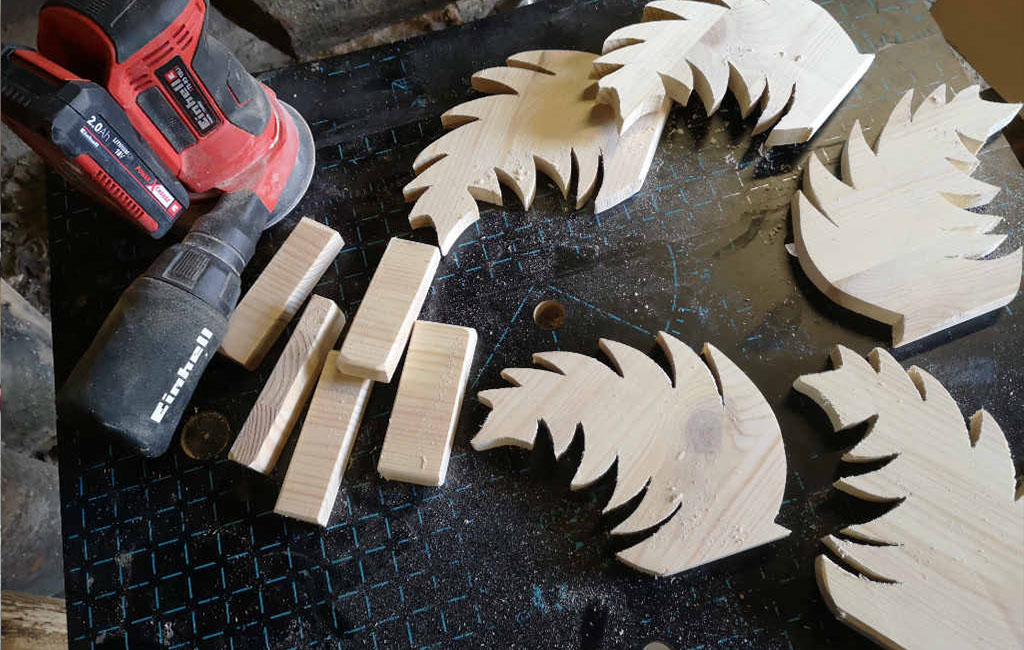
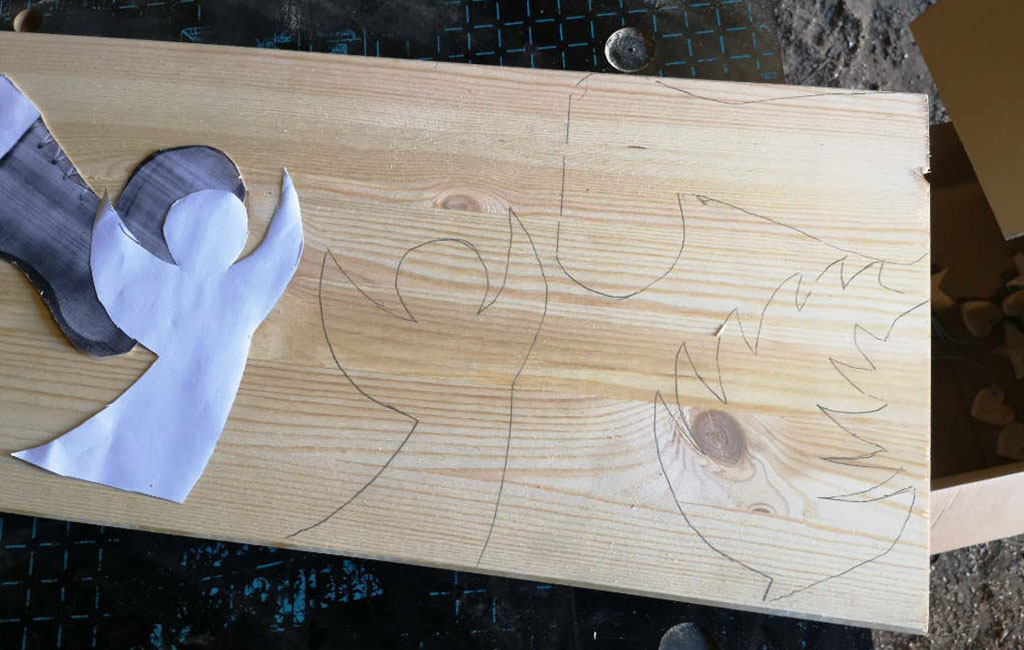
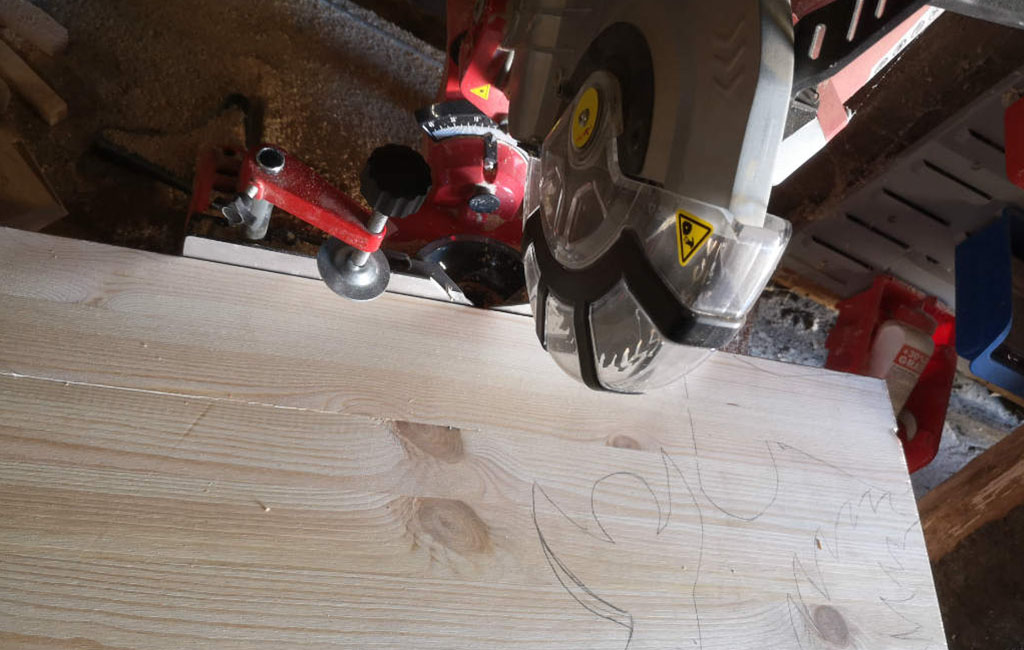
Step 1: Painting the Template on the Wood and Sawing It Out
I found the right template for this project online, printed it out, and cut it out. I then use a pencil to transfer the outlines onto the solid wood panel. The Santa Claus boot is approximately 15 cm high and 7 cm wide.
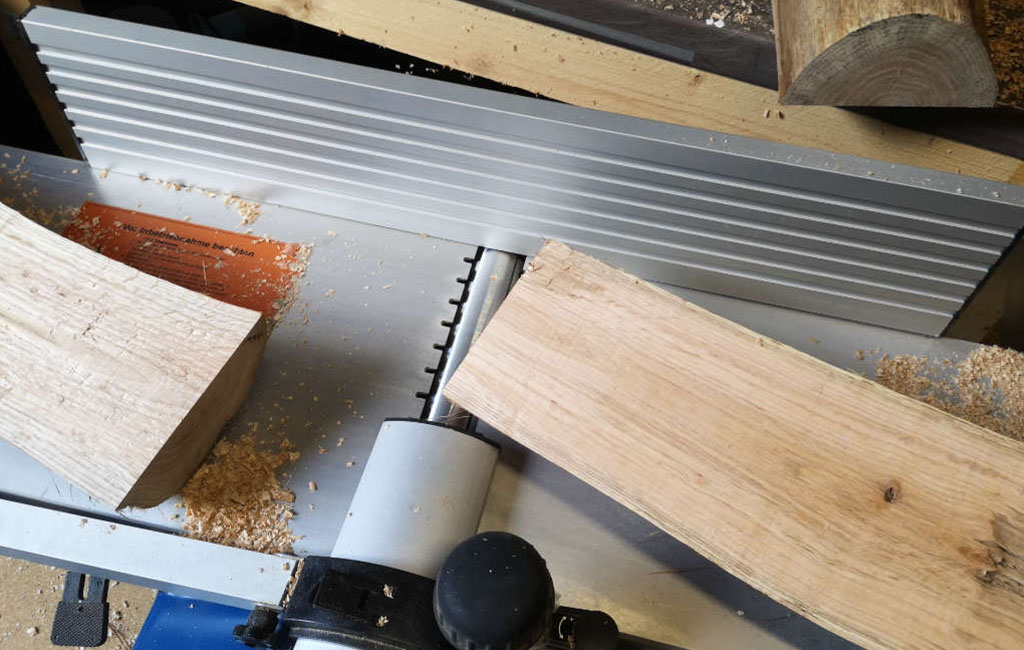
Next, I roughly cut the wooden panel to size with the miter saw before cutting out the St. Nicholas boot in detail using the scroll saw. When working with the scroll saw, it is important to work very neatly and carefully.
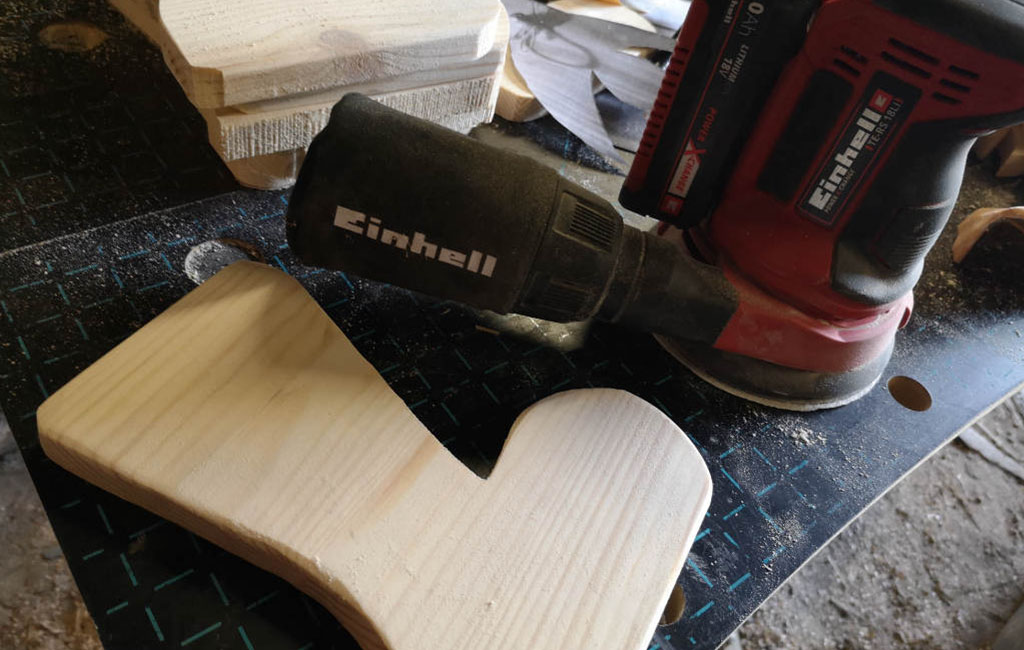
Step 2: Sanding the Object
Once the boot is cut out, I thoroughly sand the surfaces and edges using a cordless random orbital sander. I gradually work my way from 120-grit sandpaper up to 240-grit.
Steps 1 and 2, in addition to Project 1, should also be carried out for Projects 3 and 4 with the respective designs.
Step 3: Attaching Accessories to the Object
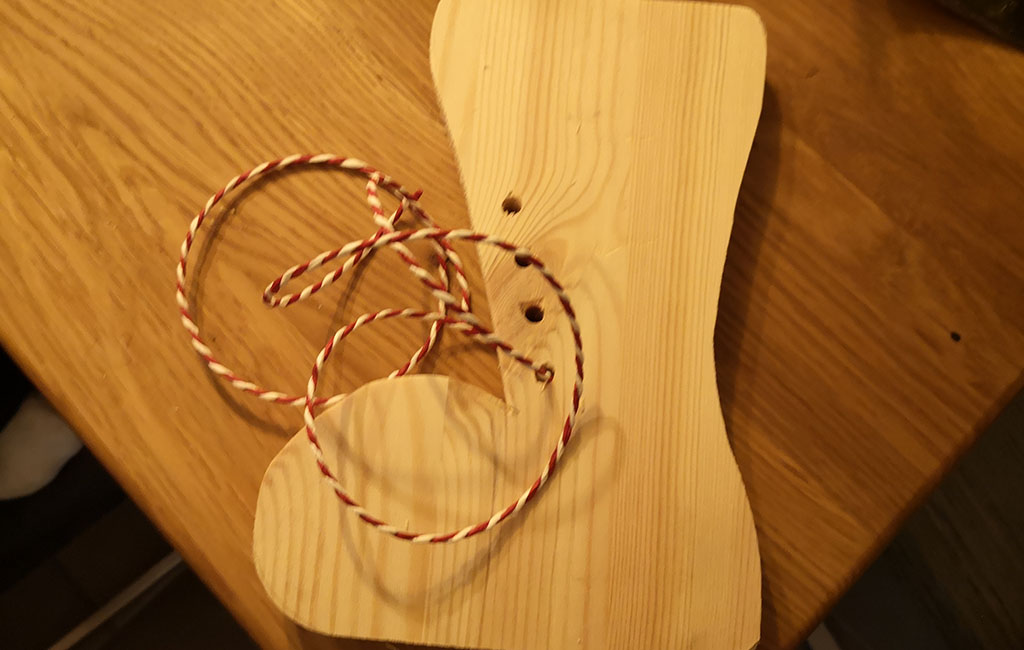
First, I attach a small eyelet to the top of the boot using a hammer so that the boot can later be hung with a cord.
Next, I drill four small holes into the boot using a cordless drill and a 5 mm wood drill bit. A red and white cord is then threaded through these holes in a crisscross pattern. After the last hole, a bow is tied, giving the boot its laces.
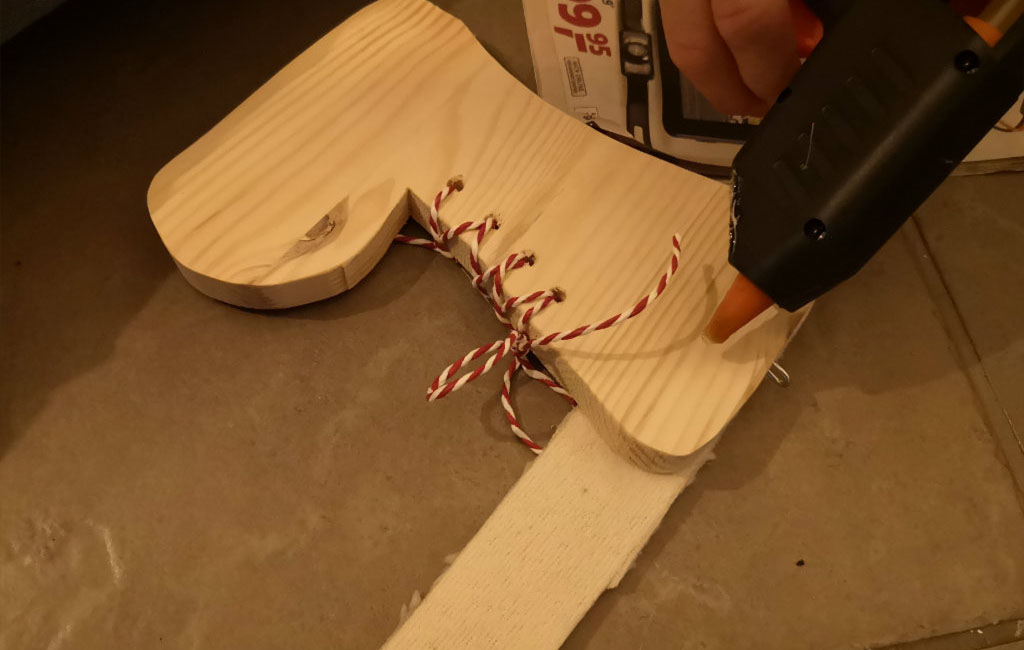
Then, I cut a 5 cm high strip from a piece of fur, long enough to go all the way around the boot. The fur is attached to the Christmas boot using a hot glue gun and left to dry for a few minutes.
Finally, a cord approximately 50 cm long is threaded through the eyelet and tied in a knot.
Now the stylish Santa Claus boot is ready to be hung up.
Project 2: Rustic Advent Candlestick
The materials required for this project are:
- Four glass candle holders and tealights
- A suitable halved tree trunk
Using this split piece of wood, we will now create a beautiful Advent candle holder.
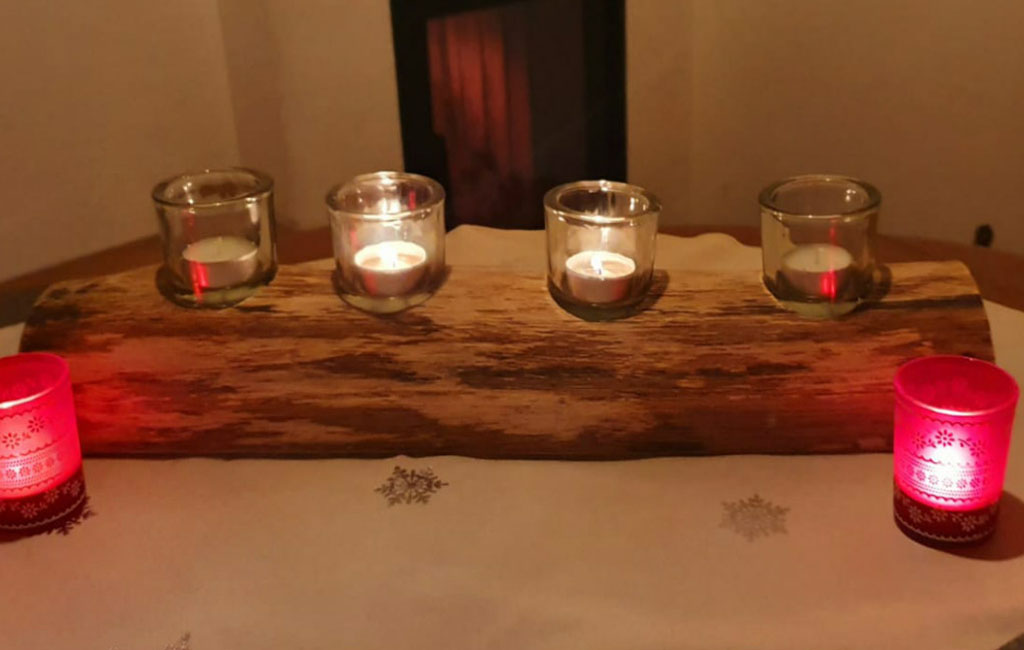
The perfect project for the dark Christmas season: the Advent candle holder is a rustic eye-catcher that fills your home with warm light.
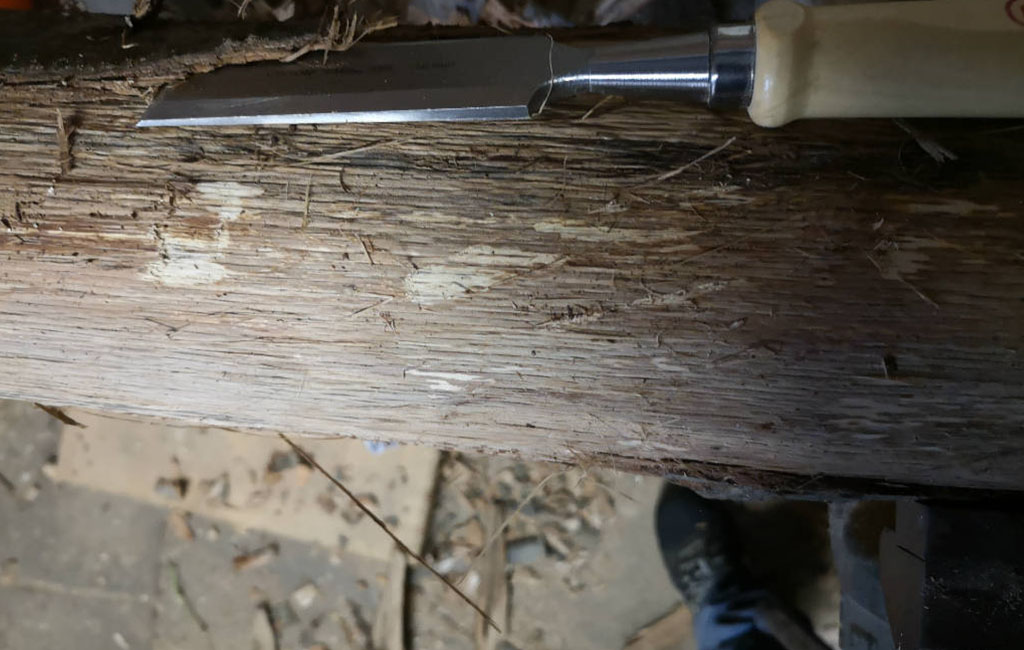
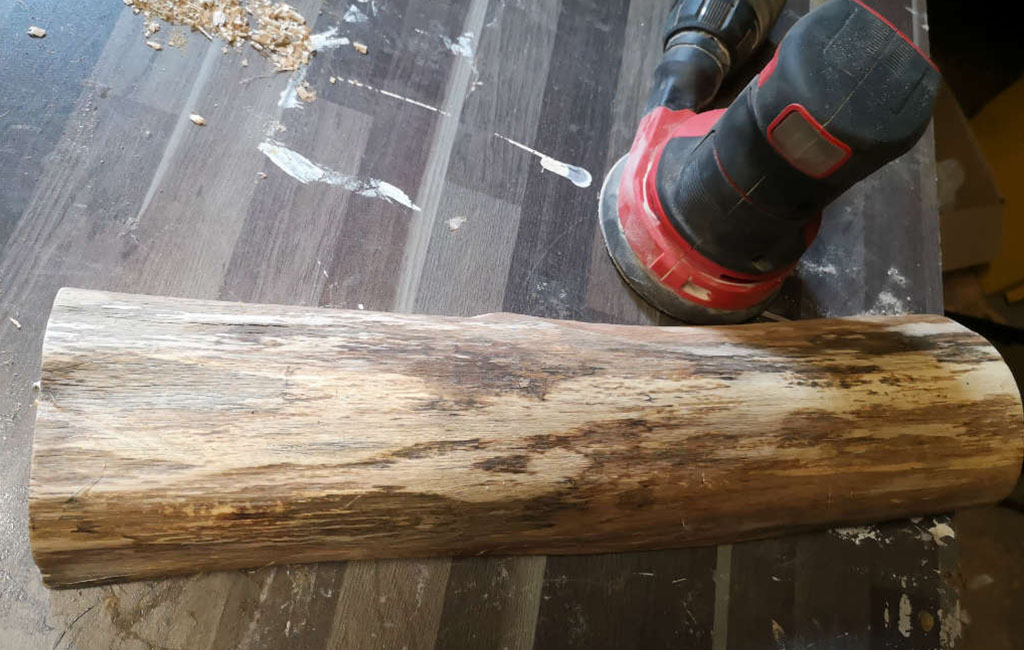
Step 1: Stripping the Bark from the Tree Trunk
At the beginning of this project, the bark is removed from the tree trunk using a chisel and a hammer. To make this task easier, it is recommended to secure the trunk to the workbench with clamps.
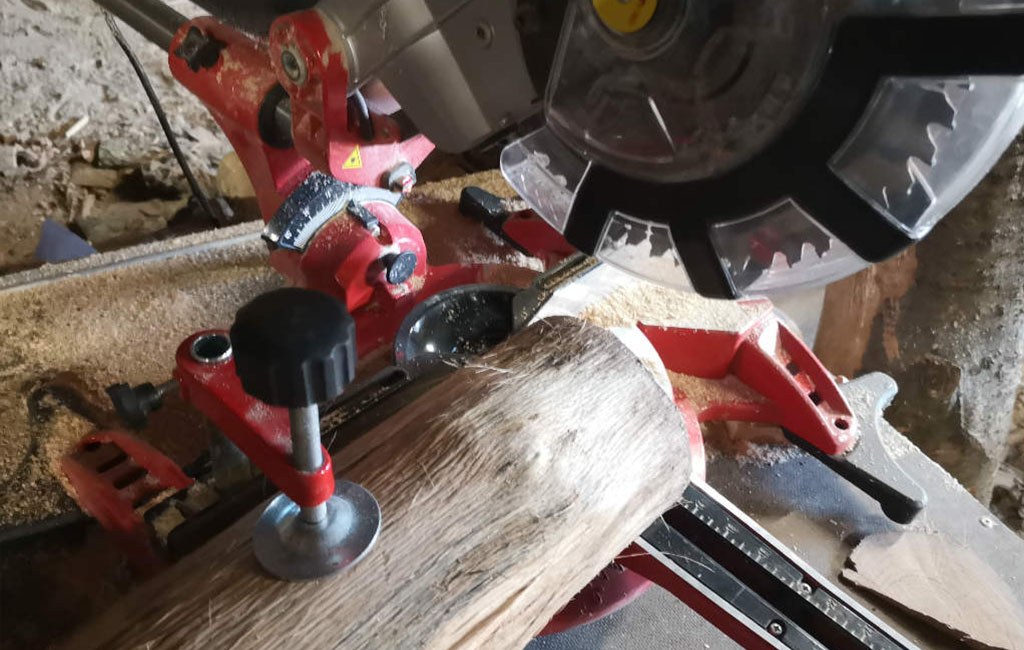
Both ends of the tree trunk are then cut off with a miter saw to create smooth edges. This step also allows you to set the desired length for the project.
Step 2: Planing and Sanding
The flat side (underside) of the wood piece is then passed through a planer, creating a smooth, even surface. This is especially important for stable placement, particularly when working with candles.
Like the other projects, the tree trunk is then sanded using a cordless random orbital sander, using sandpaper with 120- and 240-grit.
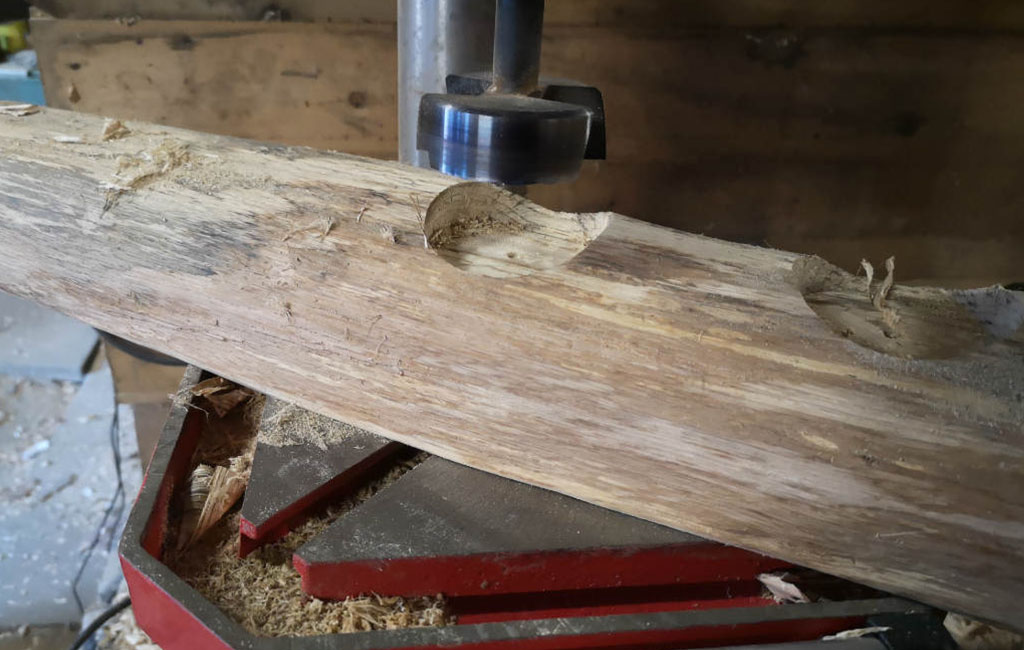
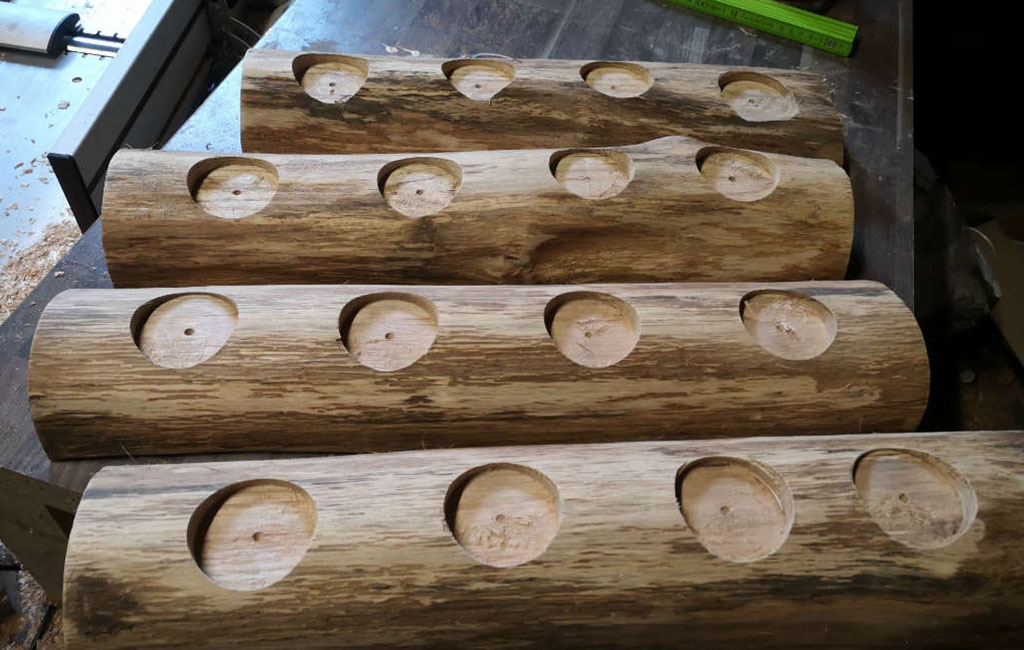
Step 3: Drilling Holes in the Tree Trunk
In the third step, the holes for the candle holders are drilled into the tree trunk.
To do this, mark four evenly spaced points on the trunk where the holes should be drilled.
Then drill about 10 mm deep into the trunk using a drill press or a cordless drill and a 60 mm Forstner drill bit (depending on the size of the glass candle holders). This ensures the glasses sit securely.
It is also recommended to deburr the holes with a piece of sandpaper. Depending on your preference, the tree trunk can be painted or treated with wood oil at the end—there are no limits to your creativity.
After allowing sufficient drying time, place the glasses with the candles into the holes, and the Advent candle
Project 3: Crooked Christmas Tree with a Christmas Ball
The materials needed for this project are as follows:
- A solid wood panel (glued laminated wood)
- A cord
- A Christmas tree bauble of your choice
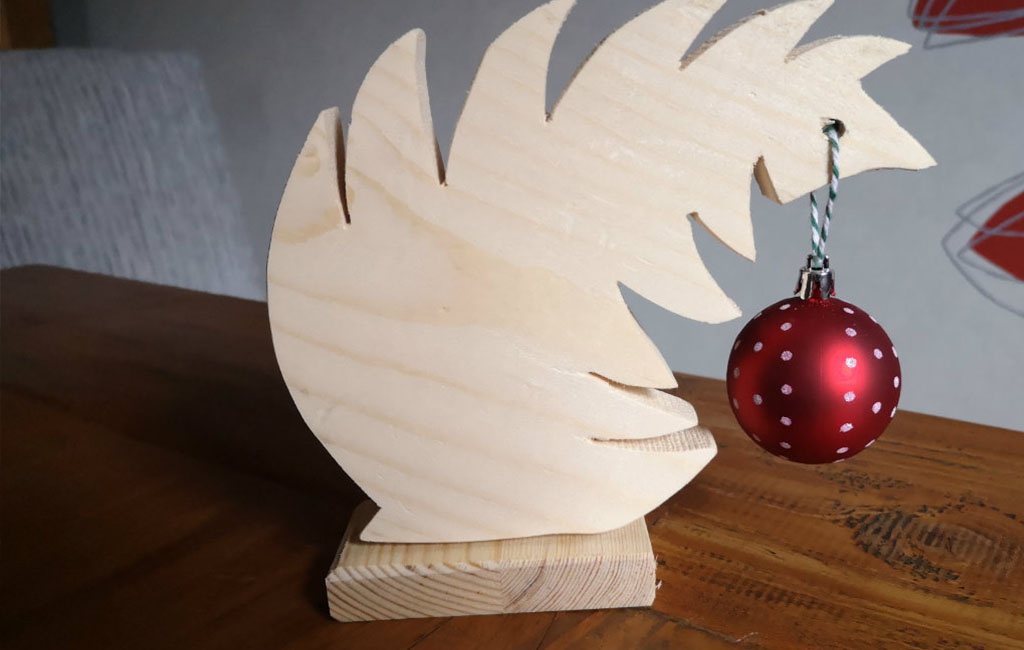
The quirky eye-catcher for the Christmas season: this flexible Christmas tree can be placed anywhere you like in a cozy spot and is sure to amaze one or two onlookers.
Steps 1 and 2:
First, follow steps 1 and 2 from Project 1.
The Christmas tree in the example is 12 cm high and 8 cm wide.
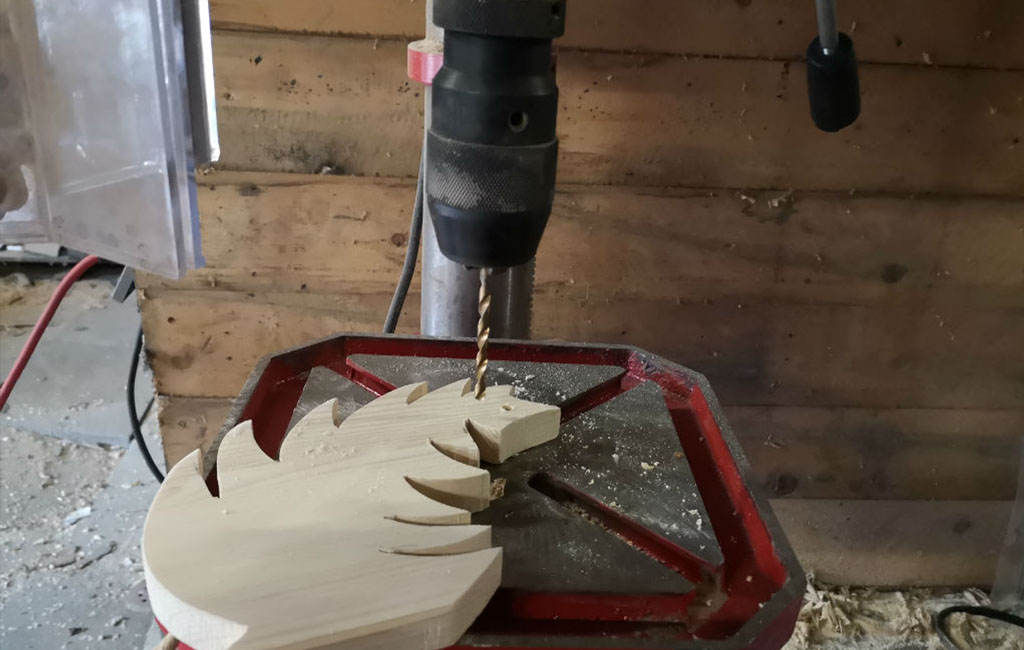
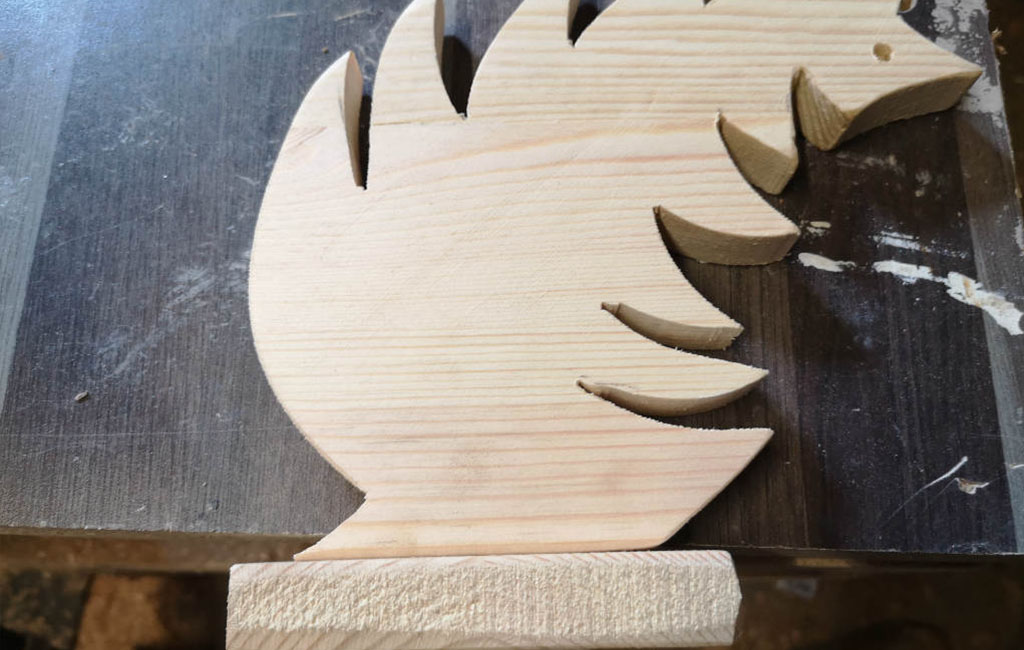
Step 3: Attaching the Bottom and Drilling the Hole
Once the Christmas tree has been cut out and sanded according to the template, a hole is drilled into the tip using a 5 mm wood drill bit. This will later be used to attach the Christmas bauble with a cord.
For the base, a piece of solid wood panel measuring 3 cm x 10 cm is cut to size and also sanded accordingly.
Now the tree is positioned on the base, and the arrangement is checked and marked.
The tree and the base are then screwed together using 5 x 30 mm wood screws through pre-drilled holes.
Finally, the cord is threaded through the hole, and the Christmas bauble is attached and knotted.
Now the Christmas tree is finished and ready to be set up.
Project 4: Angel with Candle Lighting
A small, charming wooden angel provides light during the Christmas season.
The materials required for this are also minimal:
- A solid wood panel (glued laminated wood)
- A glass candle holder with a tealight
- A cord
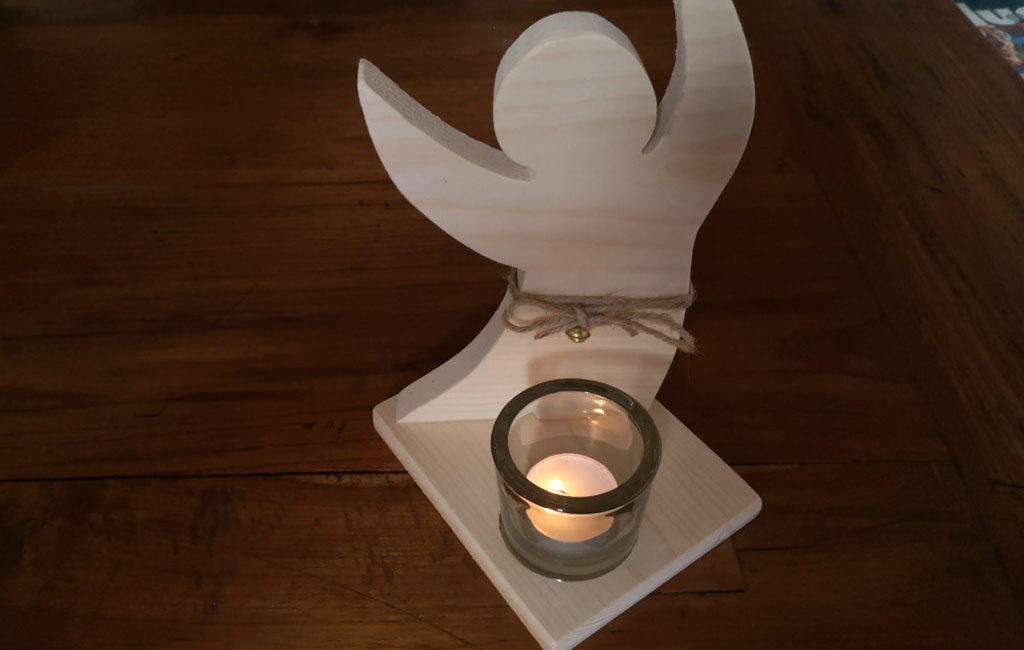
This project can be perfectly placed on a windowsill or on a table.
Steps 1 and 2:
First, follow steps 1 and 2 from Project 1.
The dimensions of the angel are: 15 cm in height and 7 cm in width.
Step 3: Editing and Attaching the Bottom
Once the angel has been cut out, the next step is to work on the base.
To do this, a piece of solid wood panel measuring 8 × 8 cm is cut to size and carefully sanded again using the random orbital sander.
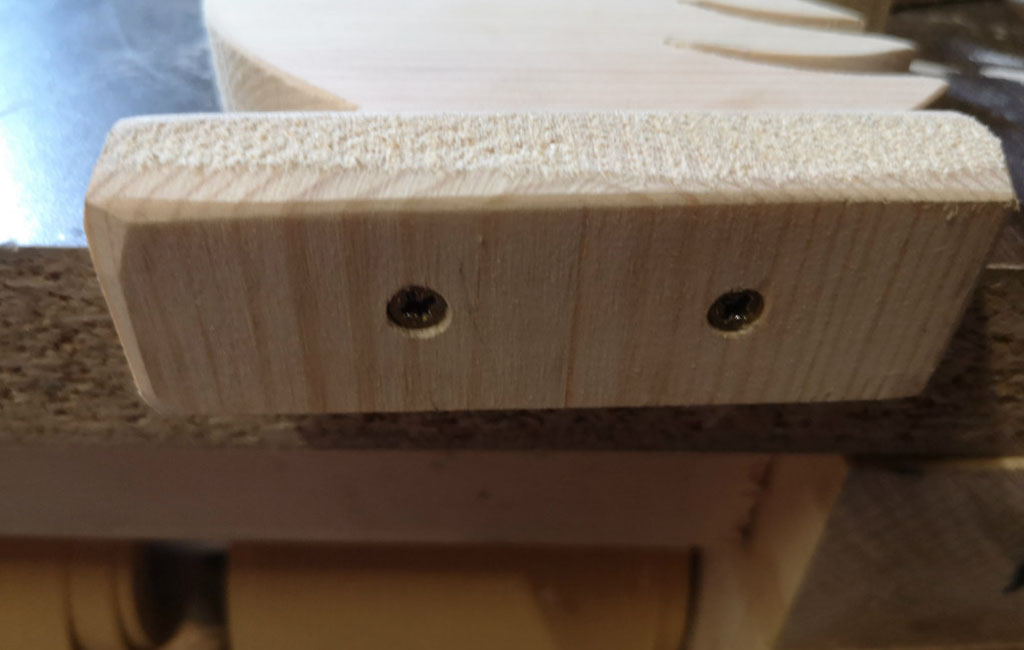
As in Project 3, the angel is positioned on the base, and the arrangement is checked and marked. Before screwing the base and the angel together, a suitable hole for the glass candle holder is drilled into the base. For this, use either a drill press or a cordless drill with a 60 mm Forstner drill bit (depending on the size of the glass candle holder) and drill about 5 mm deep into the center of the wood.
Now the angel and the base are screwed together using 5 × 30 mm wood screws. It is important to pre-drill the holes.
As a small accessory, a cord with a little bell is tied around the angel’s waist.
Once the glass candle holder is placed into the project, the angel is ready to provide warmth and light!
These four small projects will hopefully inspire you and show that beautiful Christmas decorations can be made with minimal materials and effort.
Have fun creating these or similar projects!
Suitable Tools for the Project
Here you'll find Einhell tools and accessories that are perfect for bringing this DIY project to life.


Published on 12.12.2019
Tobias Peters is a passionate DIY enthusiast who shares a wide range of projects on Instagram @tobis_handcraft and his website tobis-handcraft.de – from furniture making and decoration to lighting design. Together with his partner Steffi, he is also renovating a 1950s country house. On the Einhell Blog, Tobi offers practical tips and step-by-step guides for creative home improvement projects.