


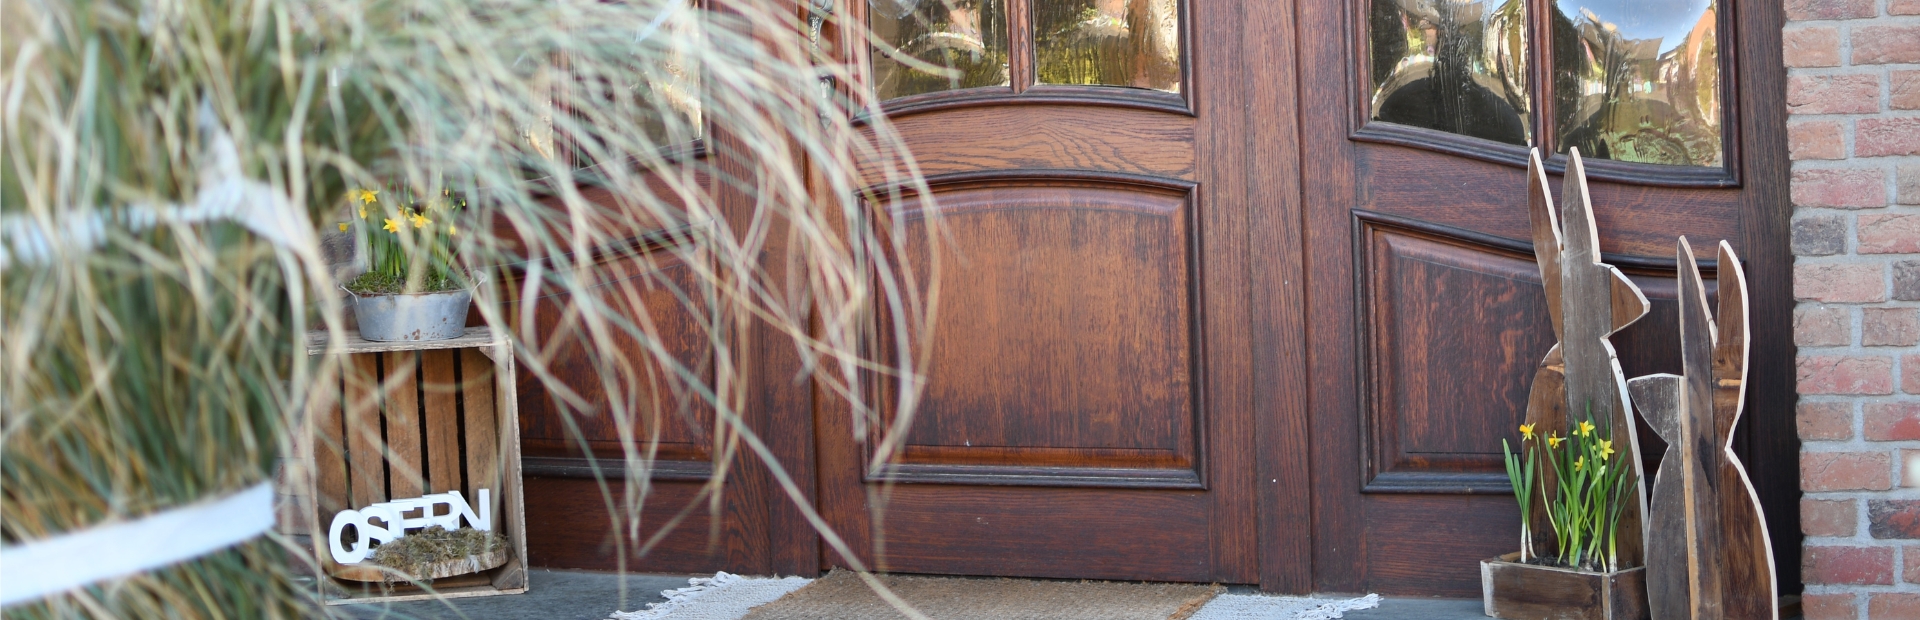
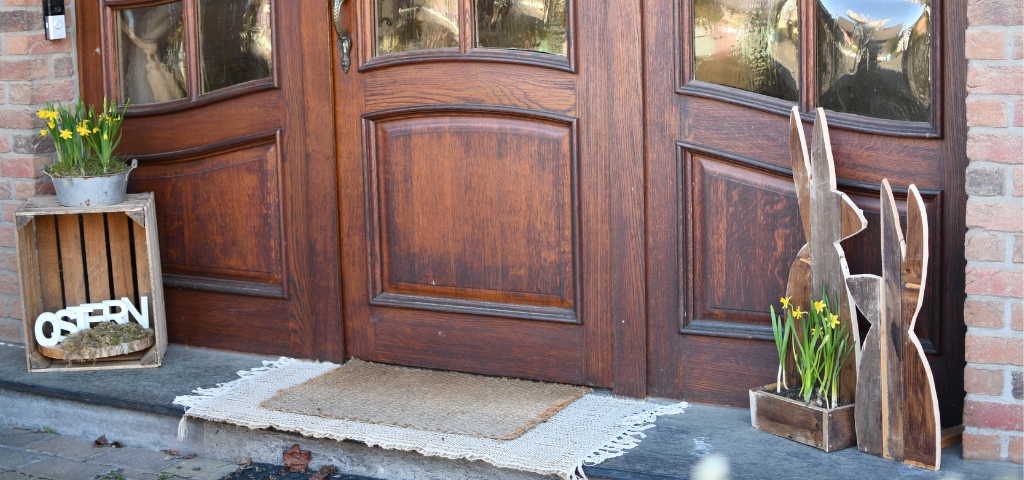
Decorative Wooden Easter Bunnies
DO IT YOURSELF
Beautiful Easter decorations don’t have to be expensive. How about, for example, Easter bunnies made from old slats? Not only can these be made in no time at all, but they also offer the perfect opportunity to make good use of leftover wood that you’ve got lying about anyway.
With a little creativity and a knack for DIY, you can create a unique and sustainable decoration for the Easter season.
In this post, we’ll show you how to make your own Easter decorations quickly and easily.
Tools and Materials
Material
- Scraps of wood, for example 85 × 10 cm or smaller
- Screws
- Bulbs, spring flowers and potting soil for decorating the plant basket
- Optional: pond liner or sturdy plastic sheeting for lining
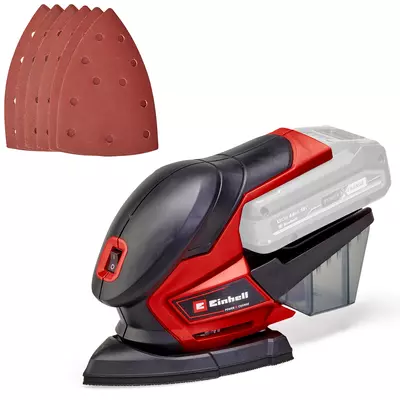
- Sanding paper, grit P40–P120
- Sandpaper blocks
- Sandpaper sponge
- Old T-shirts/microfibre cloth for oiling
- Hard wax oil
Instructions: Easter Bunny Door Decoration
Step 1: Draw the design on paper
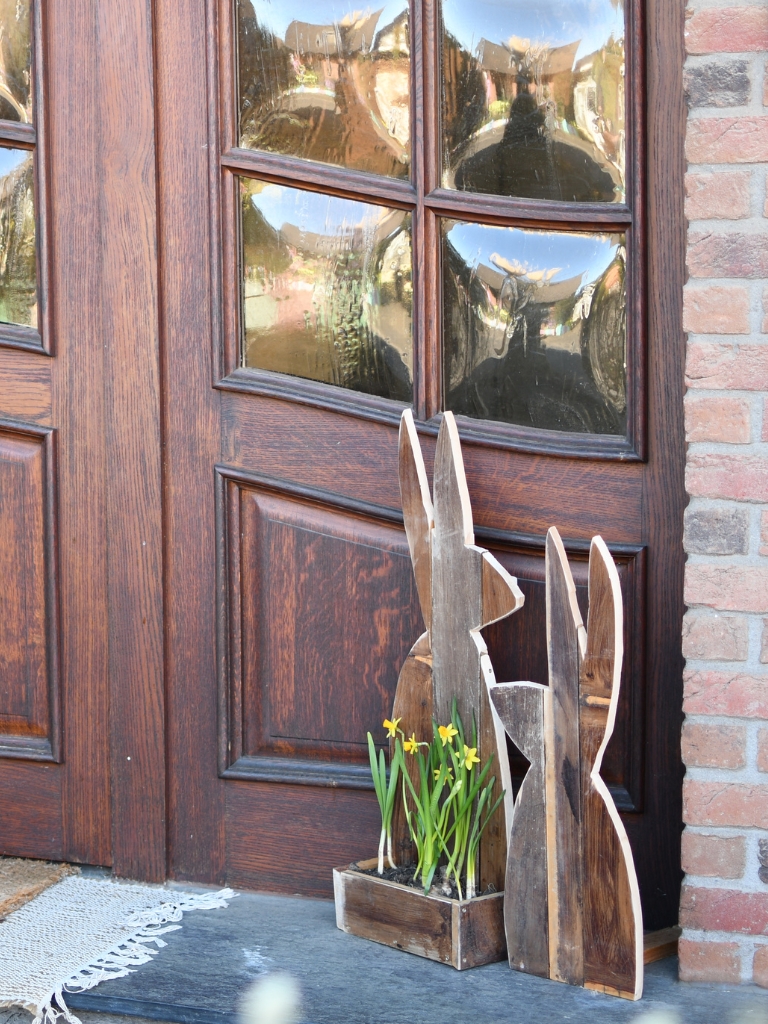
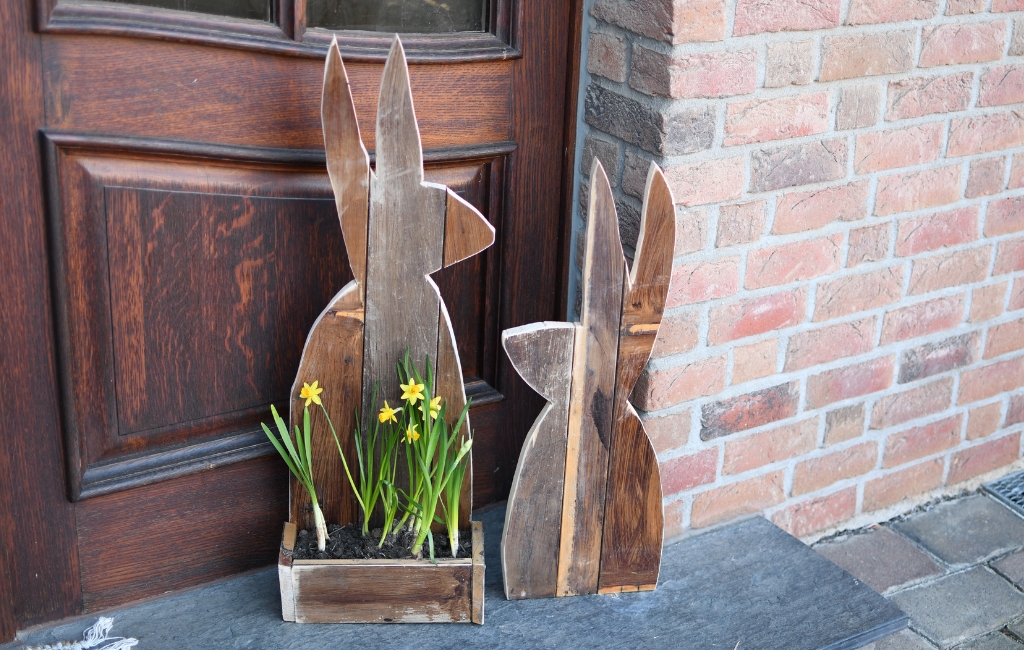
First, you need to draw a full-size sketch so that you can then transfer it onto the Wood. For a lovely overall look with two wooden rabbits in front of the front door, you should sketch out two rabbits of different heights, one with a height of 70 cm and the other with a height of 85 cm. You can also adjust the dimensions slightly to suit your own preferences. It all depends on where the rabbits will be placed in your home and what size you prefer.
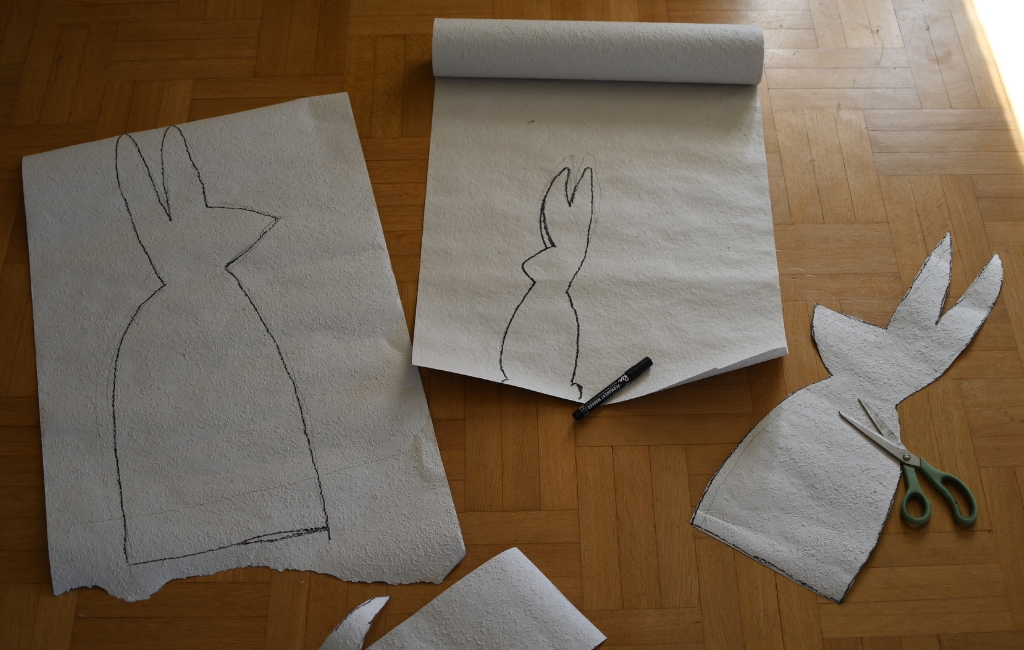
Step 2: Transferring the outline onto the wood
In the next step, sort the leftover slats by size and place them horizontally side by side, ensuring there is enough space for the templates. If you are using shorter slats, you can of course stack them on top of one another up to the desired surface area. It is important that the slats lie as flush as possible against one another so that the shape remains stable later on. Then carefully trace the template onto the wood with a pencil.
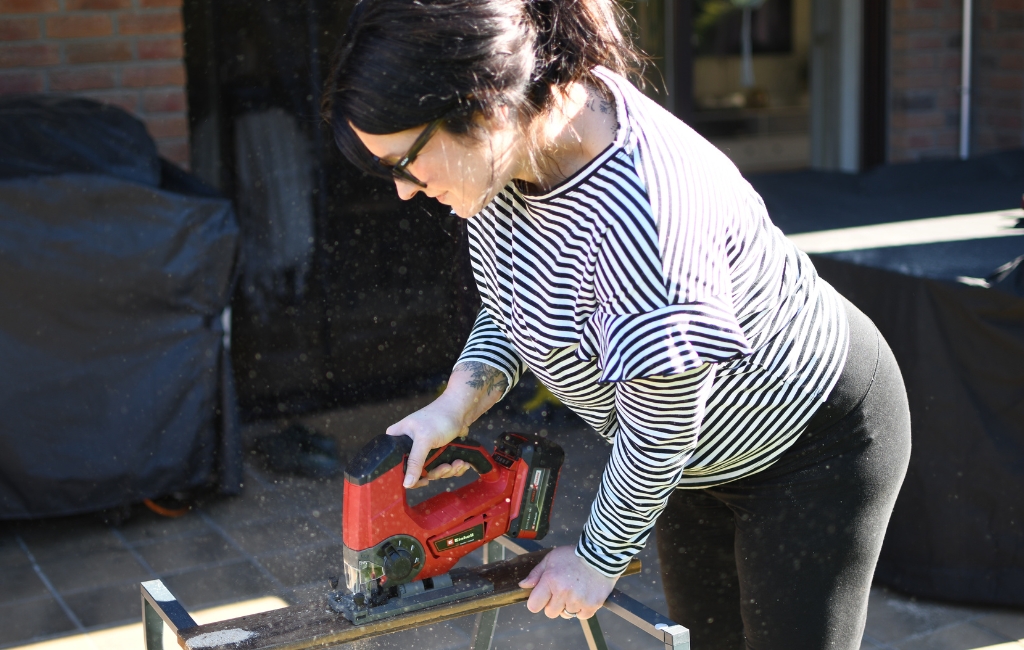
Step 3: Cutting out the rabbit shape
Now it’s time to start cutting: use the cordless jigsaw to cut out the marked rabbit pieces precisely. Make sure you work calmly and evenly to ensure the edges are clean. A handy tip: Put the cut-out pieces back together straight away so you don’t lose track of them and know exactly how everything fits together later on.
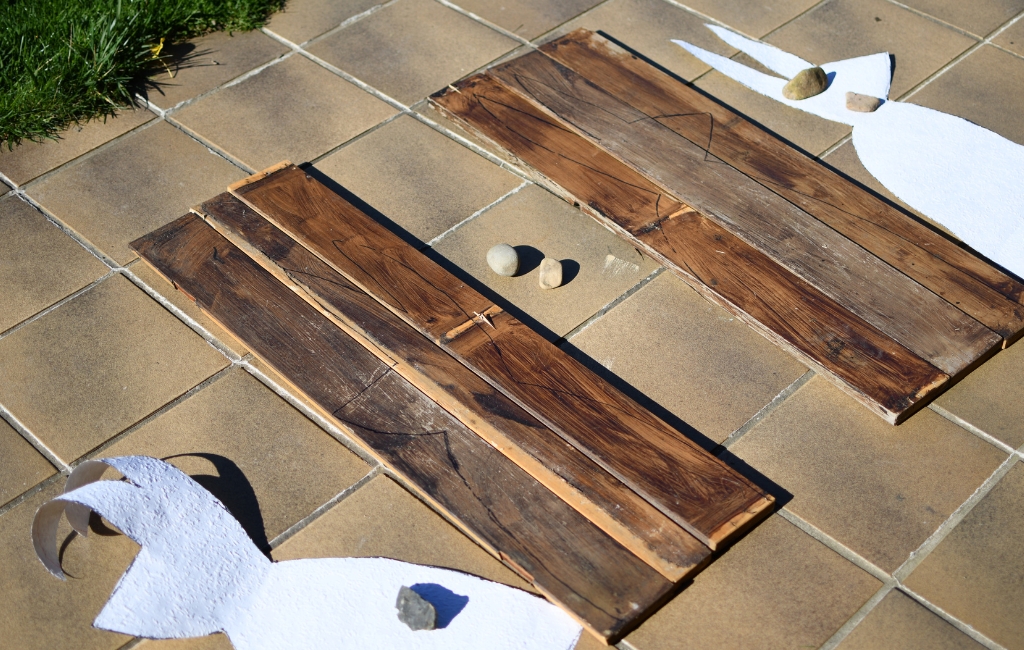
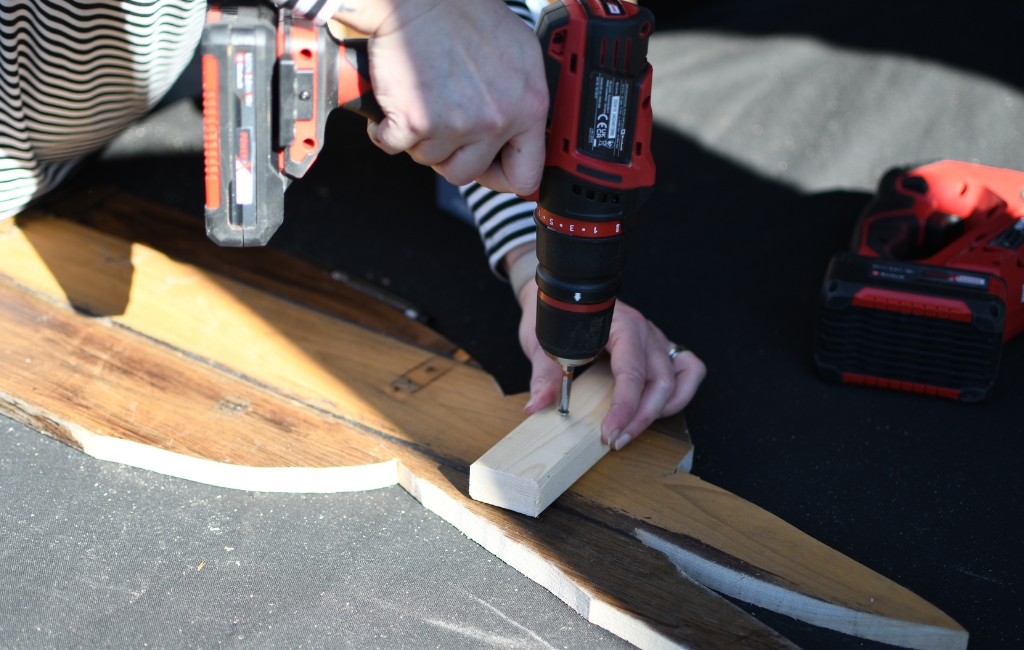
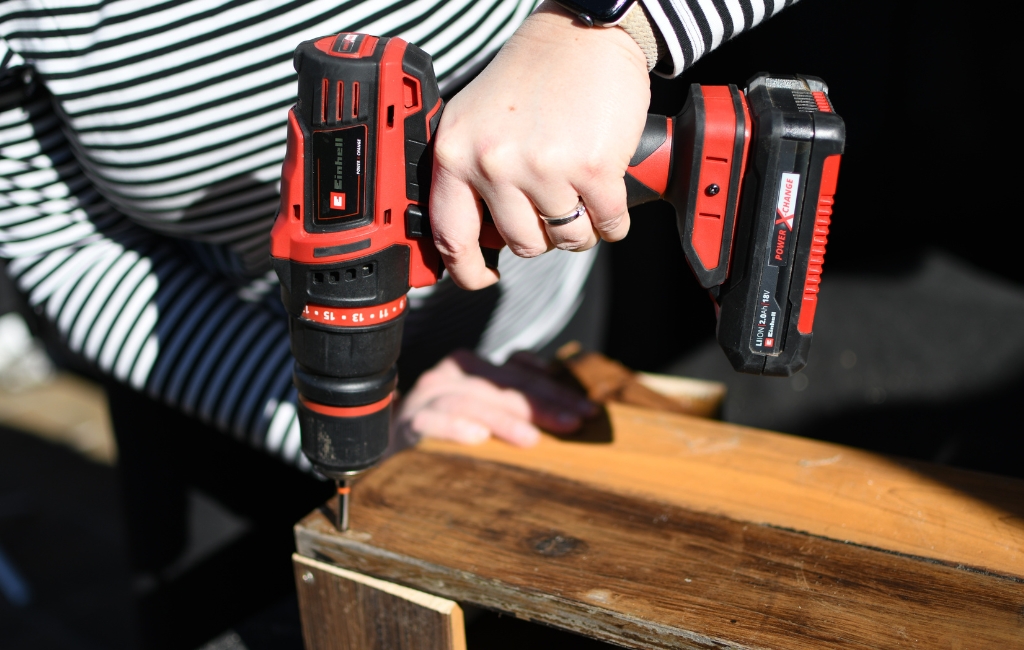
Step 4: Screw the leftover slats onto the back
Next, attach smaller and thinner leftover slats to the back so that you can screw the individual parts together using a cordless drill. You’ll need a different number of screws depending on the size of the rabbits – make sure everything is securely fastened.
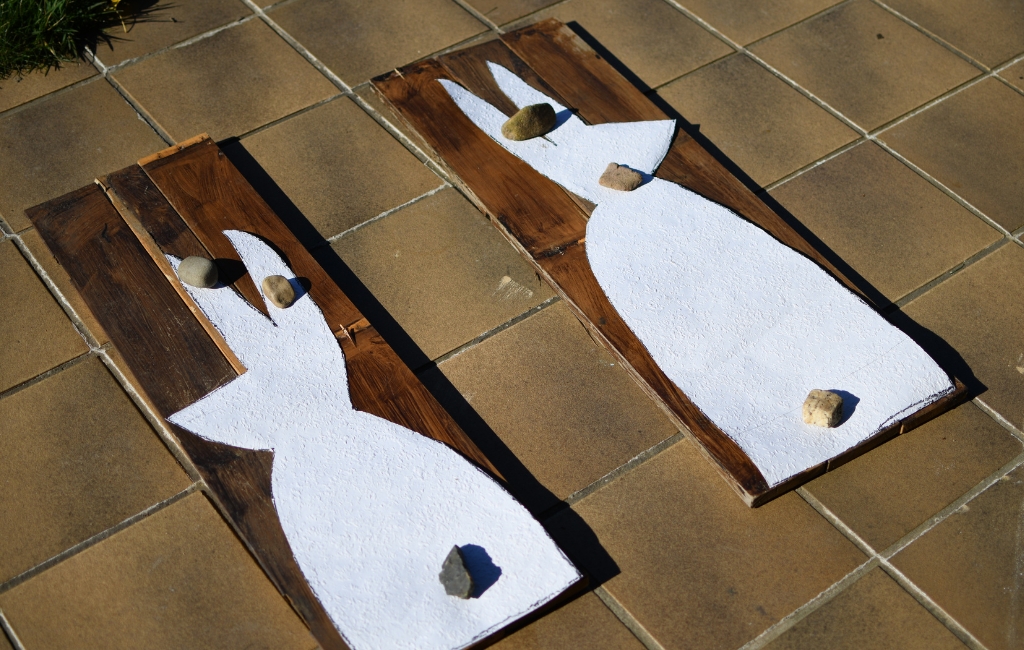
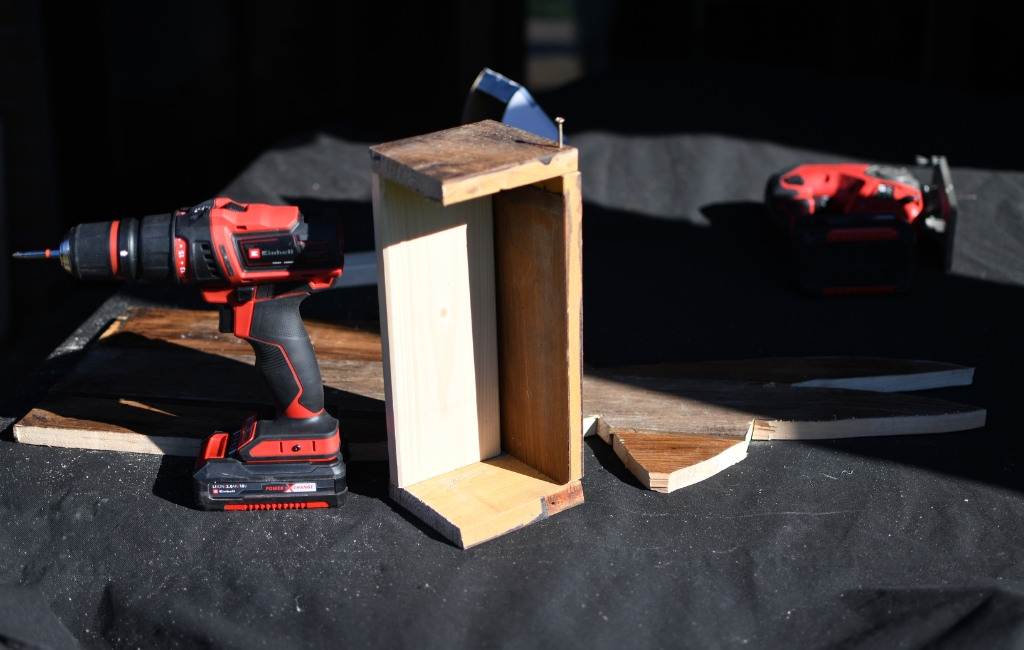
Step 5: Attaching the flower box and base
One of the rabbits now gets a small flower box as well. This not only provides additional decorative scope, but also ensures stability, so no separate base is required. For the second rabbit, instead, screw an extra piece of wood onto the left-hand side to serve as a base.
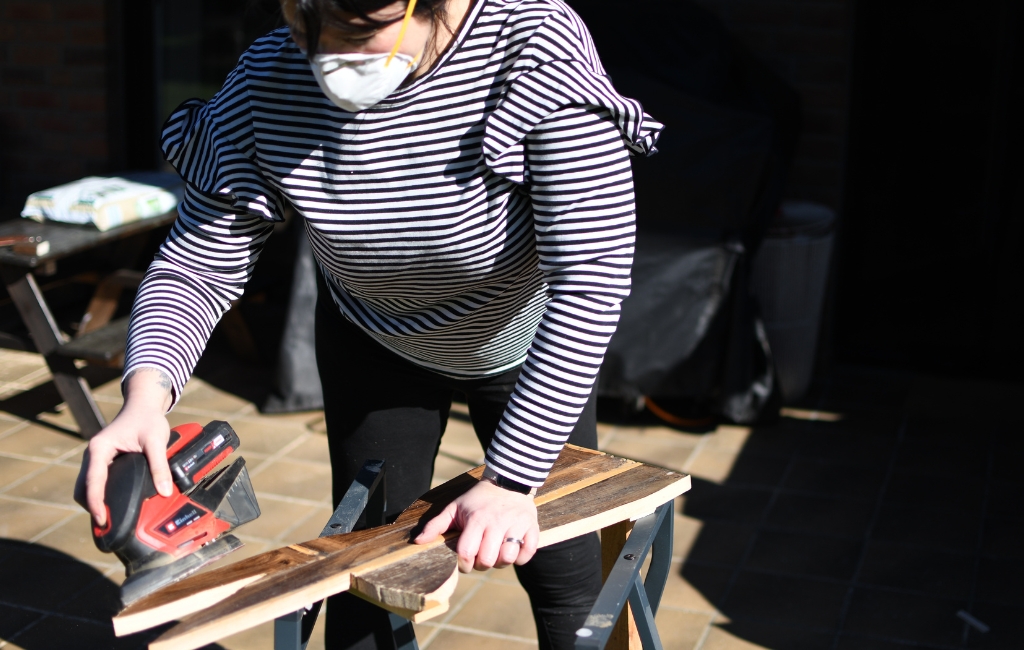
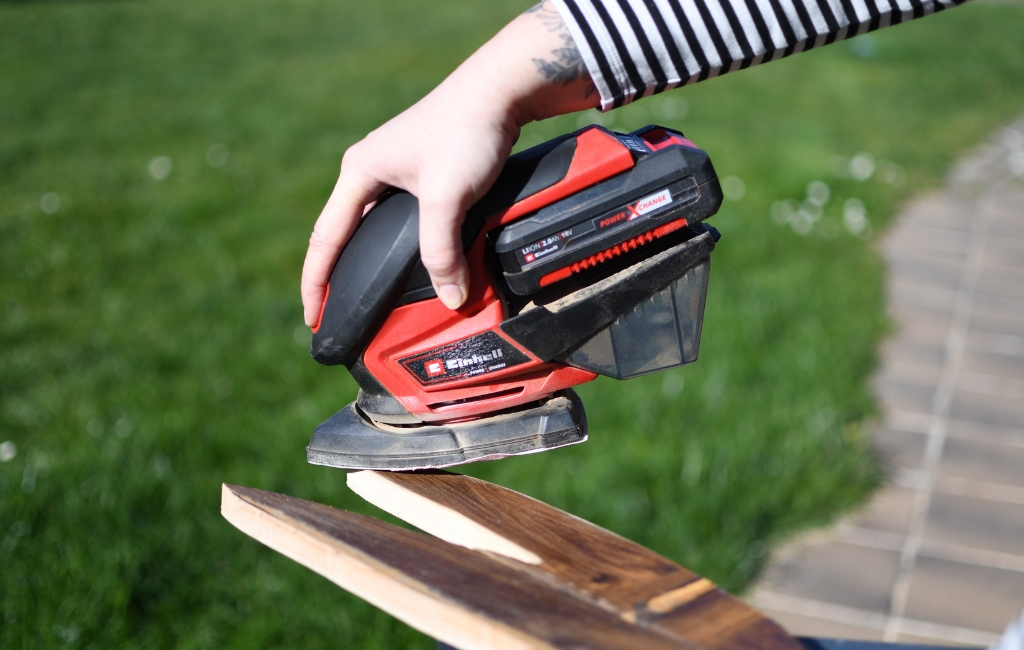
Step 6: Sand down the finished rabbit shape
For the finishing touches, use the cordless multi-sander. Sand down all the edges thoroughly and remove any splinters. This step is particularly important to prevent injuries and ensure a smooth finish. If you wish, you can then paint, varnish or leave the rabbits untreated and apply a wood preservative – depending on whether they are to be placed outdoors or indoors.
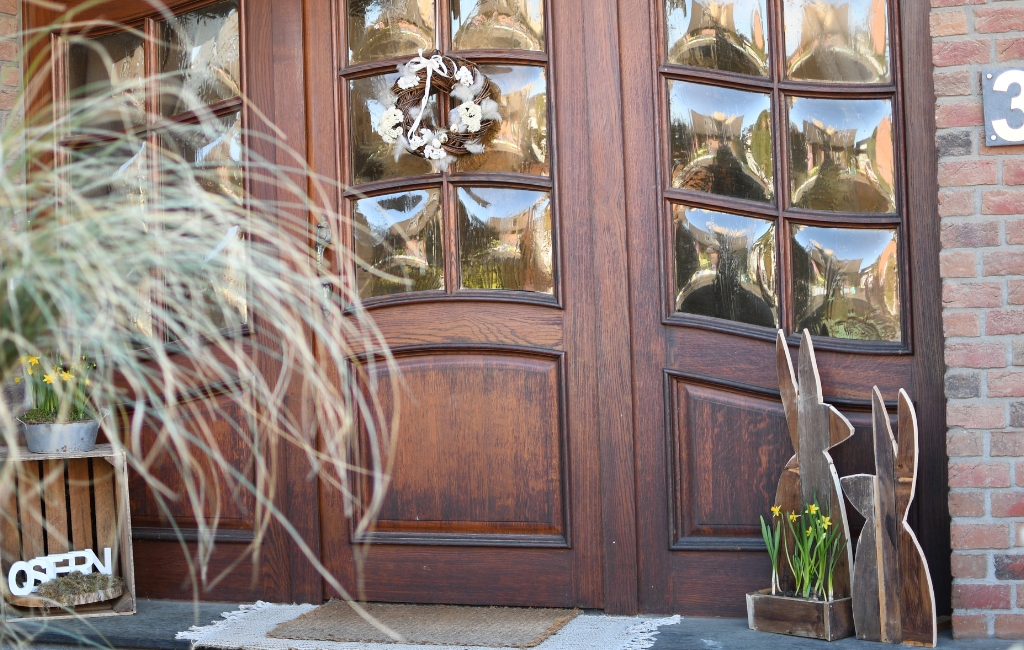
Step 7: Planting the window box
Finally, line the window box with plastic sheeting to protect the wood from moisture. Then fill it with potting soil and plant it with spring flowers or bulbs of your choice. Daffodils, hyacinths or small tulips, for example, look particularly lovely.
Your Easter decorations are ready!
In no time at all, you can transform old wood into something completely new. A sustainable, unique and lovingly crafted Easter decoration that’s sure to turn heads. Bring on Easter!
Have fun making your own!
Suitable Tools for the Project


In this article you will learn all about:

Published on 16.03.2026
Whether lifestyle content or DIY ideas, Jennifer from @jestil.de has been sharing her passion for her home, as well as for interior design, styling and craftsmanship, for many years. The 33-year-old entrepreneur works as a journalist, author and creative director. Alongside personal stories and inspiration, her community can follow her journey towards owning her own home, including the refurbishments and renovations, on a daily basis. Her posts combine everyday practicality with a distinct sense of aesthetics.