


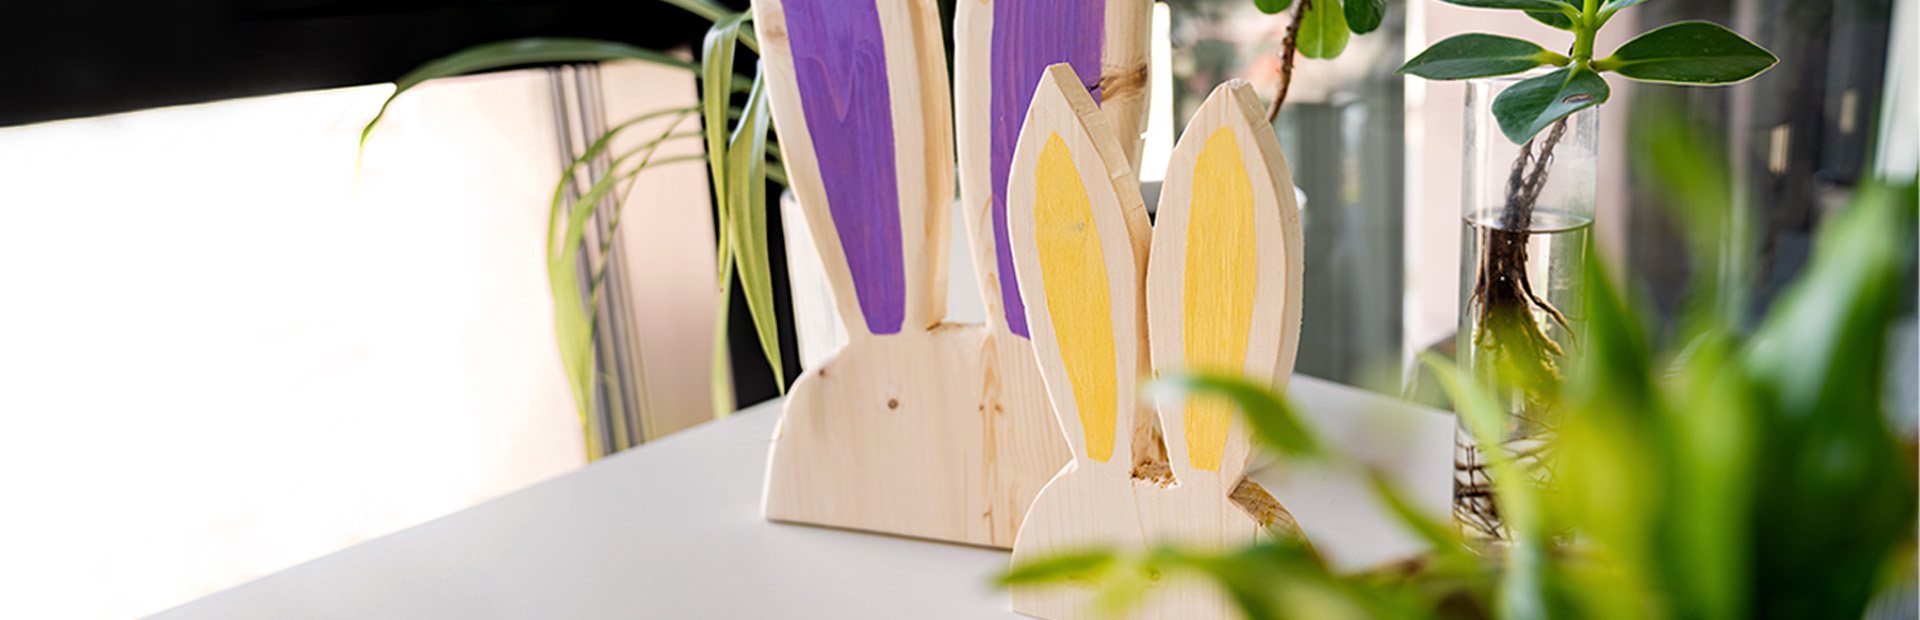
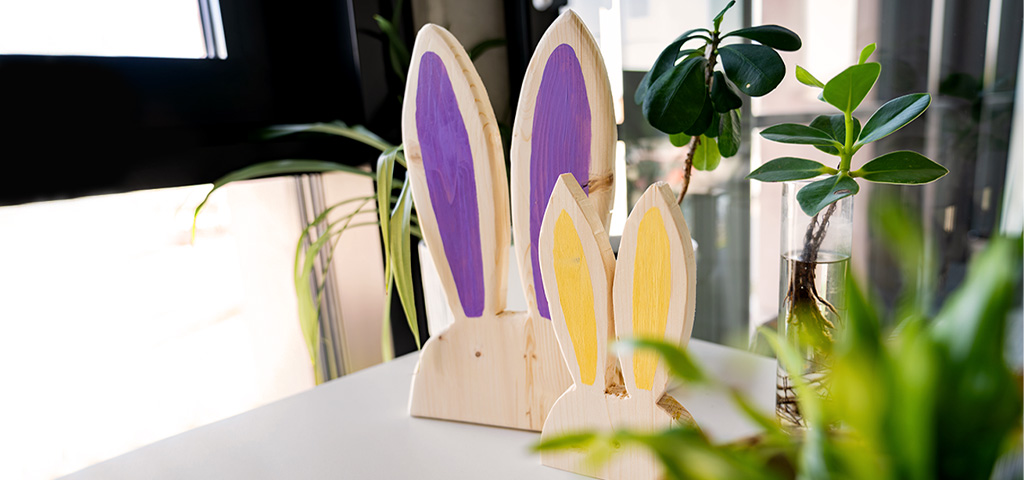
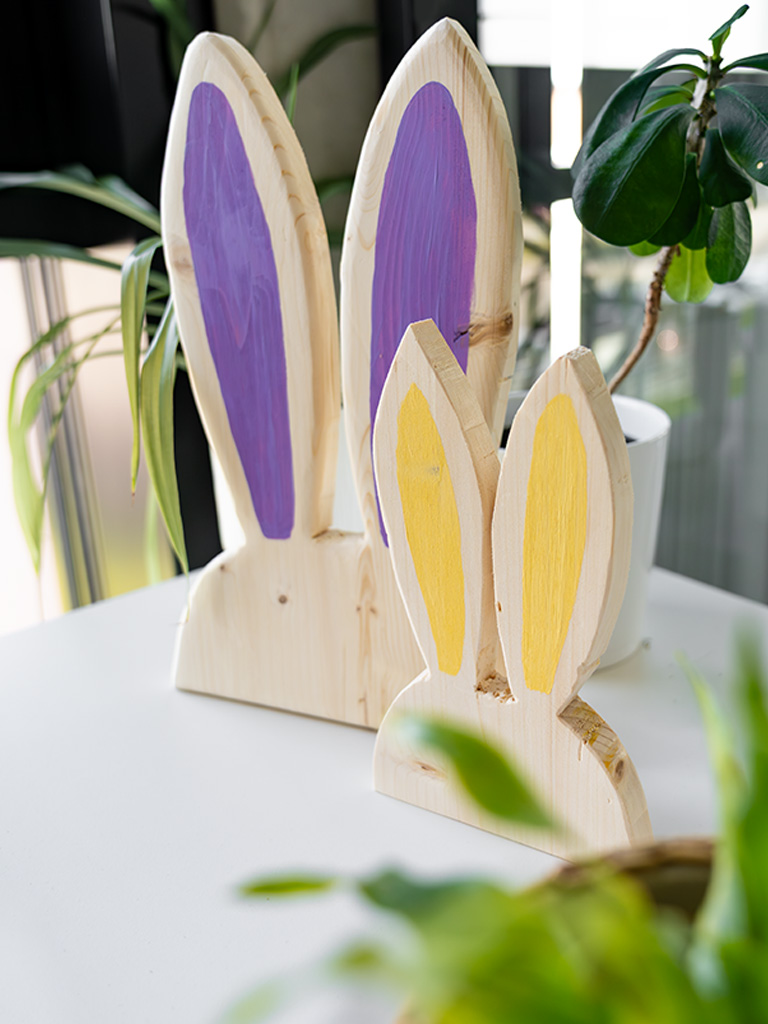
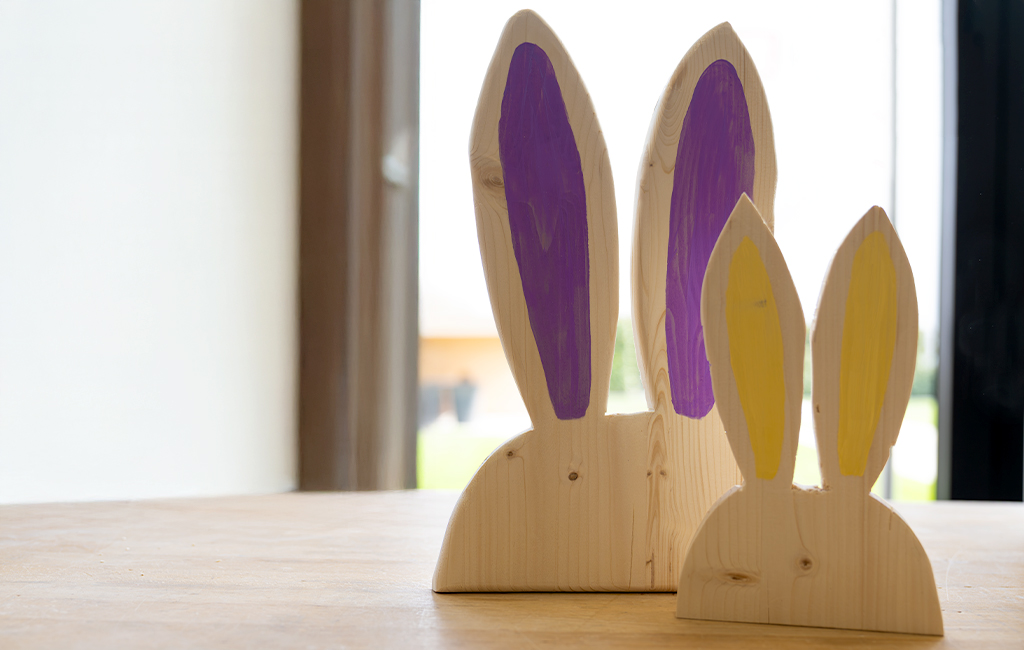
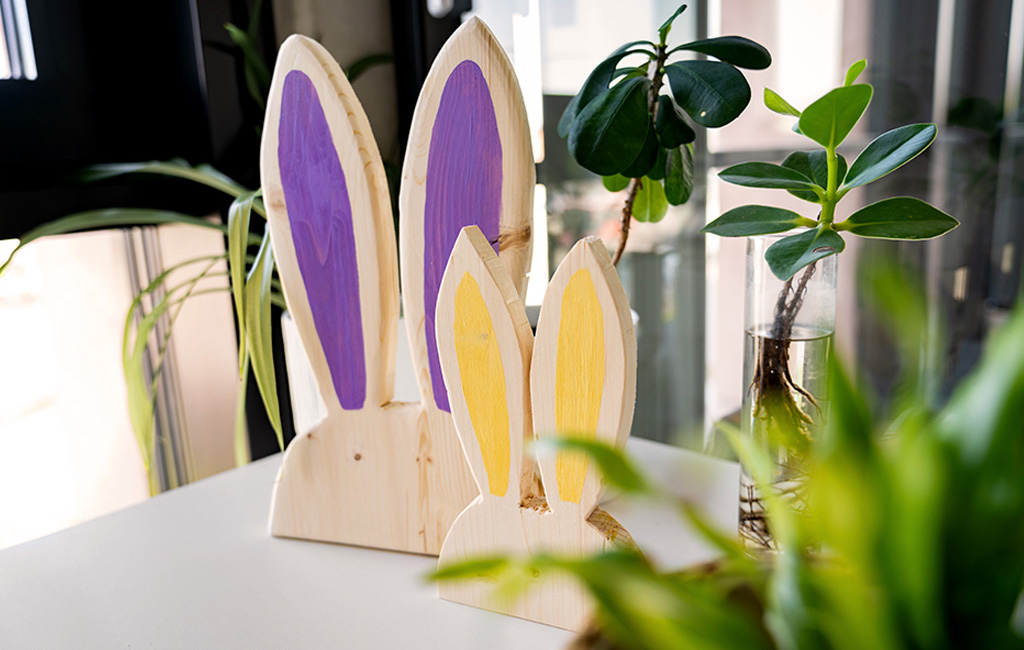
Cute wooden Easter bunny decorations
DO IT YOURSELF
Easter is just around the corner – the perfect time to bring a touch of spring into your home with some lovely DIY decorations! These cute wooden bunnies are the ideal addition to your Easter celebrations: easy to make yourself, they’re guaranteed to lift your spirits and create a real Easter atmosphere.
With a bit of paint and some attention to detail, you can conjure up little eye-catchers for your table, windowsill or even as a gift idea in no time at all.
In this post, we’ll show you how to make your own Easter decorations quickly and easily.
Tools and materials
Material
- Pencil or acrylic paint
- Spruce wood (thickness: 2 cm)
- Decorations of your choice (eggs, moss, etc.)
Step-by-step guide to making Easter bunny decorations:
Step 1: Sketch the outlines of the Easter bunnies onto the wood
The first step is to transfer the shape of your wooden bunnies onto the wood. To do this, carefully sketch the outlines onto the wooden board with a pencil – this will give you a clear template to guide you when sawing. Make sure the lines are clearly visible but not too thick, so that you can easily touch them up later.
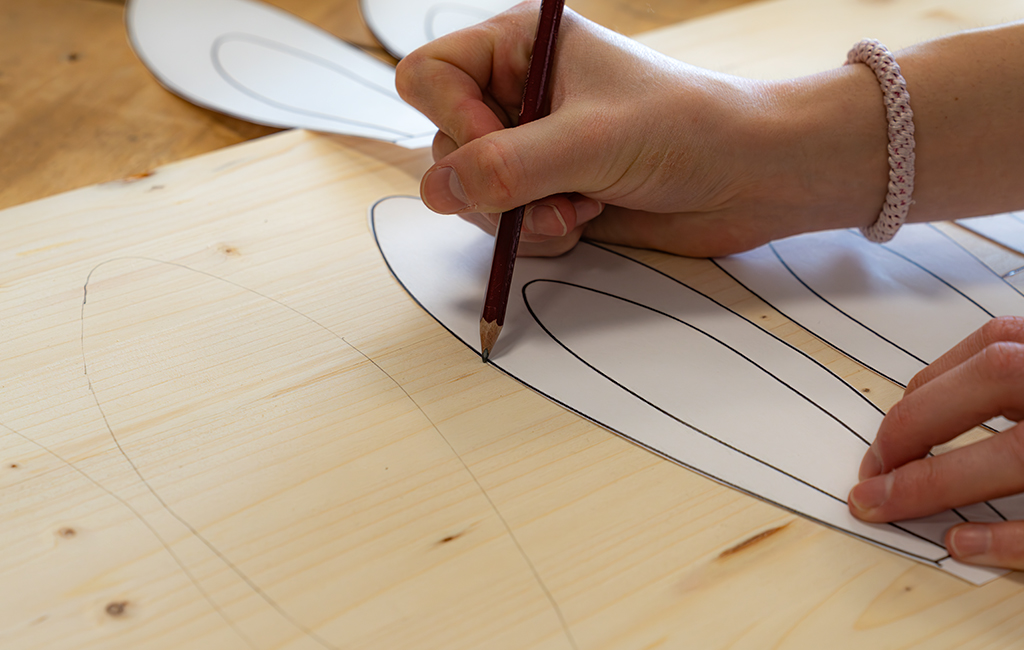
💡 Tip: If you like, you can cut out a paper template beforehand and place it on the Wood – this will ensure that each rabbit turns out even and symmetrical.
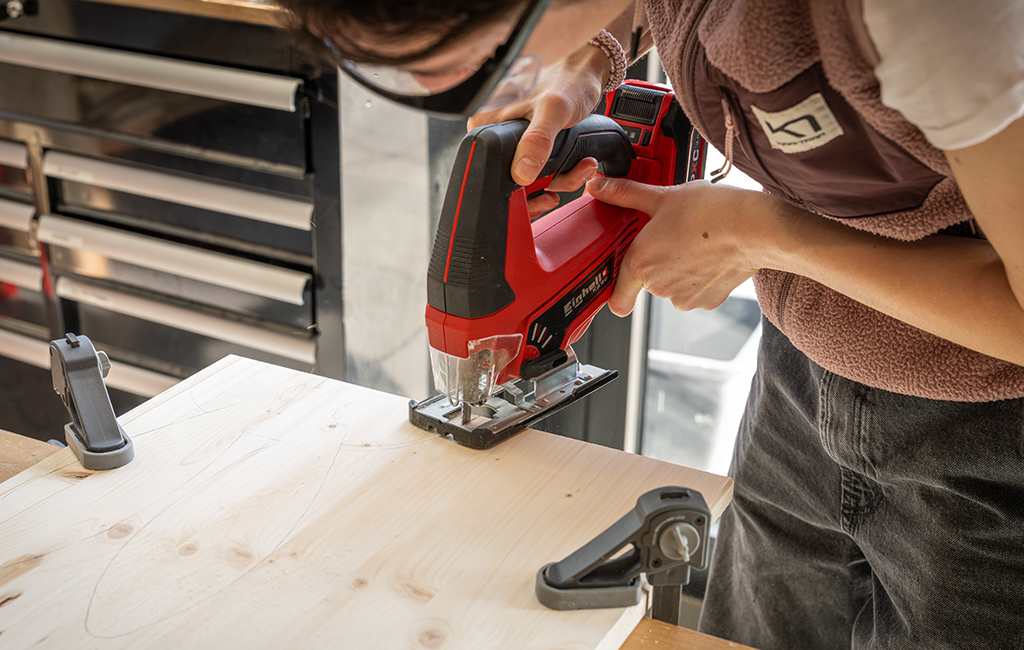
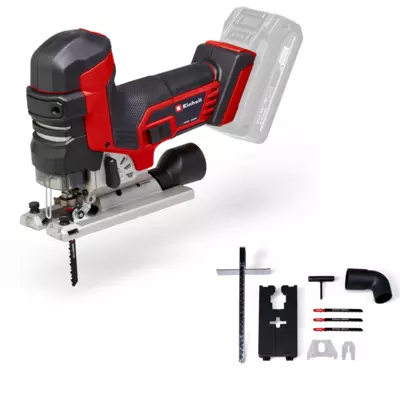
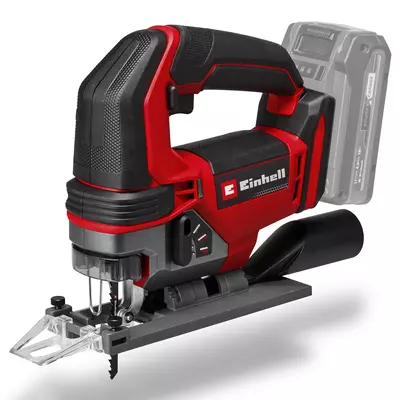
Step 2: Cut out the rabbits using a jigsaw
Now it’s time to start sawing! Use a jigsaw to carefully cut out the outlines of the rabbits you’ve drawn. Make sure you saw slowly and evenly and hold the wood steady so that the contours remain clean.
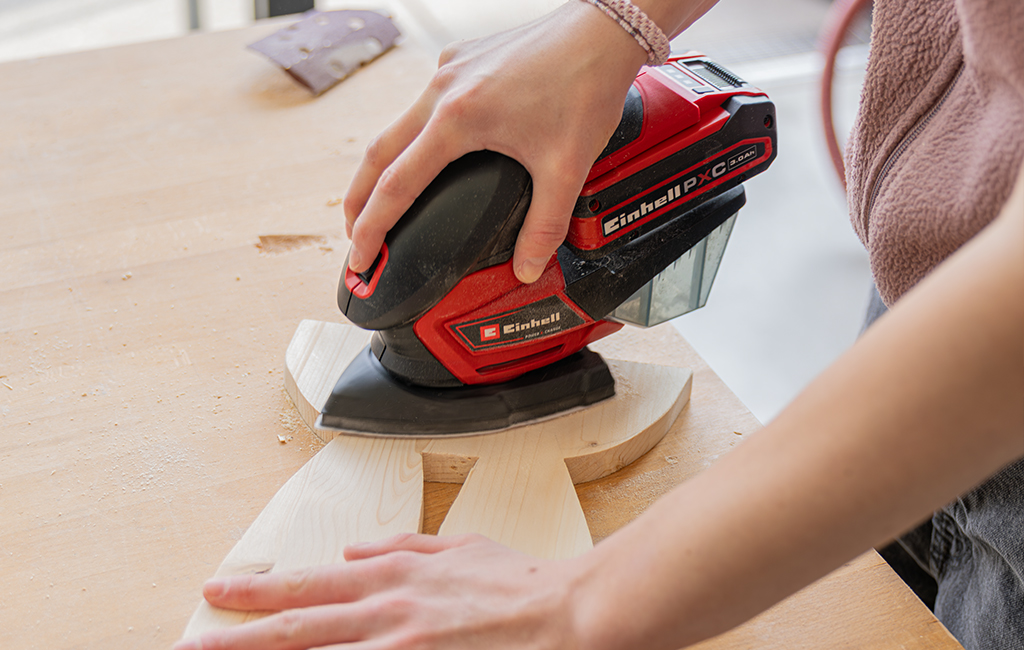
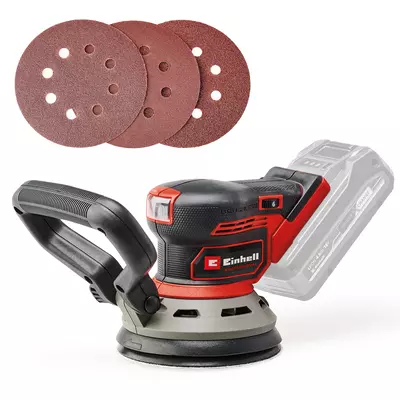
Step 3: Sanding
Once you’ve cut out the shapes, your wooden bunnies are ready for a final sanding. Use a random-orbit sander to thoroughly smooth all edges and surfaces and remove any splinters. This will give your wooden bunnies a smooth, professional finish, making them easy to decorate later on.
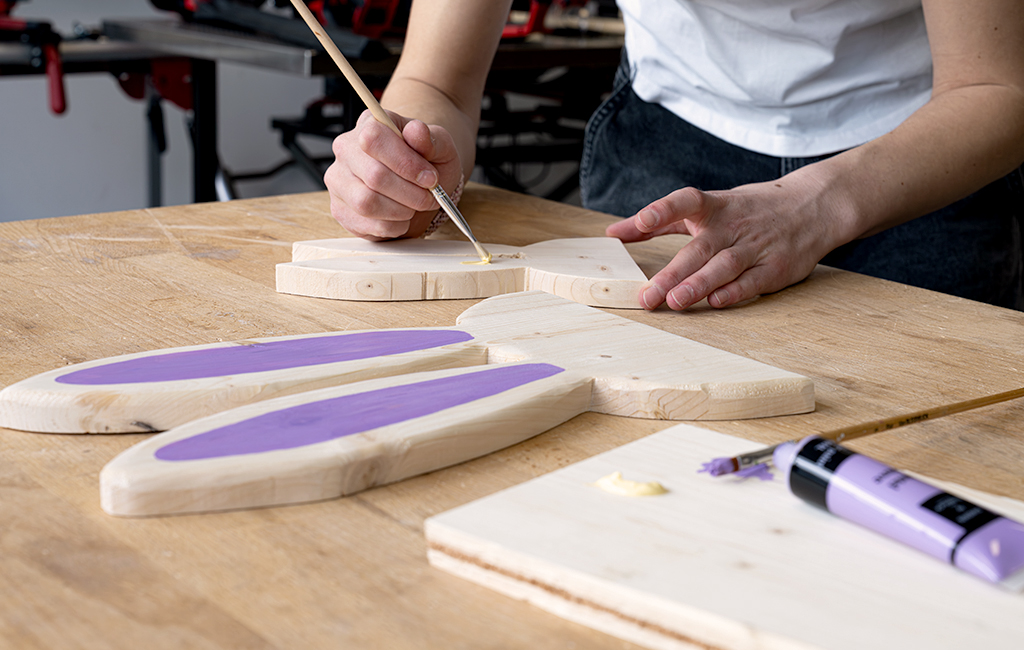
Step 4: Painting the wooden bunnies
Now your wooden bunnies are coming to life! Use acrylic paint or wood-colouring pencils to add details such as the face and ears – little eyes and a nose give the bunnies their charm. Make sure the paint dries thoroughly before moving on to the next step or adding further details.
Step 5: Decorating
Finally, it’s time to decorate! For example, arrange your wooden bunnies in a small group so they really stand out. Add small Easter eggs, moss or other spring decorations as you like. In no time at all, you’ll have created a lovingly crafted eye-catcher that’s perfect for Easter.
Final thoughts
And there you have it – your cute DIY wooden bunnies are ready! It’s that quick and easy to create your own personalised Easter decorations.
Have fun making them.
Suitable Tools for the Project
In this article you will learn all about:

Published on 16.03.2026
Laura Wallner works in online marketing at Einhell and deals with creative content on a daily basis. She loves doing crafts – from upcycling projects up to seasonal decorations. Her motto is: learning by doing. That’s why she likes to allow for a bit of leeway when working with materials like Wood. Her essential Einhell tool is the USB cordless battery adapter for charging her mobile phone – so she never runs out of battery whilst crafting, whether she’s using it for online instructions or music.