


Hanging Advent Wreath
DO IT YOURSELF
As every year, I make my Advent wreath myself, but for quite some time now I’ve been thinking about giving it a permanent place in our home. A little tradition that brings excitement each year anew – and, above all, always hangs in the very same spot.
So this winter, we’re starting a new family tradition – with a hanging Advent wreath.
In this post, we’ll show you how to quickly and easily craft a hanging Advent wreath.
Tools and Materials
Materials
- Branches and fir greenery from the garden
- Rope or chain for hanging
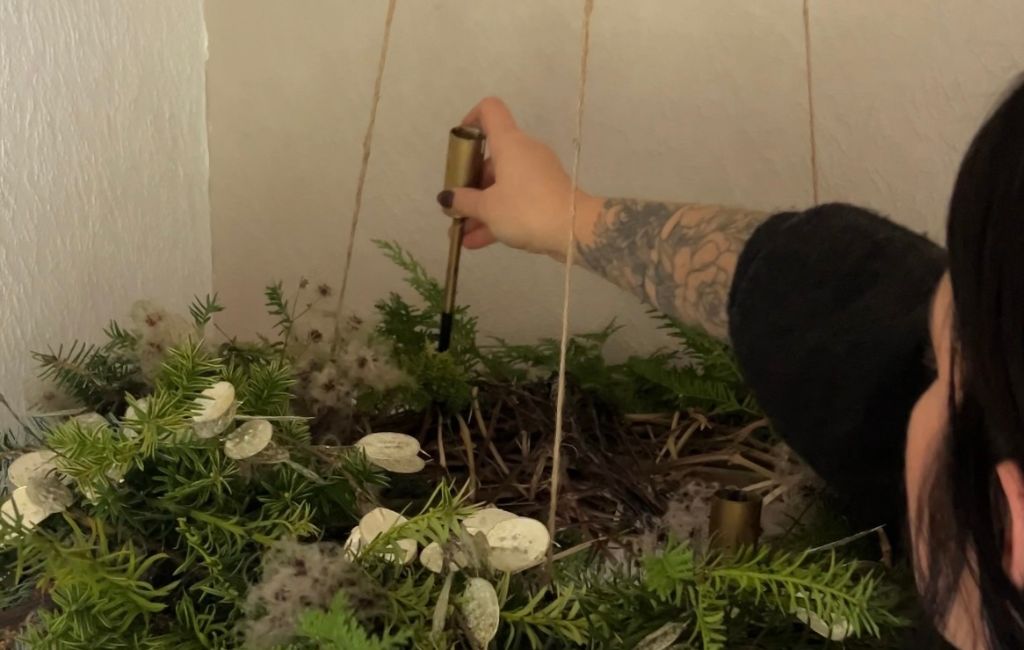
- 4 candle holders
- 4 candles
- Decorations of your choice
- Screw hook and matching wall plug
- Binding wire
- Large pot as a shaping aid
Step-by-step instructions
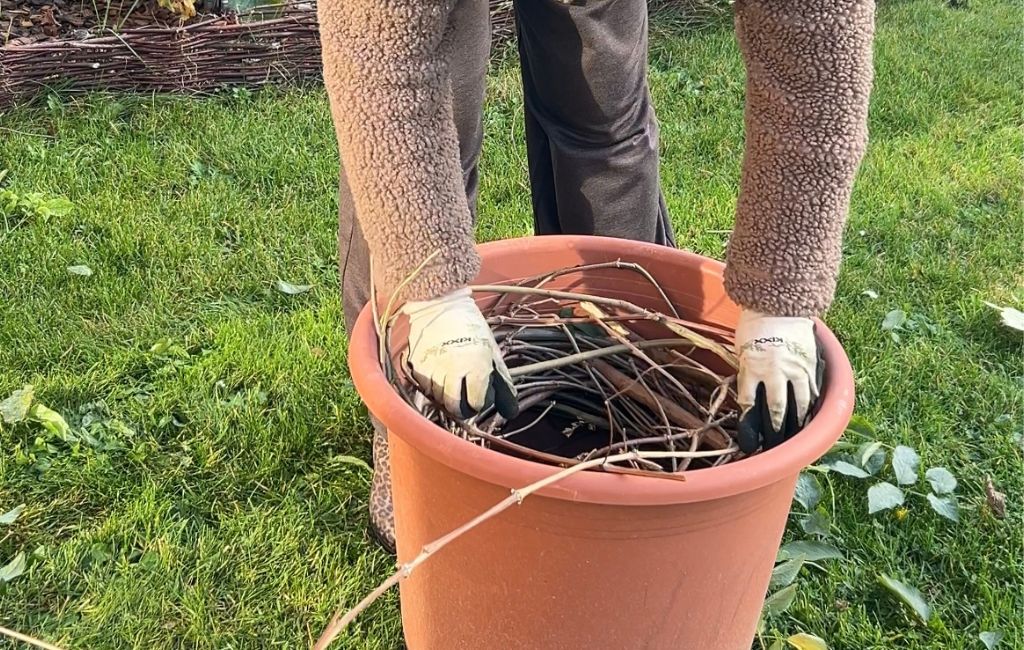
Step 1: Preparation in the garden
The practical thing is: you can give your hedges or trees a little winter trim – and the cuttings are perfect for making the wreath. To do this, you should first remove all long, unnecessary summer shoots from your shrubs.
For the thicker branches, my absolute favourite garden helper came into action: the cordless branch pruner. It allows you to effortlessly cut even sturdier twigs without straining your hands. Especially when cutting many branches, you’ll quickly notice how much easier the work becomes when the tool is reliable and gentle on your muscles.

With the Einhell Professional cordless branch pruner, suitable branches for the Advent wreath can be easily cut.
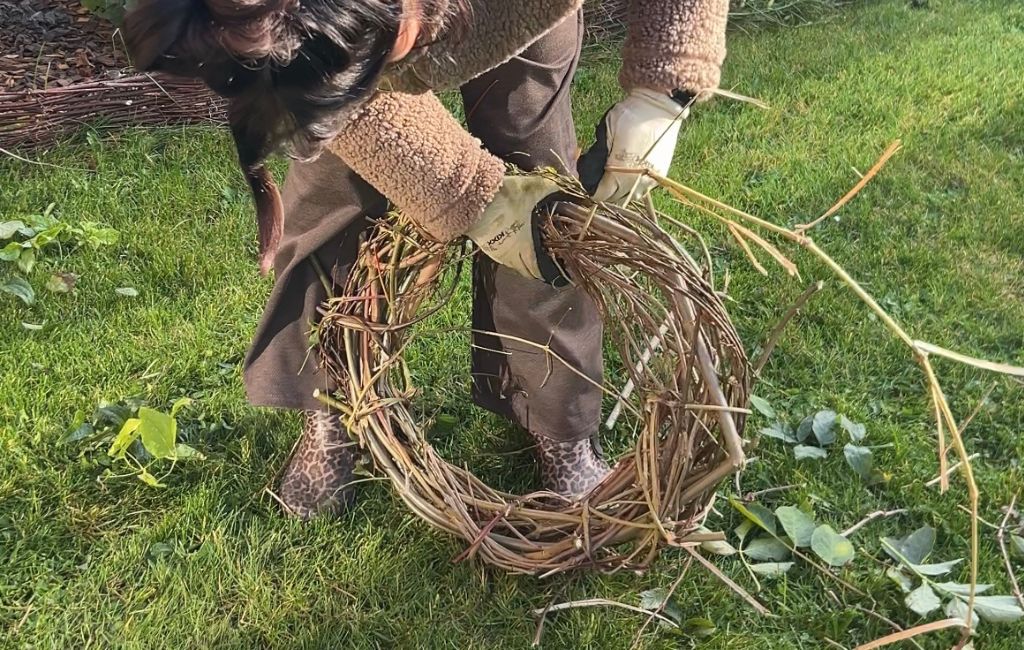
Step 2: Binding the wreath
To ensure the wreath becomes nicely round and stable later on, place all the branches you’ve gathered into a large pot. The pot acts as a mould, helping the branches naturally take on a smooth curve. Then wrap everything tightly with wire. You can work layer by layer, adding in small branches as you go until the wreath looks full and even. The more branches you use, the fuller it will look once it’s hanging.
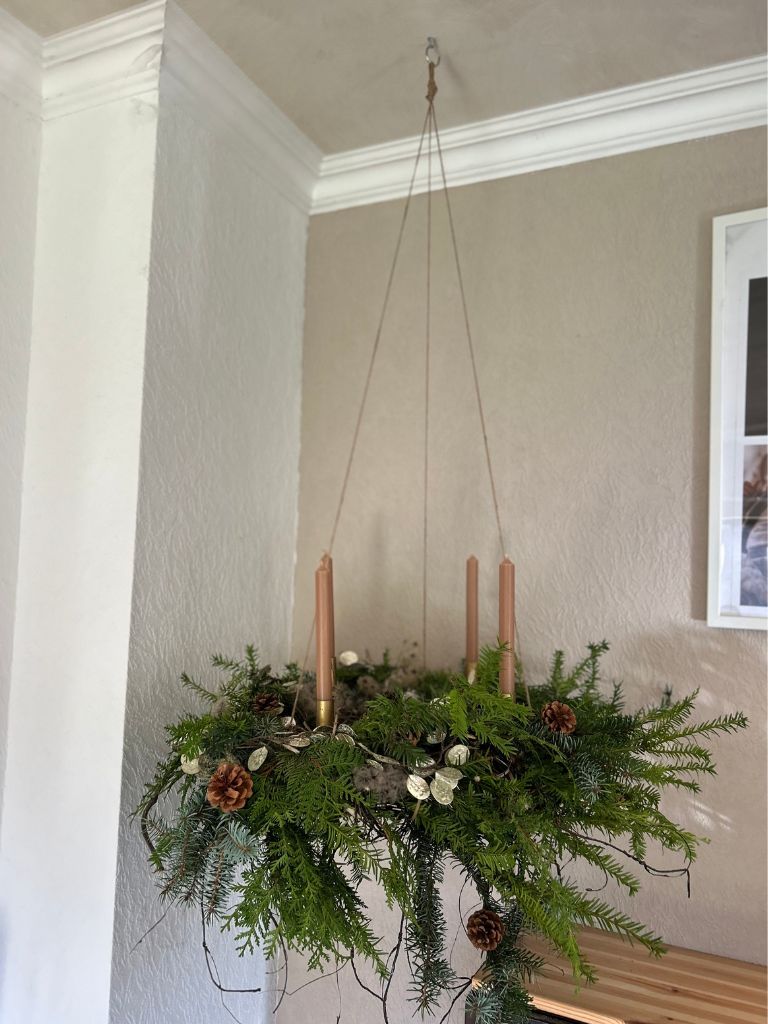
Step 3: Preparing the hanging point
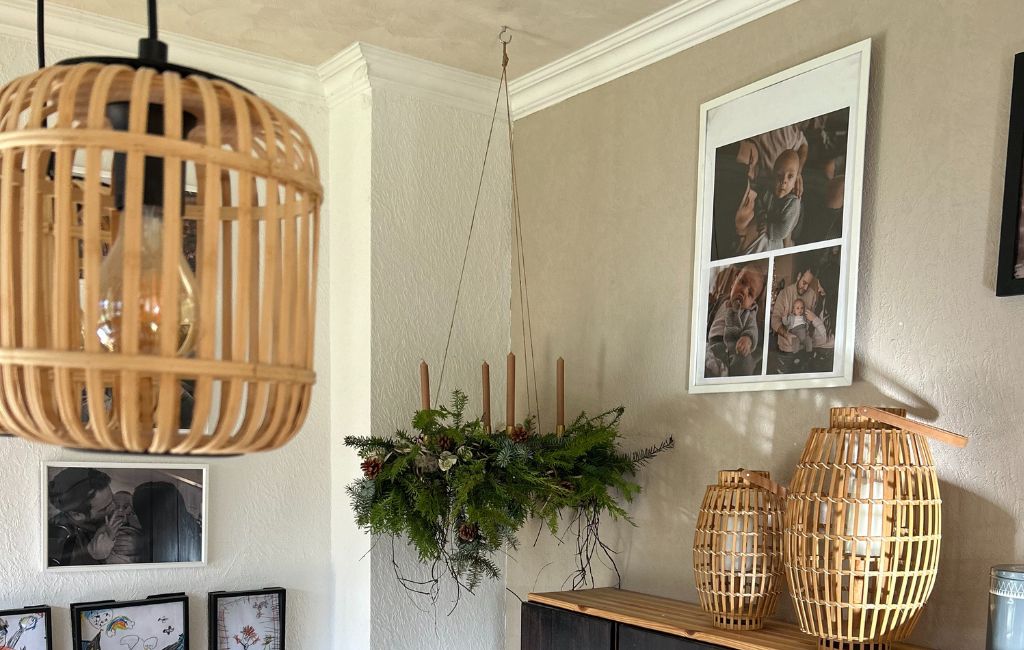
I had already had the perfect spot in the dining room in mind for a while: a quiet corner directly above the dining table, where the Advent wreath will now find its place every year.
Choose a suitable spot in your home. Then mark the position on the ceiling. Next, you’ll need the right drill bit for your ceiling. Insert it into the cordless drill driver and carefully drill the hole. Then simply push in the wall plug, screw in the hook – and the hanging point is secure.
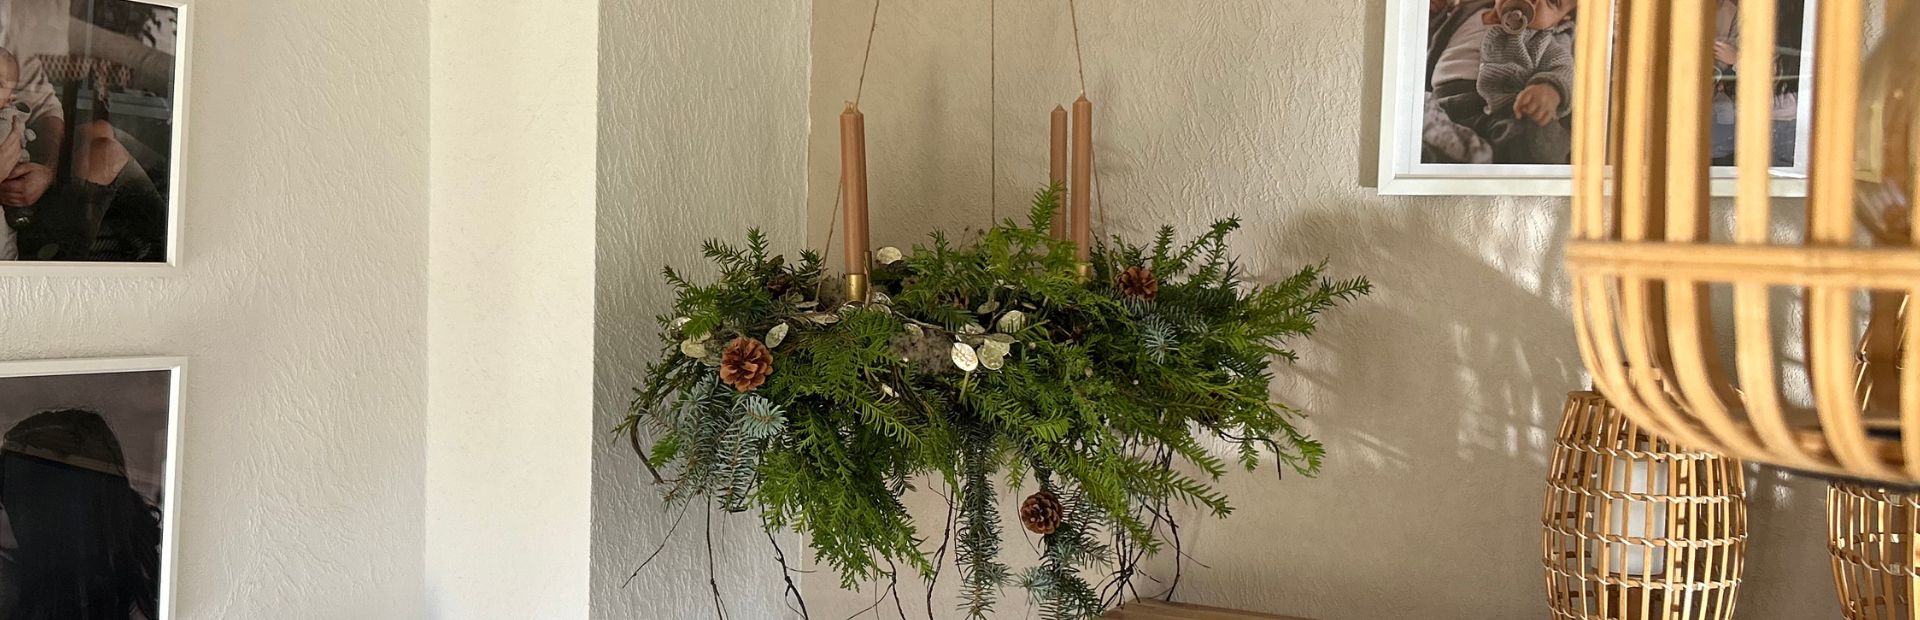
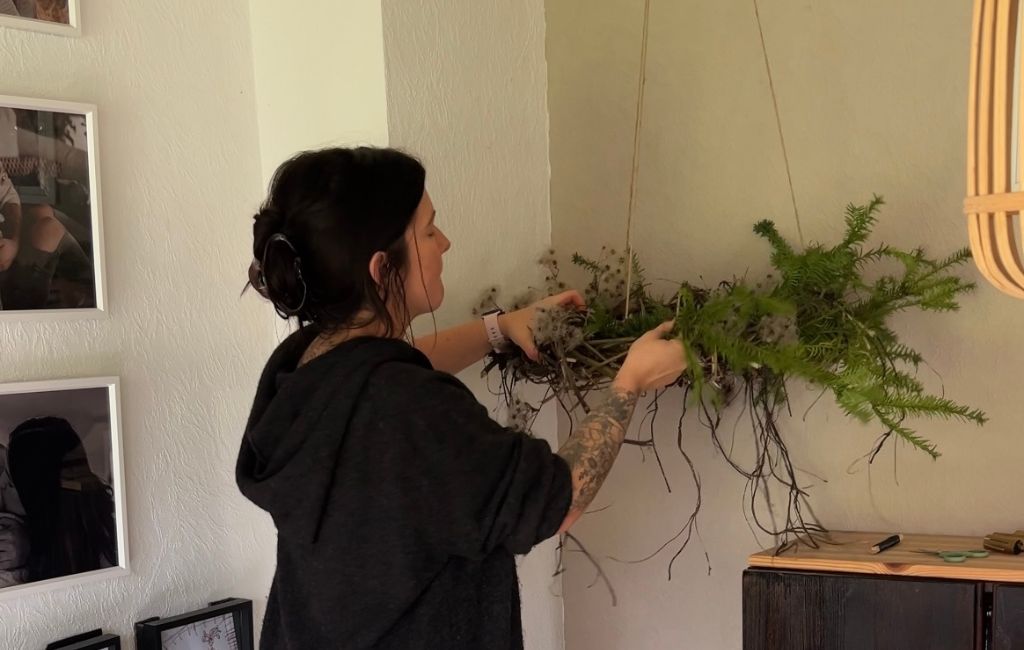
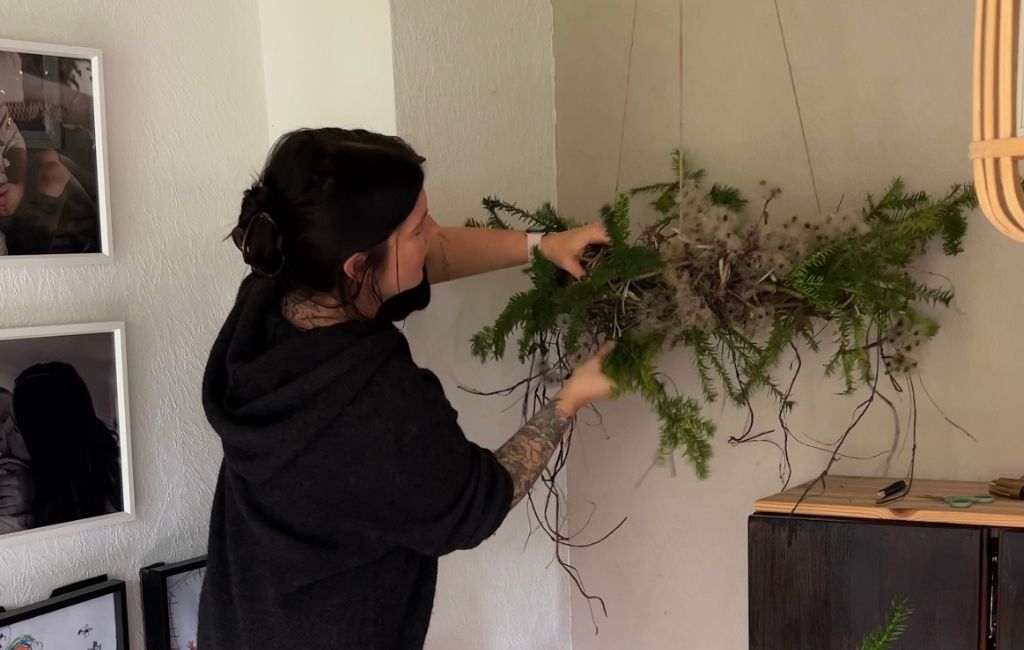
Step 4: Hanging and decorating the wreath
I attach the wreath at three points using ropes so that it hangs straight and doesn’t tilt. Then it is given its new place of honour. Now comes the loveliest part: decorating.
This year, I opted for a simple, natural colour palette: greens, browns and beige tones that go beautifully with the raw branches. The fir greenery can easily be tucked between the larger twigs and holds by itself. A few selected decorative elements such as pine cones, berries or wooden ornaments give the wreath a warm, cosy look. Finally, place the four candles into their holders. This is where you can let your creativity run free and design the Advent wreath exactly the way you want it!
Conclusion: A unique piece for many years to come
With a little time, natural materials and good tools, you can create a very special one-of-a-kind piece that will bring joy year after year. I’m already looking forward to how our hanging Advent wreath will continue to spread its festive atmosphere right above the dining table as a little family tradition in the years to come.
Have fun making your own!

Ein Adventskranz, der für viele Jahre hält. Einfach Äste und Kerzen austauschen und schon ist wieder alles festlich geschmückt.


In this article you will learn all about:

Published on 24.11.2025
Whether lifestyle content or DIY ideas, Jennifer from @jestil.de has been sharing her passion for her home, as well as for interior design, styling and craftsmanship, for many years. The 33-year-old entrepreneur works as a journalist, author and creative director. Alongside personal stories and inspiration, her community can follow her journey towards owning her own home, including the refurbishments and renovations, on a daily basis. Her posts combine everyday practicality with a distinct sense of aesthetics.