


Wooden Christmas Tree
DO IT YOURSELF
Fancy a different kind of Christmas tree? We’ll show you how to build a wooden Christmas tree as stylish wall decor. Perfect as an alternative to the classic Christmas tree, as an Advent calendar, or for displaying festive decorations.
And the best part – you can reuse it every year! Our product trainer Philip will explain step by step how he built the tree in this guide. Grab your tools and let’s get started!

We’ll show you how to quickly and easily build your own wooden Christmas tree.
Tools and Materials
Material
- Pine wood slats:
- 2 × cut length 1.20 m
- 2 × cut length 0.98 m
- 2 × cut length 0.50 m
- 18 × cut length 0.25 m
- 2 × trunk pieces 1.40 m
- Continuous hinges
- 10 cm flat connector
- 2.5 mm wood drill bit
- 80, 210, 240 grit sandpaper
- Chipboard screws 3.0 × 12 mm
- Chipboard screws 3.5 × 40 mm
- 18 screw hooks 2.6 × 30 mm
Instructions: Wooden Christmas Tree
Step 1: Cutting the wood
First, cut the wooden slats to the required lengths. Cut the six outer slats to the following lengths: two at 1.20 m, two at 0.98 m and two at 0.50 m. Then cut the 18 inner slats to 25 cm each, as well as the two wooden beams for the trunk to 1.40 m each. Once all the pieces are cut, you should smooth the edges of the slats with sandpaper. This will prevent splinters and make working with the wood more pleasant.
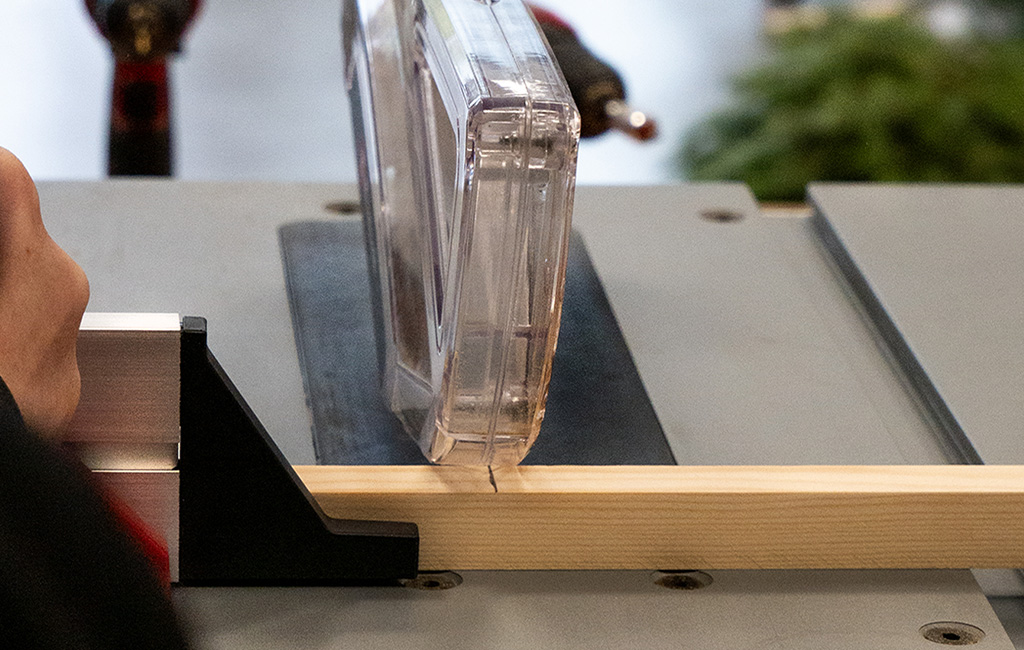

Step 2: Cutting the outer slats to an angle
To give your Christmas tree its characteristic triangular shape, cut the ends of the outer slats at an angle. Use a saw with an adjustable cutting angle (a cordless table saw). Make sure the angles are precise so that the slats form an even and stable frame later on.
Step 3: Assembling the first half of the tree
Now you can start assembling. Begin with one half of the Christmas tree. Lay out the three outer slats of this half so that they form a triangle. Attach the inner slats to create the diamond pattern. Before driving in the screws, carefully pre-drill all connection points. This prevents the wood from splitting when you screw it together. The flat connectors on the back provide additional stability. Screw them in so that the slats are securely joined together.
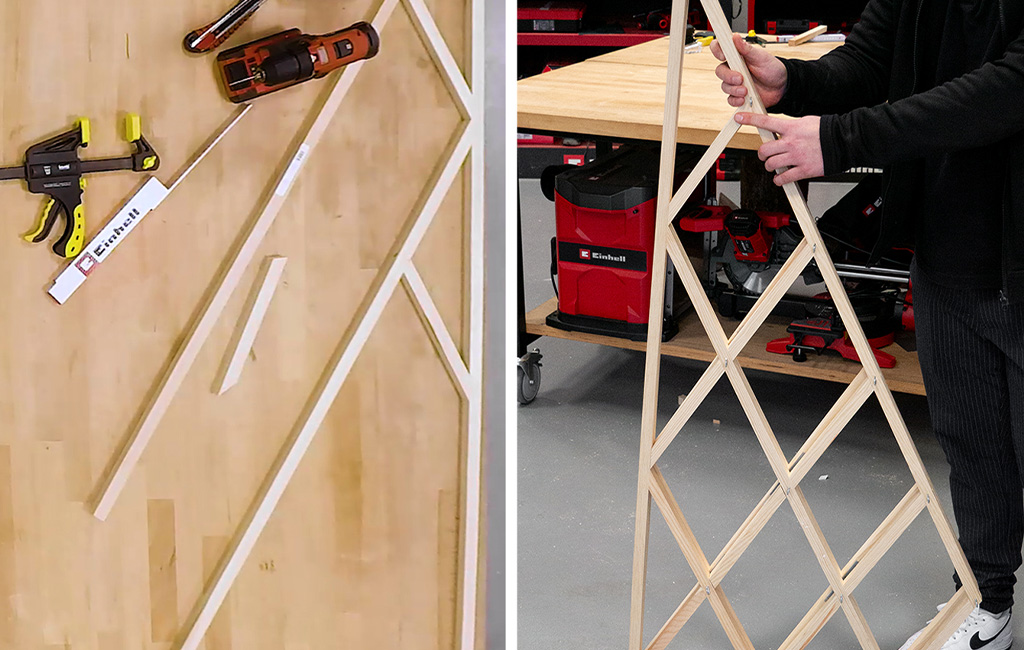
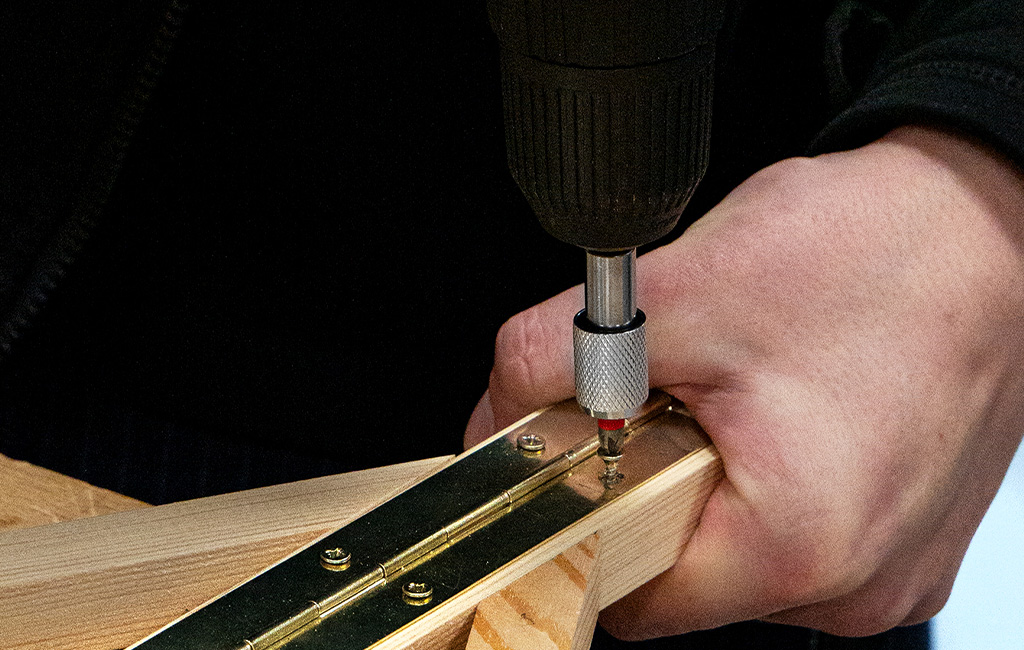
Step 4: Building the second half and connecting both halves
Once you’ve completed the first half, repeat the process for the second half of the tree. As soon as both halves are finished, you can join them together. Trim the continuous hinge to the appropriate length if necessary, then attach it along the central axis of the two halves. This ensures the tree remains stable while still being able to fold flat to the back.
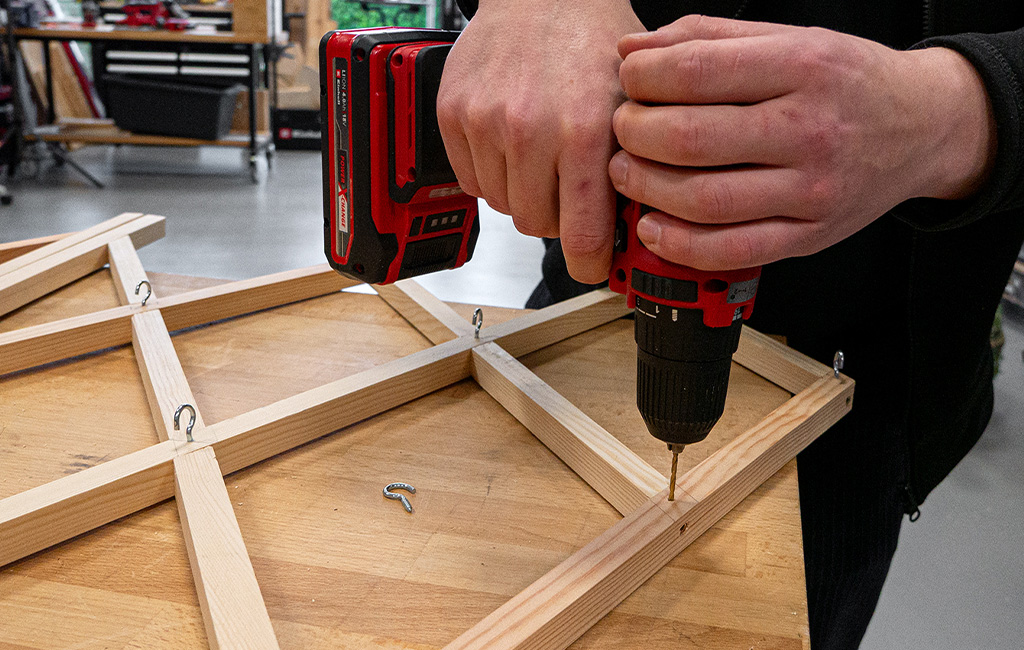
Step 5: Attaching the hooks
Now it’s time to attach the hooks that will later be used for the decorations. Mark the spots where the hooks should be screwed in. It’s a good idea to place them at the intersections of the diamond shapes. Again, pre-drill the holes and then screw in the hooks.
Step 6: Mounting the tree on the wall and decorating
Your Christmas tree is now complete and ready to be mounted on the wall. Now it’s time to decorate – let your creativity run wild!

Tip: You can also screw in 24 hooks and use it as an Advent calendar! Have fun building it. 😊
Suitable Tools for the Project


In this article you will learn all about:

Published on 25.11.2025
Whether it’s smart tool tips or exciting DIY projects: Philip shares his passion for powerful equipment and clever solutions for everyday home improvement. For many years, he has been training both Einhell employees and external partners, providing product knowledge and demonstrating hands-on applications. With plenty of expertise and enthusiasm, he also brings his own project ideas to life and lets his community follow along. His content combines practical expert knowledge with creative inspiration for every workbench.