


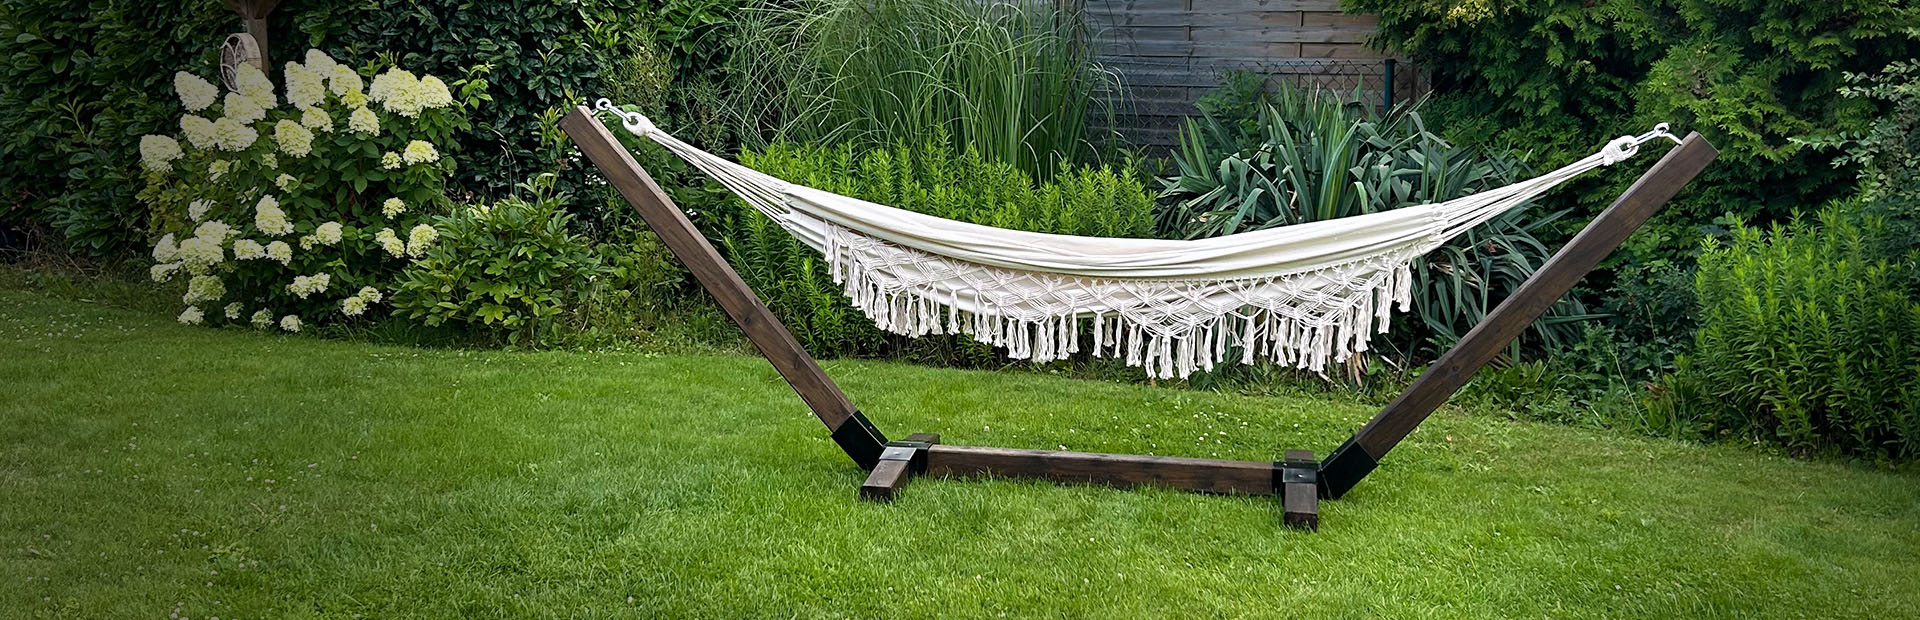

Build your own hammock stand with ease
DO IT YOURSELFEnjoying the sun in a cozy hammock, completely relaxed and at peace, is something very special. There is hardly anything better than lying down in a hammock after a long day and simply switching off. But what if you haven't yet found the right frame for your own garden? That was exactly the case for me.
Either the frames on offer were made entirely of metal, which I, personally, don't like at all, they seem far too clunky, technical, and uninviting to me. In addition, many of them are firmly anchored to the ground and therefore not very flexible in terms of their position. And since I like to change the position of my garden furniture from time to time, this was simply not an option for me. So, I decided on the spot: if I can't buy the right hammock stand, I'll just build it myself!

In this post, we’ll show you how to build your own hammock stand in no time.
Tools and Materials
Materials
- 4 wooden beams, each 2 meters long (to fit the steel hammock legs, 9x9 cm)
- 2x steel hammock legs (as connectors)
- 2x sturdy screw-in hooks
- Various screws
- Weatherproof glaze for outdoor use
Instructions Hammock Stand
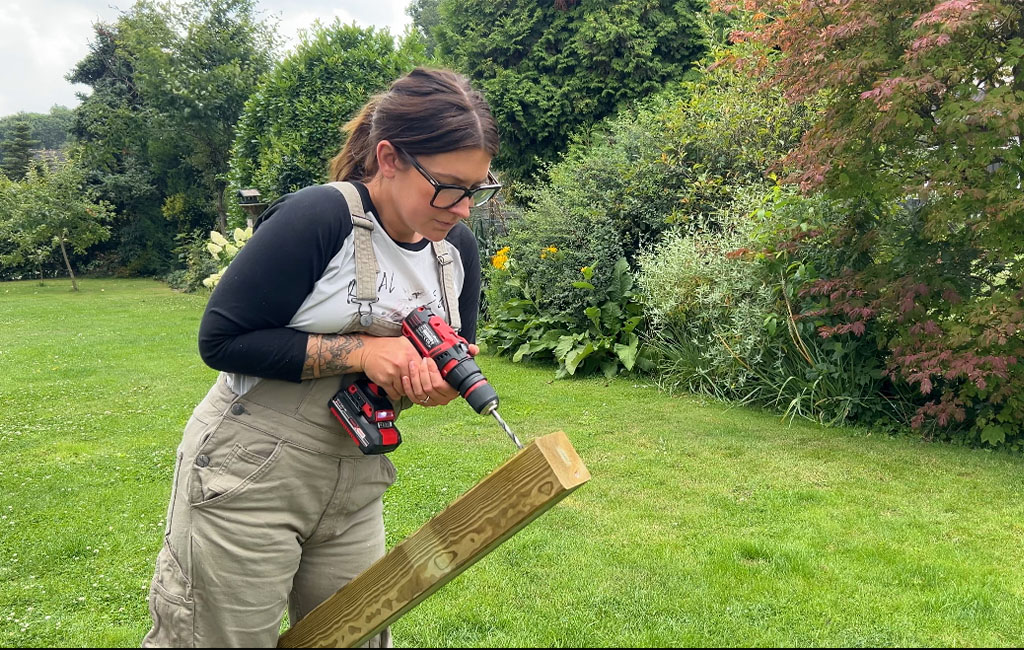
Step 1: Preparations
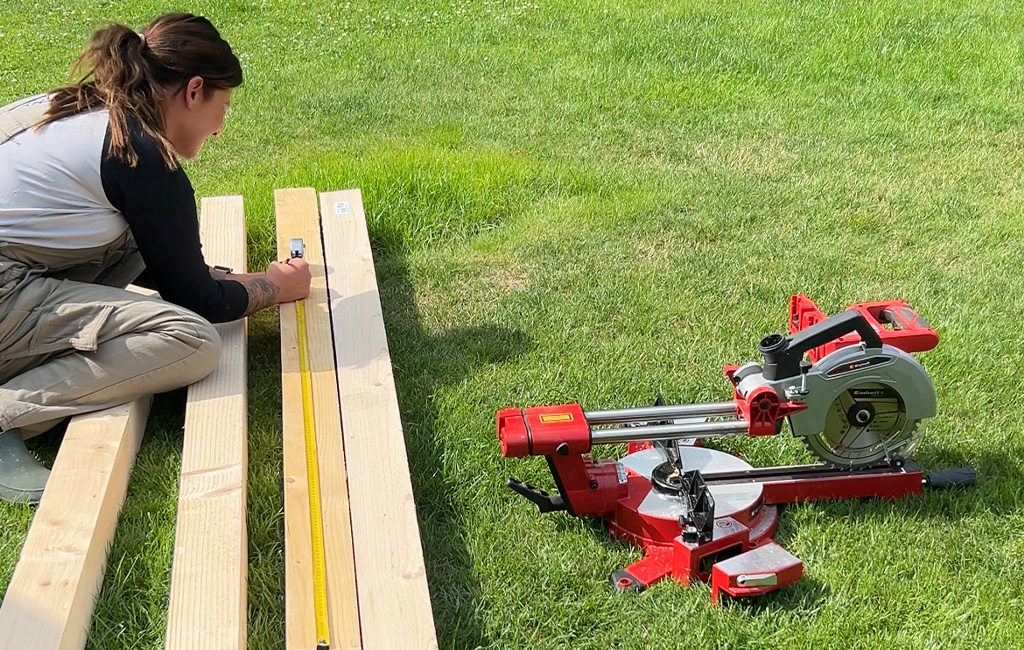
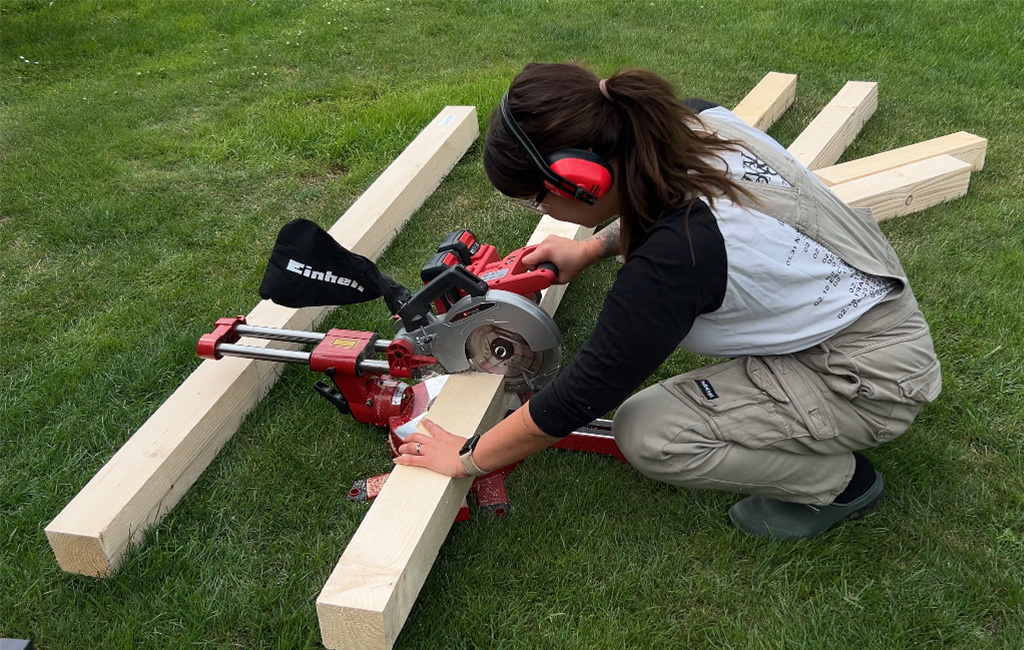
First, I transferred the corresponding measurements to the wooden beams. I cut three pieces, each 1.40 meters long. These will later form the ends with the eyelets for holding the hammock and connect the two steel frames to each other. In addition, I sawed four pieces, each 40 cm long, they serve as the legs of the frame.
With my cordless pull-cut miter saw, it was very easy to cut everything to size with precision. Once everything was cut, I set the pieces aside.
Step 2: Drilling Work
Since the steel connectors did not have pre-drilled holes for fixing the beams, I had to drill them myself using a cordless drill. The best way to do this is to start with a very small metal drill bit and work your way up step by step with larger drill bits until you reach the right hole size for the screws.
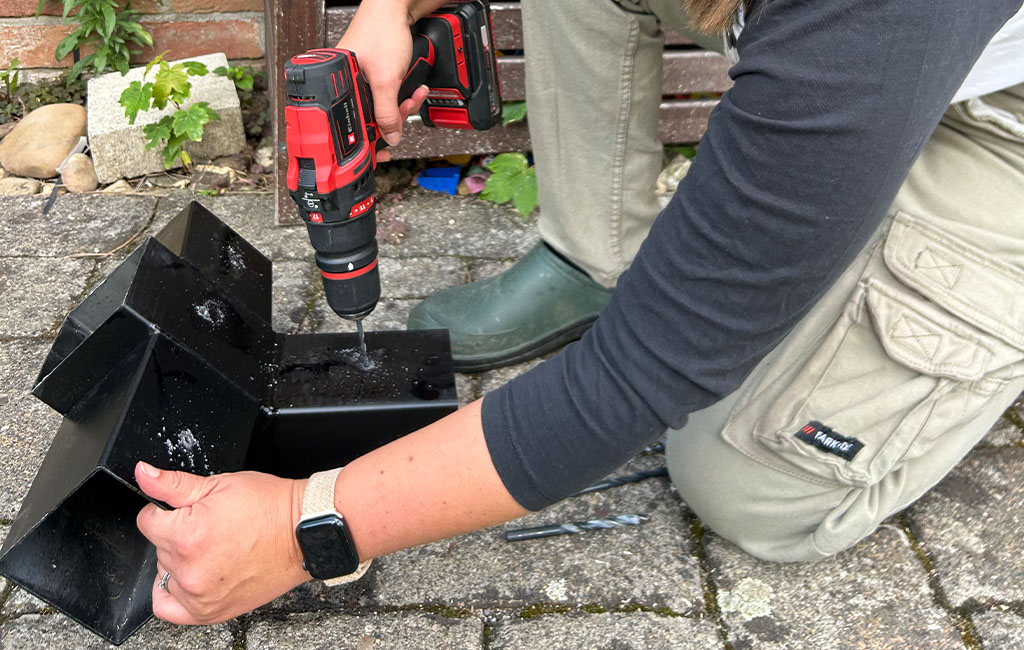
A little tip: regularly apply a little oil to the drilling site while drilling – this minimizes friction and makes the work much easier.
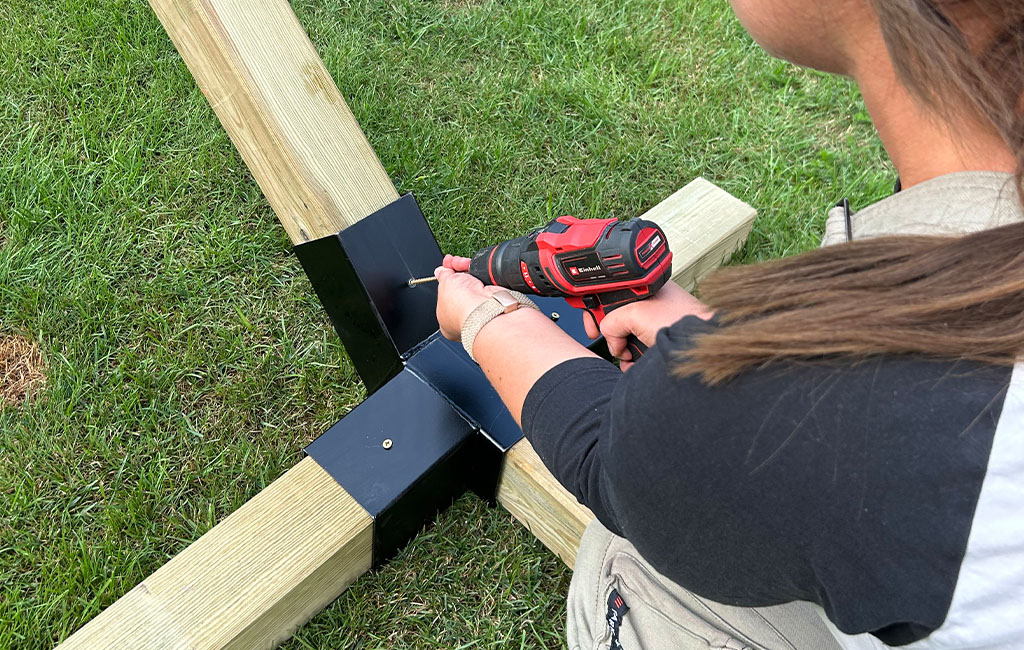
Step 3: Structure
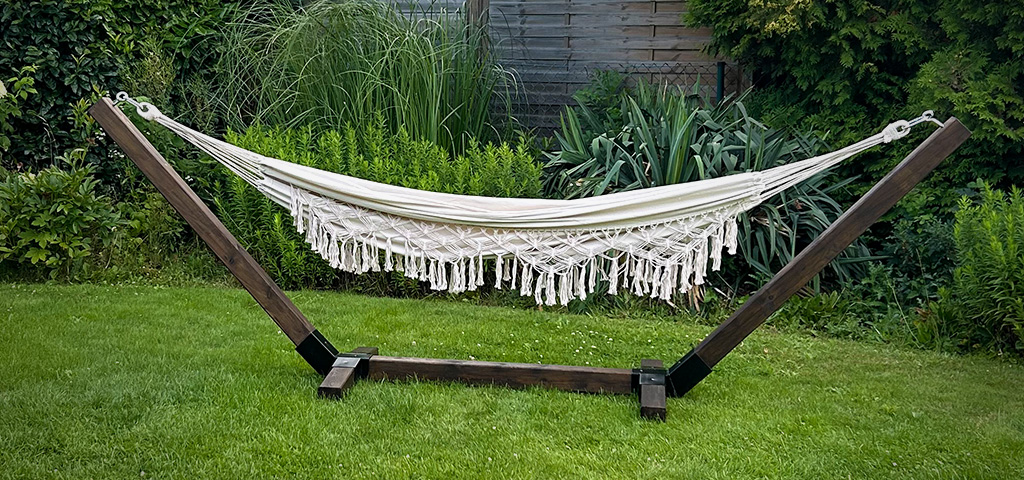
Now the actual assembly can begin. All parts are screwed together to form a stable frame.
To ensure that the hammock can be hung properly, drill a hole at each end of the upper beams. The screw hooks are then screwed into these holes.
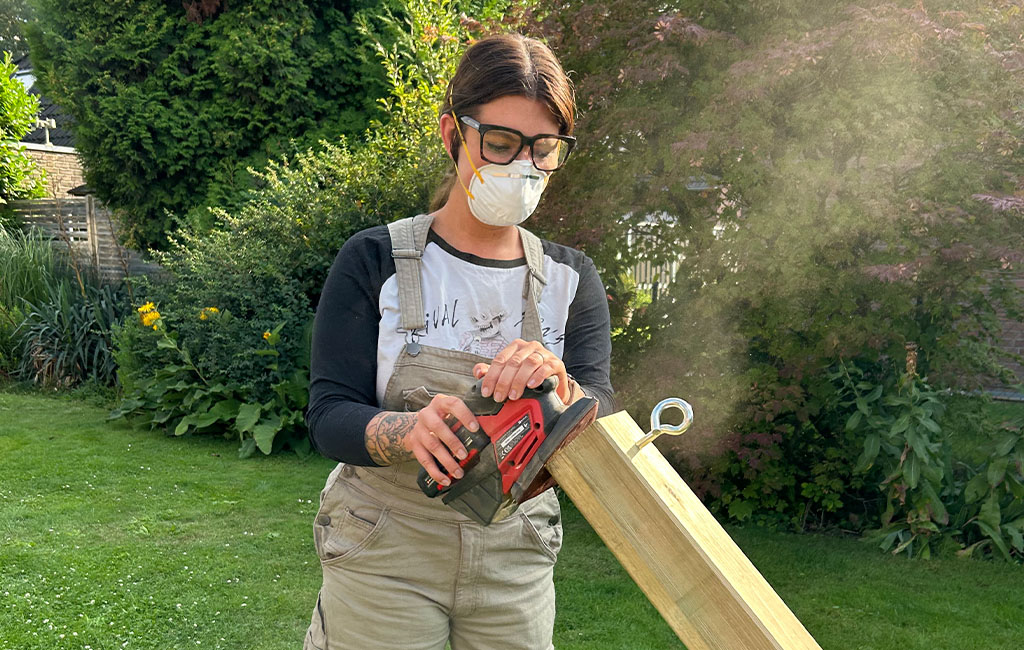
Step 4: Sanding Wood
To make the wood splinter-free and smooth, I carefully sand all edges with the cordless angle grinder—after all, safety and comfort come first.
Finally, I coated the entire frame with a high-quality water-resistant glaze. In my case, in the color rosewood, which perfectly matches our other garden furniture. After it had dried, the time had finally come: I could hang up my hammock, lie down in it, close my eyes, and simply enjoy myself—whether in the midday sun or in the evening with a good book.

As you can see, building your own hammock stand is really not that hard. With a little planning, some DIY skills, and the right tools, the project was completed in just under five hours and the result is really impressive!
Suitable Tools for the Project
Here you'll find Einhell tools and accessories that are perfect for bringing this DIY project to life.


In this article you will learn all about:

Published on 10.09.2025
Whether lifestyle content or DIY ideas, Jennifer from @jestil.de has been sharing her passion for her home, as well as for interior design, styling and craftsmanship, for many years. The 33-year-old entrepreneur works as a journalist, author and creative director. Alongside personal stories and inspiration, her community can follow her journey towards owning her own home, including the refurbishments and renovations, on a daily basis. Her posts combine everyday practicality with a distinct sense of aesthetics.