


Cutting slots is a breeze - how?
You can find out how to properly use a wall grinder and what to look out for here!Anyone who focuses on completing work themselves when building or renovating their own home in order to save costs will also be confronted with the subject of cable and pipe laying.
Laying electrical cables, water, gas or heating pipes under plaster can also be completed by non‐specialists. The professionals will then take over the connection and wiring later. So as not to have to laboriously lift the required wall slots by hand, the use of a wall grinder is helpful. With the help of this tool, the channels can be produced quickly and accurately. Reason enough to take a closer look at this specialist.
Functionality
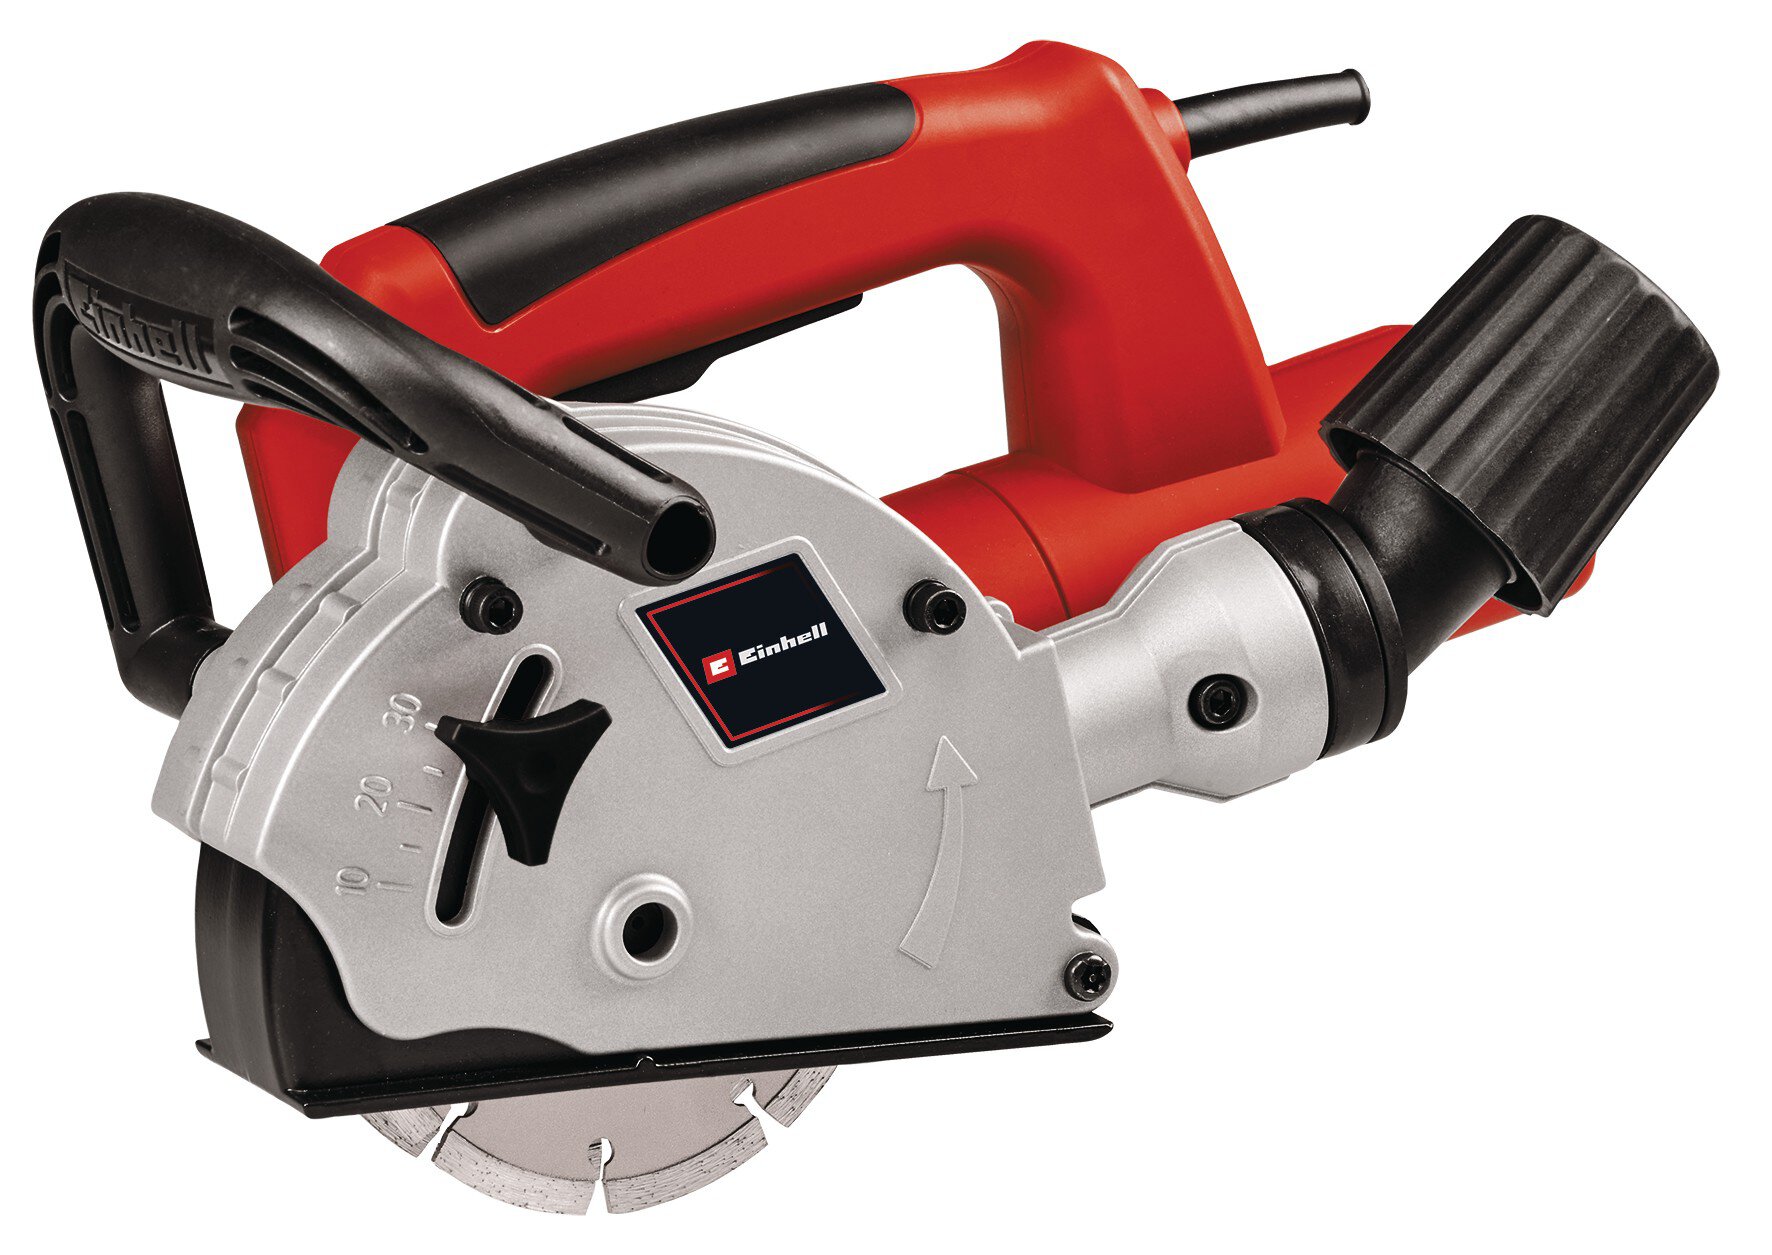
Basically, the wall grinder is an angle grinder in which two diamond blades are driven. A guide shoe is attached to the spring‐adjustable protective cover and ensures that the machine can be guided straight. The two diamond blades each cut a slot in the wall, whereby the depth and width can be adjusted beforehand. After slitting, the remaining central bar can be easily removed with a hammer and chisel or a hammer drill with a suitable chisel. The channel is ready!
Operation
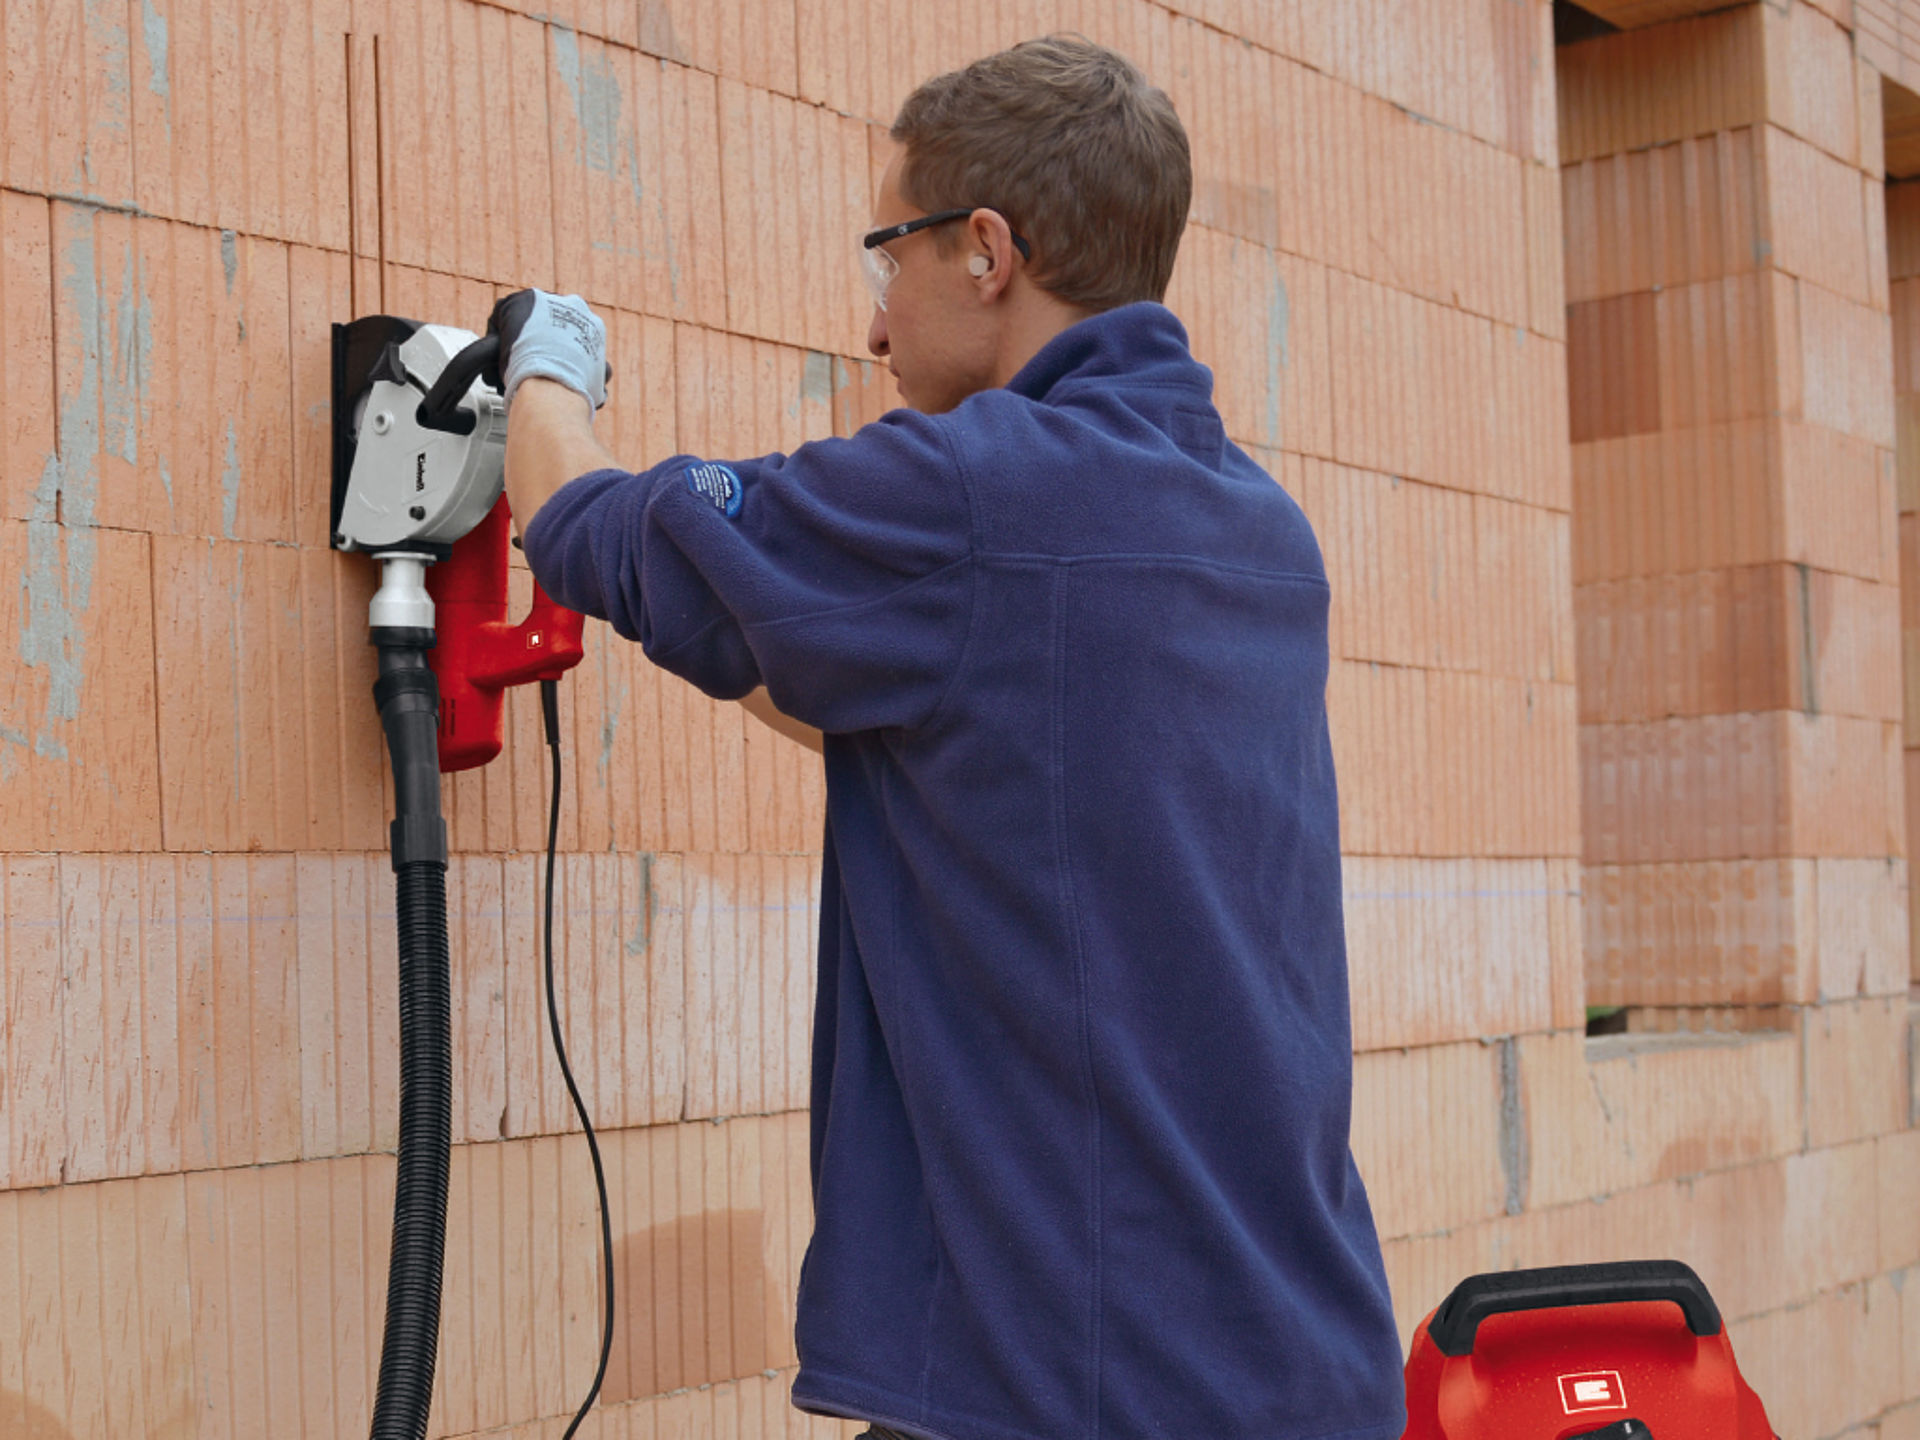
Due to the guide shoe and the adjustable protective cover, the grinder can be compared to a submersible saw. The grinder is attached to the wall, started and then the separator sheets are slowly dipped into the wall. The depth stop prevents the channel from being slotted too deeply. Now the grinder can be moved forward on the wall using the rollers on the guide shoe. This is naturally easier with plaster and aerated concrete than with concrete. But with the right diamond blades, even reinforced concrete is no problem. Proper extraction is important with this type of work. A connection for a powerful vacuum cleaner is provided on the protective hood, because the slitting of masonry causes an enormous amount of dust to be produced. Without proper extraction, you’ll barely be able to see your hand a few centimetres in front of your face.
Before grinding, clearly mark the course of the channel. This can be done with spray paint e.g. bright colours. This makes it easier to see the lines you've drawn, even in a dusty environment.
What should you look out for when making a purchase?
The performance of a wall grinder is decisive when it comes to speedy work. If it is too low, blockages can occur and cutting takes longer. The weight is important as well. Finally, it has to be pressed against the wall and guided at the same time. This can demand a lot of power in the long term. With a power consumption of 1300 watts, the ratio of power and weight is ideal for the home improvement sector. Incidentally, dust extraction only works properly if the protective cover properly closes off the working area of the cutting discs. The attachment of the vacuum cleaner hose should ideally be secured with a bayonet lock, so that the hose does not slip off during work. The width of the channel can be adjusted with spacers, the depth by means of an adjustable depth stop, ideally with an indication of the slot depth in millimetres. The slit width should be at least 25 mm the slit depth at least 20 mm. On the subject of safety, a circuit breaker is a useful feature here. A soft start ensures that the machine does not start jerkily.
What should you look out for when working?
As well as sufficient extraction, which is usually ensured with a workshop vacuum cleaner, the usual safety rules must also be observed. Above all, personal protective equipment is very important here. As well as dust, small stones can fly around, so goggles are essential. Due to the high noise levels, ear protection must be worn. Safety shoes and gloves are also recommended. There must not be anything lying around on the floor in the work area that can present a tripping hazard when guiding the wall grinder. In spite of dust extraction, it's also important to remember good ventilation.
Summary
A wall grinder is the most practical solution for making wall channels for cables. In contrast to when using a hammer and chisel, you always have a uniformly wide and deep channel in this case. This is a definite positive when reworking, i. e. when plastering or filling the channel. The workflow is also much faster and the effort is less than with conventional chiselling.
Our product recommendations for your DIY project
In this article you will learn all about:

Published on 25.09.2018
Whether it's drilling, hammering, or sanding, our professionals in the workshop and DIY field will show you how it's done. Frank Rath is a freelance blogger and a passionate craftsman. With his tips and tricks about Einhell tools, you will not only become an absolute DIY expert but also learn how to safely use each device.