20.03.2024
Spring Kickoff: How to clean and care for your garden furniture
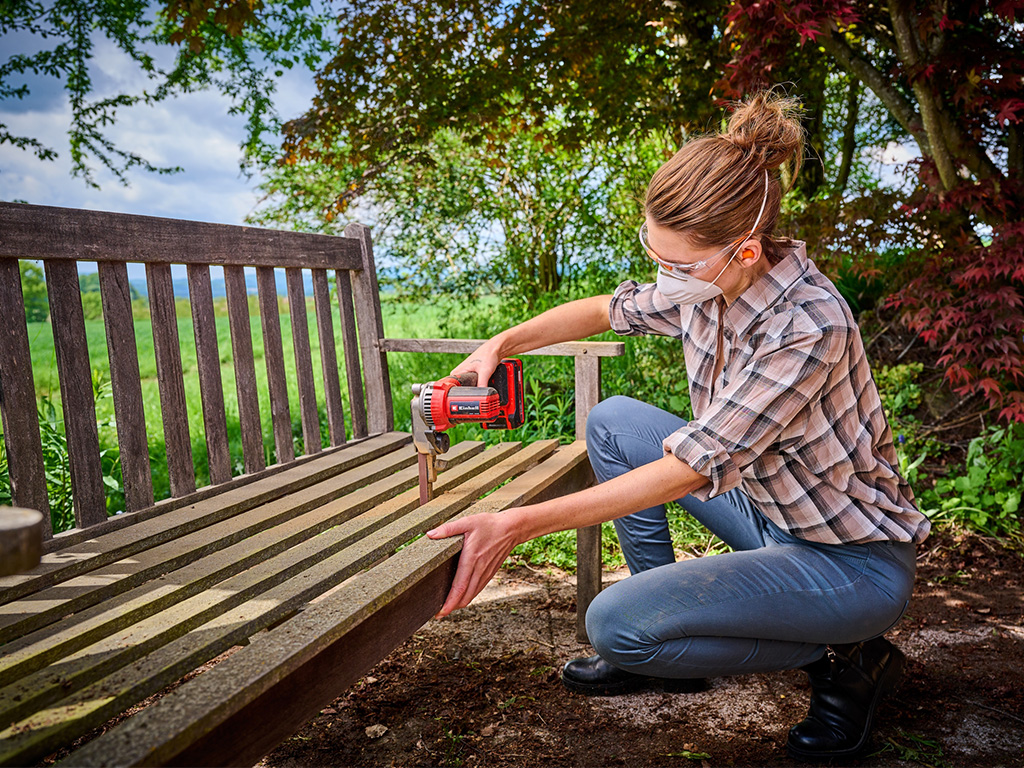
Get your outdoor space ready for spring and spruce up your garden furniture!

Do you want to benefit from all
Einhell advantages?
Do you want to benefit from all
Einhell advantages?
Whether in furniture construction, in smaller craft projects or for filigree model making – wherever you want to sand wood into shape, you are well advised with a belt sander. While you can use a stationary belt sander such as an Einhell bench belt sander or bench belt disc sander to process smaller workpieces precisely and conveniently, the mobile hand-held sanders, i.e. the hand-held electric belt sanders, are also suitable for shaping large workpieces and for sanding off the old varnish from your wooden table. Instead of grabbing the conventional sanding block with sanding paper and laboriously working the wood with your own strength, you can make life easier with a belt sander. High material removal, precise sanding, and all this without getting sweaty? No problem for the belt sander!
Want to grind metal as well as sanding wood? The stationary belt sander is a combination of a dry sander and a sanding machine for wood. The sanding belt is particularly suitable for sanding wood, but can also be used for metal, depending on the grain size. The coarse grinding wheel can be used both for sharpening tools and for coarse shape corrections in metal. An adjustable protective screen prevents injuries caused by flying sparks when working with metal. Thanks to the different grinding settings and grains, you can use the stationary belt sander individually.
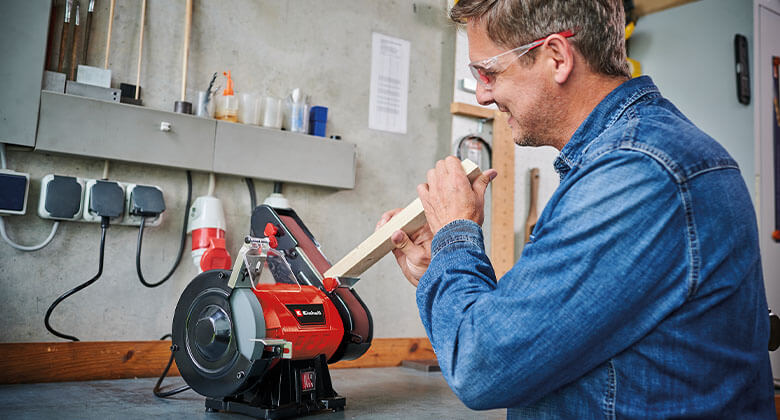
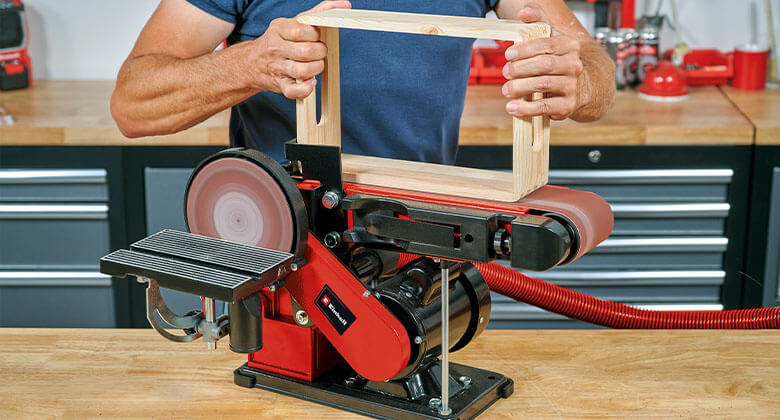
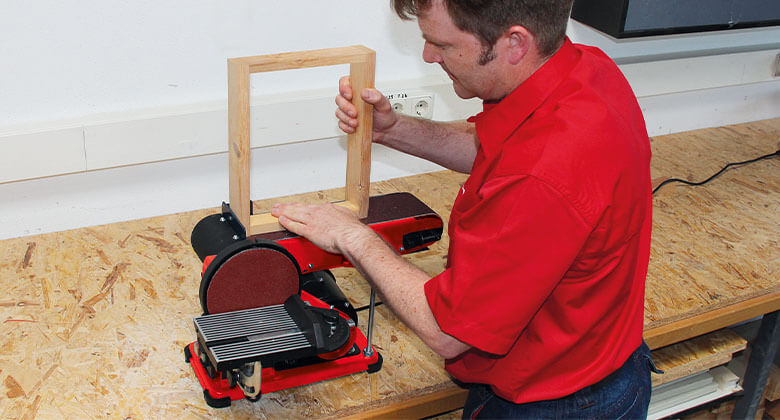
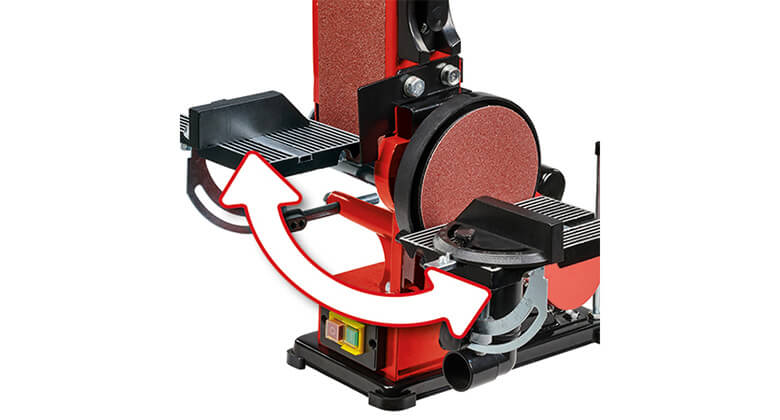
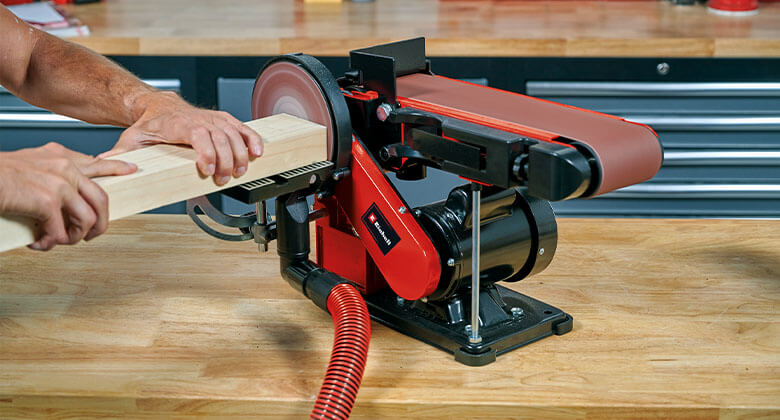
The Einhell stationary belt disc sander is equipped with both an abrasive belt and an abrasive disc. The stationary belt sander is stable and safe in your workshop thanks to its rubber feet, torsion-free construction and relatively high weight. Thanks to the suction connection, to which all Einhell wet/dry vacuum cleaners can be connected, your workplace remains clean at all times. The sanding machine is flexible thanks to the pivoting sanding belt, which can be positioned vertically or horizontally. If you want to work on larger workpieces, you can use the sanding belt to help, but if you are working on details, for example for model making, it makes sense to work using the sanding disc with a tilting support table. The stable support table made of high-quality aluminium is equipped with a transverse stop adjustable from -60° to 60°, which can be used both with the sanding belt and on the sanding disc. So, you can use the practical 2-in-1 device in a variety of ways!
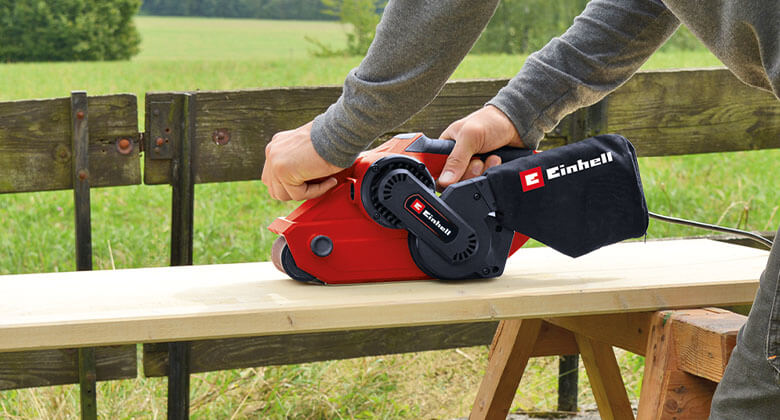
Einhell electric belt sanders are compact and lightweight in the hand. The mobile belt sanders are perfect for comfortably sanding larger surfaces and, for example, removing an old layer of varnish from wooden floors. With the hand-held device, you can work flexibly wherever you have a power connection for your cable. This allows you to process workpieces of virtually unlimited size – this is the advantage of mobile belt sanders over stationary machines, which allow you to process smaller, handy pieces. A powerful induction motor in a handy belt sander with a power of over 800 W also ensures high belt speeds and efficient material removal. This way, the work is done quickly and precisely!
Wattage, belt speed, weight, adjustable work rests, transverse stop and accessories – with stationary and hand-held belt sanders, there are a few things that could be important to you when handling the devices. We have summarised what you should pay special attention to and what makes a good belt sander for you here.
First, you should be aware of which workpieces you want to process with your belt sander. Is it about getting the old wooden table back on its feet, and while you're at it, maybe taking care of the parquet floor? Then a hand-held belt sander is the tool for you! If, on the other hand, you work more in your workshop, build small furniture or models, then you tend to sand individual wooden parts. The stationary belt grinders are suitable for this purpose, which you can use to sand precisely with the help of flexibly adjustable work and workpiece supports. Depending on what you want to grind, a stationary or hand-held model is right for you – or, if you work with wood a lot in general, maybe both devices might be a useful addition to your workshop!

Sanding belts are available in different grain sizes. Depending on how hard your wood is, how much material you want to remove and how finely you want to sand, you will want to change the belt in between. You should also replace the belt when it is worn out. It is therefore important to ensure that the belt can be easily changed and reattached when purchasing your device. Depending on the model, our belt sanders are equipped with an abrasive belt adjustment or a tool-free sanding belt centring, so that the optimal belt run can be precisely adjusted. Our mobile belt sanders also have a sanding belt tension that enables tool-free belt changing using locking levers.
So that you can work optimally with the belt sanders and grinders, they should have a few features that may be quite helpful to you. With our electric belt sander TE-BS 8540 E, for example, you can regulate the speed and adapt it to each application and type of wood. For easier and precise guidance, our mobile hand-held sanders are also equipped with a practical additional handle for two-handed operation. In addition to a secure stand, the stationary belt sanders also have pivotable and partly removable work and workpiece supports. Where you move the mobile sander flexibly, the stationary machines require a stable support to hold your workpiece securely and stably against the sanding belt or sanding disc.
Small details often make a big difference. That's why the accessories included in the purchase decision are also of interest for you. Depending on the model, for example, a sanding belt, a sanding disc or a dry sanding disc are included in delivery, so that you can start working immediately. Incidentally, the Einhell stationary belt disc sander TC-US 380 is also equipped with a transverse stop with an angle scale on the work table, with which all possible geometries can be easily sanded. So that you always have a clean workplace, certain stationary belt sanders also have a suction adapter. The mobile version of the sander, on the other hand, is equipped with a dust collection box or bag, depending on the model. This means you always have a good view of your workpiece!
In the blog, our DIY experts explain what you need to look out for when working with belt sanders.
Get your outdoor space ready for spring and spruce up your garden furniture!
With this DIY camper kitchen, home-cooked meals won’t be missing from your travels.

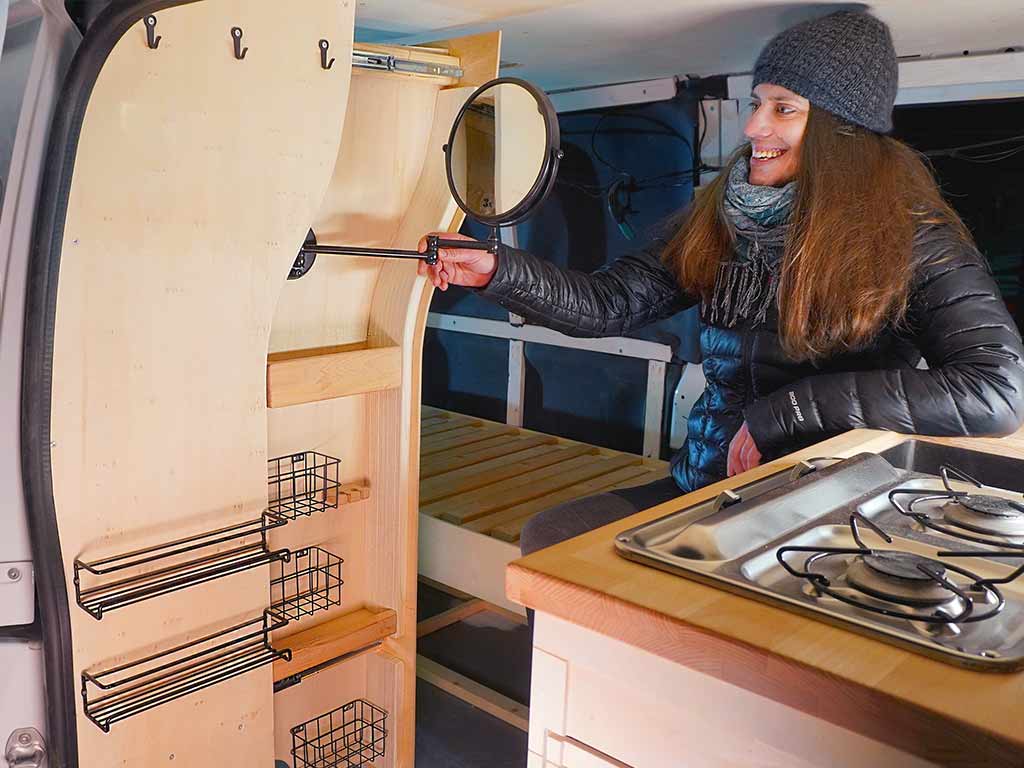
Store your toiletries in perfect order while on the road – with this DIY pull-out cabinet for your…

As soon as the weather allows, do you love spending time outdoors? How about a matching Adirondack…

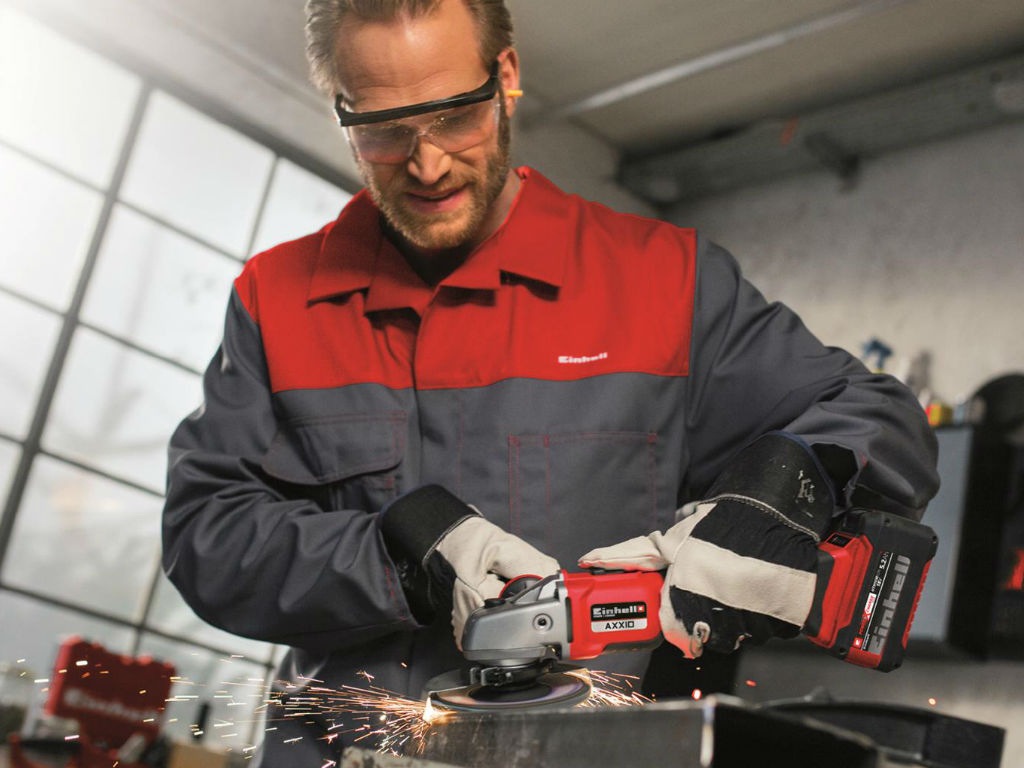
Finding the right grinder for your own projects is often not as easy as you think. The variety of…