The Gauge for the Golden Section
The golden section occurs in nature and in the human body, but also in art and architecture. This has been a well‐known design rule since ancient times. The division ratio of this theory is called a balanced guideline and is perceived by humans as particularly harmonious.
With an appropriate gauge, objects can be arranged in a golden section on a given surface and thus create a harmonious image. The gauge also serves to measure simple length ratios in the golden section.
So it is worthwhile to recreate the golden section gauge and thus create a harmonious environment. At the beginning we want to briefly explain the theory to you.
Theory Part: What Is the Golden Section?
The golden section denotes the relation between two track lengths. We have a golden section if the ratio of the larger stretch to the smaller one is the same as the ratio of the two lengths together to the longer stretch.
You can write it as a formula:
a = a+b
b a
The ratio a/b is also called the Golden number, which can be calculated from the equation above to F=1,618….
How you can easily build a golden section gauge yourself and what you need, you'll find out here.
| Material | Tools |
|---|---|
| Any kind of wood, e.g. Bamboo cutting board (20x30x0,08cm) | Circular Saw |
| Collar Nuts | Disc Sander |
| M3 Threaded Rods | Cordless Drill |
| Boiled Linseed Oil | Sandpaper |
Step 1: Cutting
Four strips of 8 mm are cut from the bamboo cutting board. Whether you use a circular saw or a band saw doesn’t really matter.
Step 2: Cutting and Shaping the Strips
The strips are cut to each other in the ratio of the golden section. The decisive factor is not the length end to end but from the connection points to the tips or connection point to connection point.
The starting point is the longest strip, which is 296 mm long. It is 5 mm to the middle of the upper connection point, so we have a length of 291 mm. Two strips are required.
The other lengths are derived from this: 180 mm and 111 mm.
The round ends are marked with a suitable size washer. You can let your imagination play for the shape of the tips. Here they were drawn straight.
The ends and tips are then quickly shaped with a disc grinder.
Step 3: Drilling the Connection Holes
The connection holes are drilled with a 5 mm drill and then lowered on one side.
Step 4: Sanding and Oiling
Before the gauge is assembled, all edges and surfaces are made a little smoother with 240‐grit sandpaper.
Then the strips get a surface protection with boiled linseed oil.
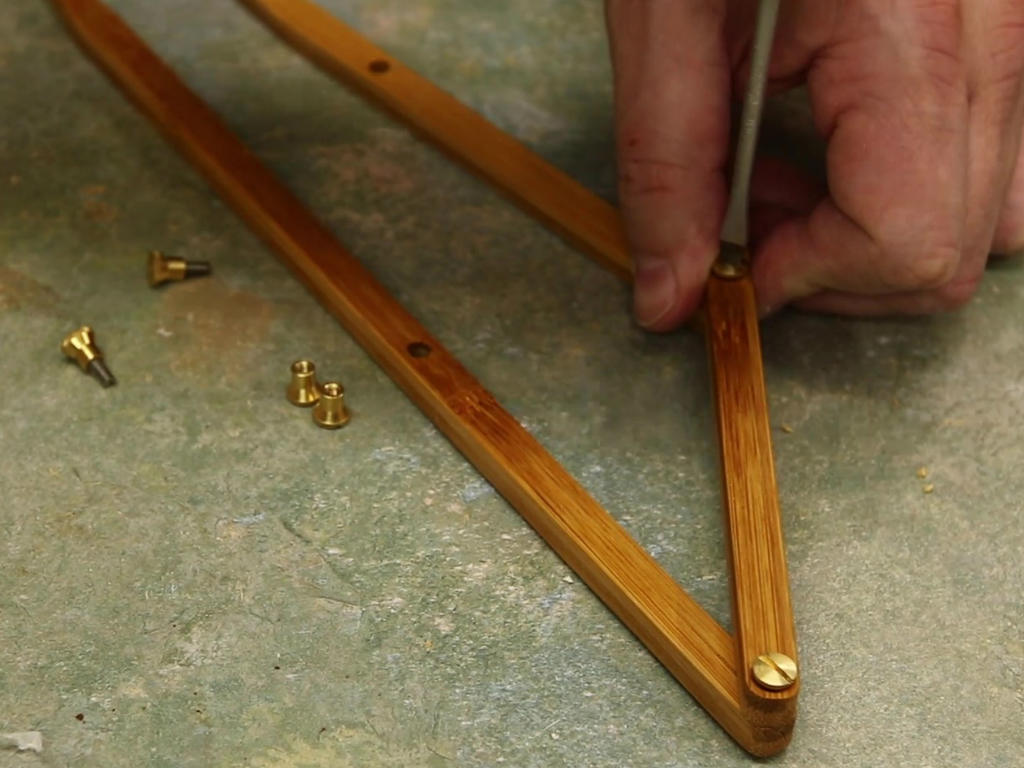
Step 5: Assembling the Gauge
Two pieces of the collar nuts are connected in a joint with a piece of M3 threaded rod.
The strips are assembled according to the template.
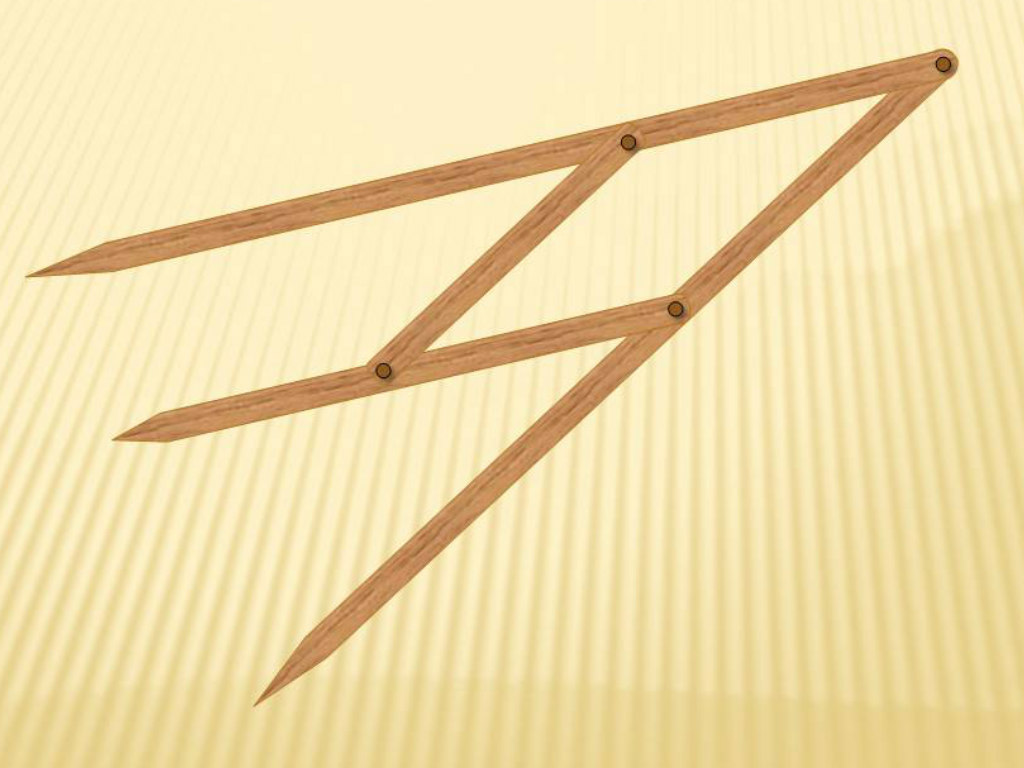
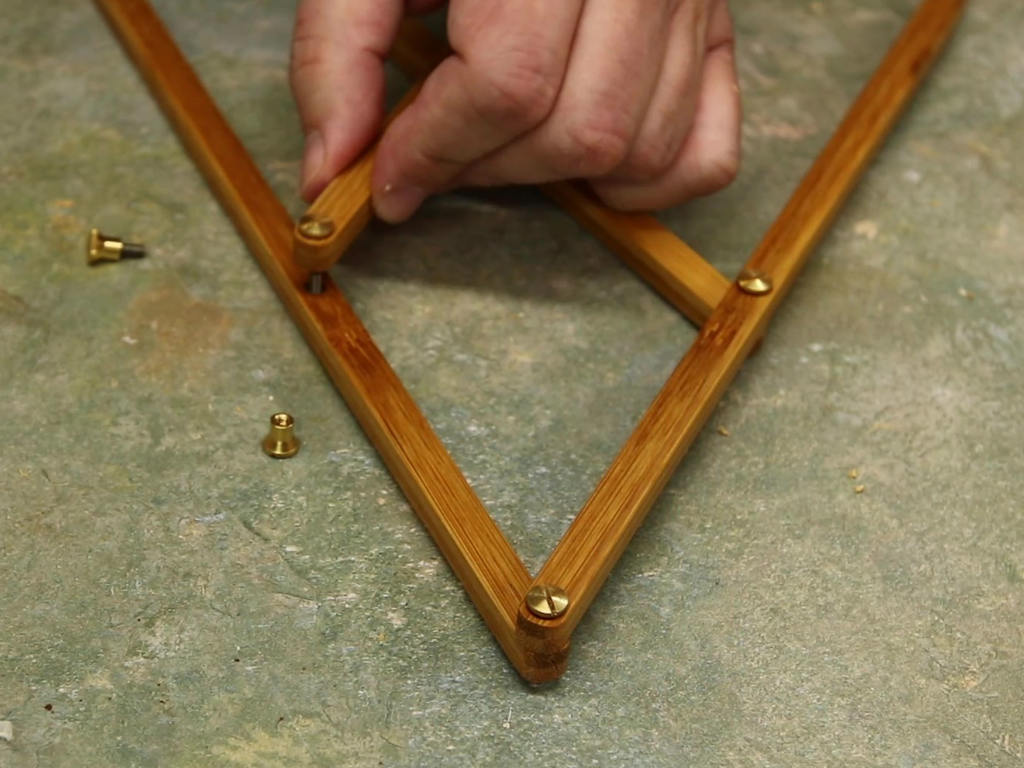
Application
The gauge is now complete. Because all the strips are in the length ratio of the golden section and through the practical application of the similarity sets for triangles and radiation sets, the distances between the tips always have the ratio of the golden section.
Have fun recreating the gauge!